How to install the outdoor switch
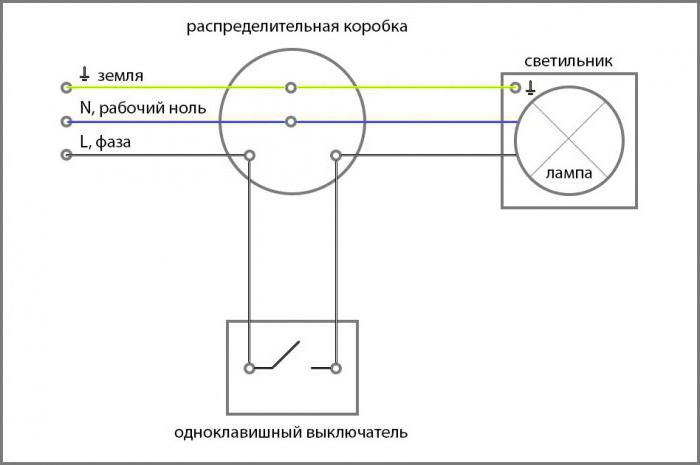
The most important rule when installing any switch, under lighting or automatic, - it always needs to be connected to the phase conductor. Otherwise there will be a dangerous situation. If the switch is set to zero conductor, even if it is turned off, that is, if the circuit is broken at zero, the voltage in the phase conductor remains. Even when replacing a burnt out bulb, accidentally touching the phase contact in the cartridge, a person will get an electric shock. The same contact can occur between the wire and the housing of the luminaire, for example as a result of a breakdown. Then even touching the switch will pose a risk to life.
Installation (installation) of switches themselves - video
The switch is always supplied with one wire, which closes and opens inside the device. This is a phase conductor that forms a loop, sinking or rising to the switch. At the top of the loop, the wire is cut, and its ends are connected to the contacts of the switch. Thus, by turning the key on or off, the circuit is disconnected and disconnected.
For a two-key switch, a three-wire cable is used: one conductor is suitable for current, and the other two are output. It turns out that one key can break one line, while the second one will work at the same time. For a three-key switch, a wire with four cores is needed: one for the input, and three for the output.
Suppose, we plan to install a chandelier with five bulbs. For such a device, you can install a two-button switch: one key will include two lights, and the other three. This will help to illuminate the room completely or partially, if desired.
In each chandelier there should be a shoe where the wires are connected. On one side of the pad, you need to insert one phase wire, and on the other end - a wire that will diverge in two directions, according to the number of connected light bulbs. The second phase conductor should also be connected in the same way, only it must divide into three wires to three light bulbs. A neutral wire is used alone, and it must be connected to the second contact of the cartridge, where all the wires will be combined into one output conductor.
In order not to separate the individual wires from the outer sheath, it is better to use a two-wire wire for a switch with one key, and three-wire for a two-key switch to feed and drain the current and to simplify operation.
Setting the dimmer
If a dimmer is to be installed as a switch, it is necessary to select it depending on the power. Dimmer with a power of 300 W is designed for a chandelier of five lamps of 60 watts each. A dimmer with a power of 1000 W can be installed to adjust lighting in several rooms.
Mount this device in the same way as a conventional switch. As a rule, dimmer contacts have notations indicating which wire to connect to, which simplifies the task. So, the contact for the incoming wire is marked on the device with the letter L.
Installation of a pass-through switch
The pass-through switch is different from the usual number of contacts. In a conventional one-key switch there are only two of them, and there are only three switches at one end: an incoming wire is connected to one, to the other is a wire that goes to the light source, and the third contact goes to another circuit breaker. In the two-key through-switch there must be four contacts.
With the help of the through switches you can control the lighting in the apartment from different places. When installing this switch it is important not to confuse the connection order. Near the contacts on the shoe there are special signs indicating which contact corresponds to what.
General rules for replacement of the switch and ceiling chandelier
There are five basic rules for changing the switch and the chandelier.
1. When changing the switch, it is always necessary to connect the wires to the new device in the same order as they were fed to the old switch.
2. It should be remembered that a black or red wire in the wiring always indicates a phase conductor, and white - zero.
3. Before changing the circuit breaker, it is necessary to turn off the circuit or completely electrical network in the apartment.
4. When disassembling the circuit breaker, it is better to hedge and check the wires with a voltage tester.
5. Conclusions for a ceiling chandelier are usually located in an electrical box that is mounted in the ceiling (in standard apartments). Before installing the chandelier, you need to determine the wires by checking them with a tester, and be sure to familiarize yourself with the instructions attached to the chandelier, where the way to fix it must be indicated.
Installation of the switch at the end of the price
The switch at the end of the circuit should be connected to the phase conductor. To do this, the wire must be separated and connected to the two switch contacts (Figure 51). For lighting fixtures, it is better to use connecting white wires.

Fig. 51. The switch installed at the end of the circuit:
1 - supply of energy; 2 - black wires from the terminal of contacts;
3 - white wires; 4 - the wire leading to the lighting device;
5 - box with lighting fixtures on the ceiling; 6 - switch
Setting the switch on the loop
In this case, the switch is located on the circuit between the electricity source and the lighting fixture, and the energy is directly connected to the lighting fixture. Normally a white wire coming from a switch is connected to a black wire in the box, which means that it serves as a phase conductor (black).
To avoid confusion, you need to wrap such wire with a black insulating tape. This will help in the future to clearly determine where the phase is located. At the place of the switch, the phase wire forms a loop and is cut into two wires, as already mentioned, a switch is connected to them, which opens the circuit of the lighting circuit (Figure 52).

Fig. 52. Installation of a switch on the main cable loop
Replacement of a bipolar switch
With a two-pole switch, you can switch on two lighting fixtures at once. To replace this switch you need the same way as usual, not forgetting that it has a common contact.
The procedure should be as follows:
- turn off the circuit and be sure to check it with a voltage tester to make sure that it is really turned off;
- unscrew the fasteners and get the switch out of the box;
- to mark common wire, disconnect the other two wires and connect them to a new switch;
- connect the main wire to the common contact;
- connect the two remaining wires to the corresponding contacts (Figure 53)
Fig. 53. Connection of a double-pole switch:
1 - the cable; 2 - white wire; 3 - insulation tape;
4 - black wire; 5 - junction box on the ceiling
Installation of the switch with the adjustment of the intensity of light
There are switches with light intensity adjustment. If you turn the handle of such a device or press on its button, you can smoothly adjust the level of lighting in the room.
A switch with a light intensity adjustment is installed in the same way as a conventional single-pole switch. As a rule, such a device is equipped with wires that have been withdrawn from the casing and which, when assembled, should be connected to electrical cable twists (Figure 54).

Fig. 54. Installation of a single-pole switch: 1 - switch cover;
2 - single-pole switch; 3 - a metal box; 4 - grounding
There are bipolar switches with light intensity adjustment. They have one common wire and two phase wires. Only one switch can be installed on this circuit. Before connecting the wires, it is necessary to mark the common wire with an insulating tape. When installing the switch, connect the phase conductors to the black and red wires (Figure 55).

Fig. 55. Installation of a two-pole switch: 1 - common wire contact;
2 - a metal box; 3 - common wire; 4 - grounding;
5 - red wire; 6 - black wire; 7 - switch

Rope wiring

Additional wiring products

Types of power inputs to the house

How to install a new outlet correctly. Video
![]()
Taps from high-voltage power lines

Breaker protection

Residual current circuit breaker RCD (connection, video, types)

Tools for of electrical installation works

Automatic fuse

How correctly to make wiring in an apartment with your own hands: scheme, video, pho

Types of light bulbs

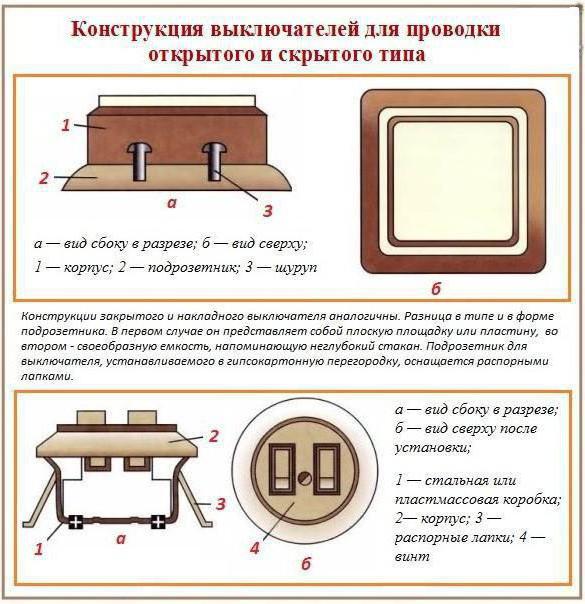
How to make the installation of open (external) wiring

Works with junction boxes
How to conduct wiring in a private house with your own hands. Scheme. Video
Electric receivers of single-phase and three-phase current. Their main characteristics

Automatic switches (VA). Types, series, calculation

How to connect the electricity meter correctly. Video
Types of interconnections

Connection of halogen lamps. Video

How to install a motion sensor. Video

Connection fluorescent lamps (daylight) circuit, device, video

Installation of a phase-to-earth fault protection interrupter

How to make a lightning rod, lightning protection. Protection against lightning. Video

Installation of concealed wiring by one's own hands. Video

Distributive (flat) shield. Video, diagram and connection

Mounting the circuit breaker in the middle of the circuit

Installation of recessed spotlights. Video

Wires, cords and cables. Features and Usage
Open wiring has always been considered not practical from an aesthetic point of view. But in buildings with wooden walls to place an electrician inside the wall is unreasonable. In this regard, the increased risks of fire and fire in the house. Thus, to use luminaires have been used exclusively.
Such equipment has a traditional design, as built-in devices, but its installation solves many problems with electricity on flammable surfaces.
Surface sockets and switches are a simplified installation. They are designed specifically for fixing in difficult conditions. To their peculiarities can be attributed the ease of attaching to the surface and connecting electricity.
To work with similar devices, the connection scheme for overhead and built-in circuit breakers can be used. It can also vary from the type of device that can be one-key, two-key or three-key.
Attention! When buying an overhead switch type, you should understand that there are not original, but fake attachments. Therefore, in order for the installation to become safe, you only need to purchase at specialized retail outlets.
The principle of installation and the algorithm of work
It is always better to start the whole process of fixing from the preparatory stages. This includes the acquisition of the right tool and material. It is desirable that all wiring has already been carried out, it remains only to install the outdoor unit.

Apparently work to address the issue of how to establish outdoor switch not difficult, so any interested beginner can cope with it.
As you know, in a house where a bright and interesting repairs, all the details visible in the interior are selected in accordance with the considered situation. Therefore, such nuances and questions as to how to choose and buy a surface-mounted switch must be fixed.

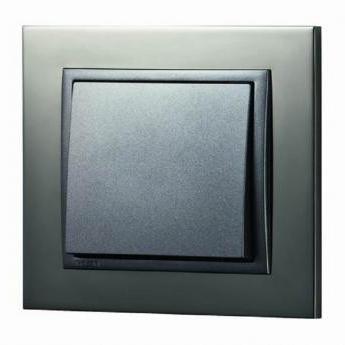
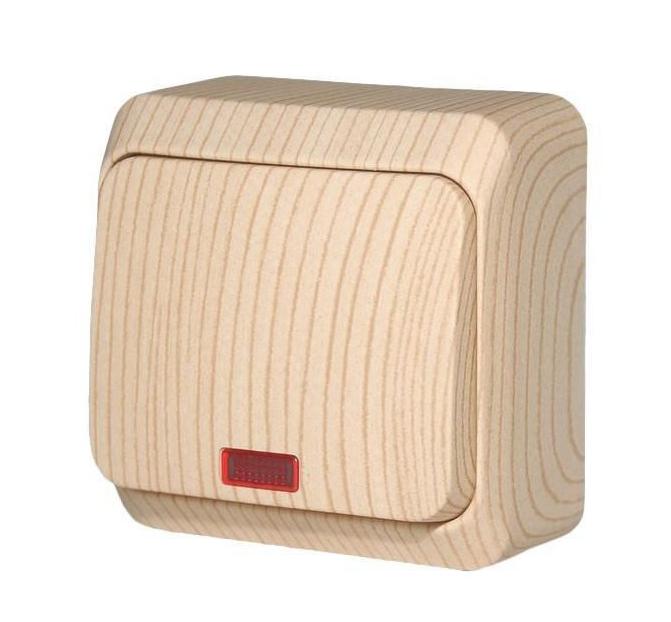
There are many variations of exterior design. They are best chosen according to the shade of the finishing material. If your wall is made of wood, it is ideal electrical installation brown, or even made in decorative woody style.
Try to take into account the strength of the structure and the availability of all components. Since it is sometimes difficult to pick up some fasteners. The number of keys is also important to observe. If you plan to put a switch on a chandelier with several light sources, or divide it to work on two different rooms.
On the manufacturers of overhead switches today, there is little to be said, but it is worth choosing the option that is well understood by consumers. Do not even pay attention to very questionable brands, especially if they do not like you in appearance.
It can be chosen to install a power unit with a decorative element. As this may be different images or special details that perfectly fit into the overall interior of the room.

Attention! The purchase of a tool for convenient switching of light of an attached type must be carried out for good reasons. It is important to meet your conditions, but in general this process does not involve difficulties.
A few words about the benefits ...
Any design, and the same standard switch has its pluses and minuses, which should not be forgotten when installing. As positive characteristics it should be noted:
- practicality;
- convenience of installation;
- reliability of the equipment;
- comfortable service;
- inexpensive construction cost.
It should not be forgotten that the simpler the installation of the electrical structure, the more comfortable will be the maintenance and repair. Moreover, you can see for yourself when you need to replace the wiring or the switch itself.

Of the disadvantages are usually allocated unaesthetic appearance, which is obtained during the installation. However, with the right choice of it, there is an opportunity to get rid of this intrusive shortcoming.
Often I meet in the apartments wiring hidden, and the switch is outdoor. We used to build this way, at least in our city. Therefore, over time, the question arises of replacing the outdoor switch. Here everything is simple and the strob for him is not what you need. Let's see below how to install the outdoor switch. All this interesting process I modeled on a small stand and below illustrated each step with photos. Having looked them, you can not only install the outdoor switch, but also dismantle it and if you need to replace it. Watching ...
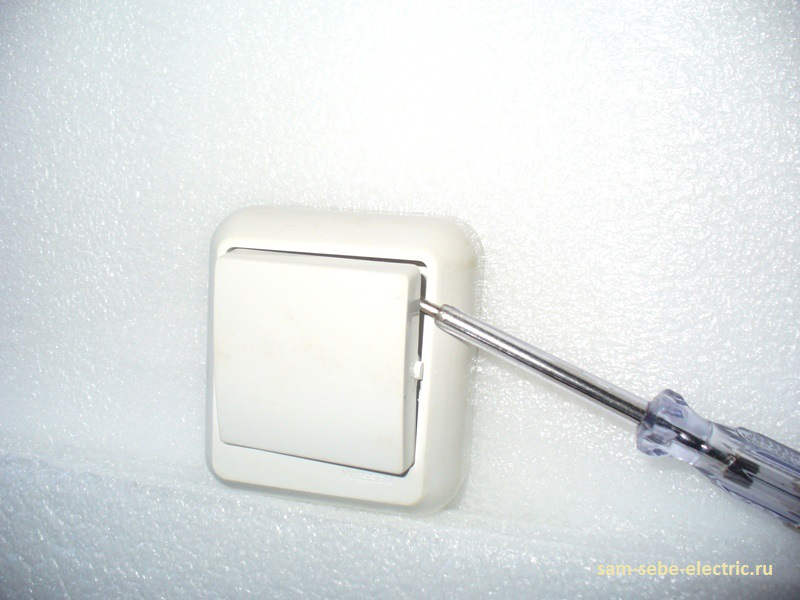
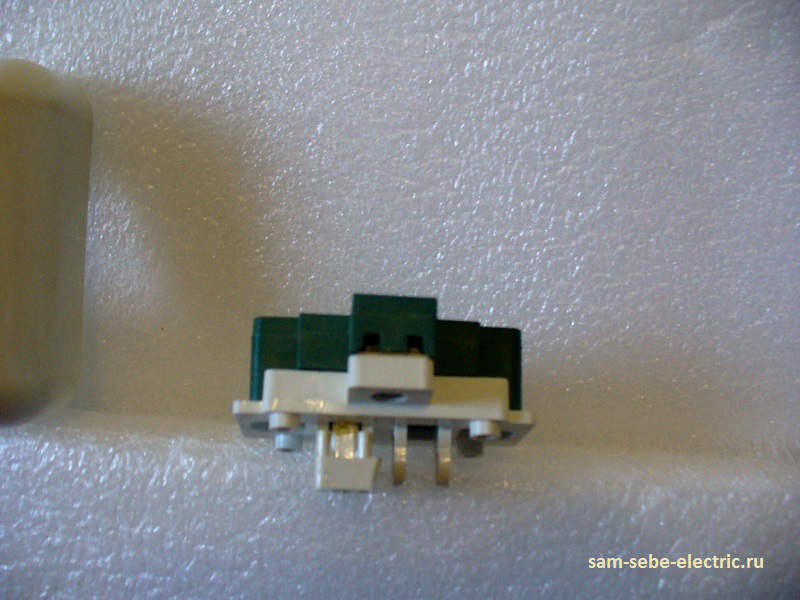
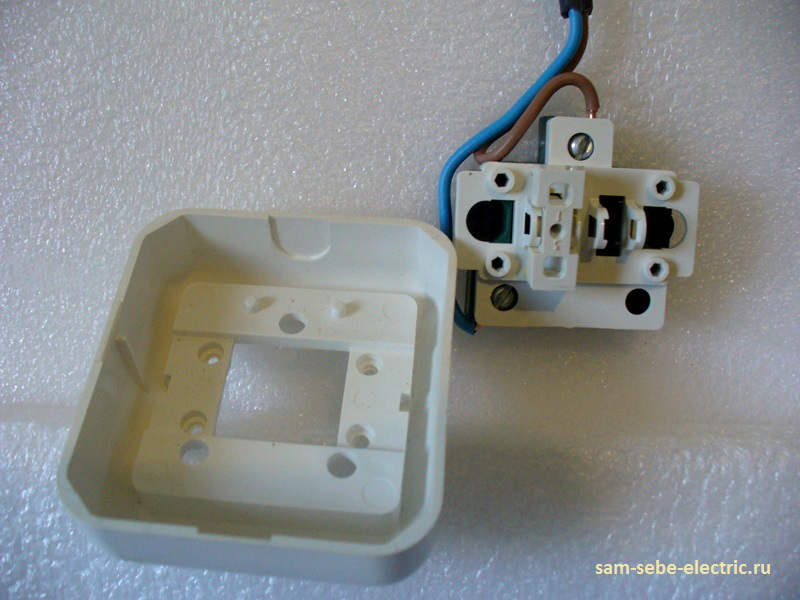
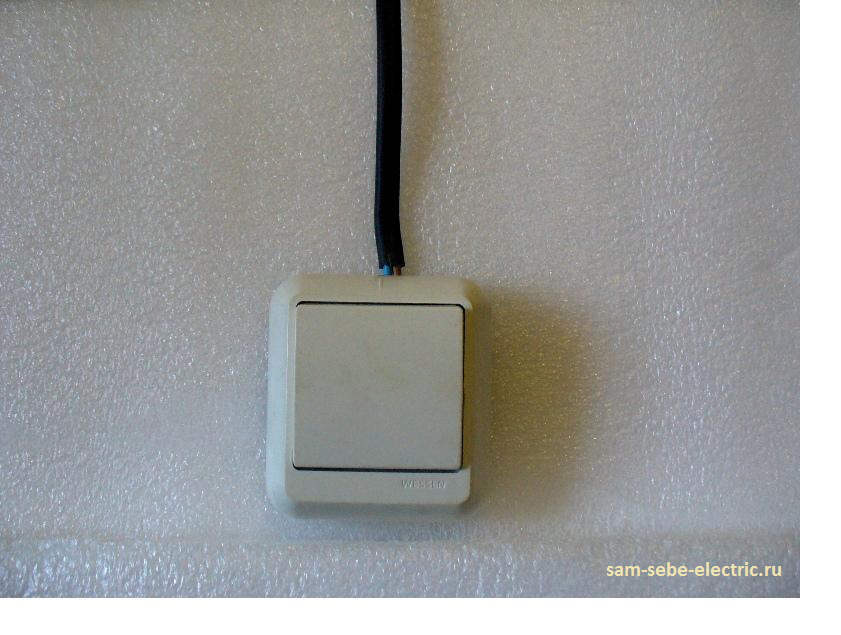
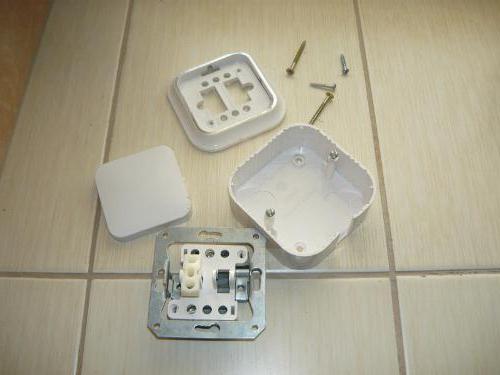
As an example, take this kind of outdoor switch. The installation process of all switches is basically the same, only for different manufacturers their design may be slightly different.
First we need to disassemble it. To do this, use a thin flat screwdriver to press the key and take it out.
That's what we end up with ...
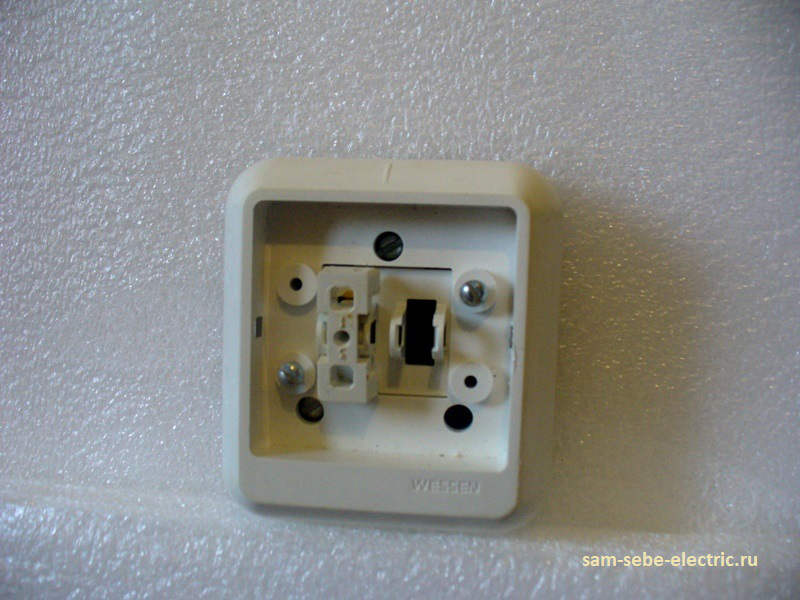
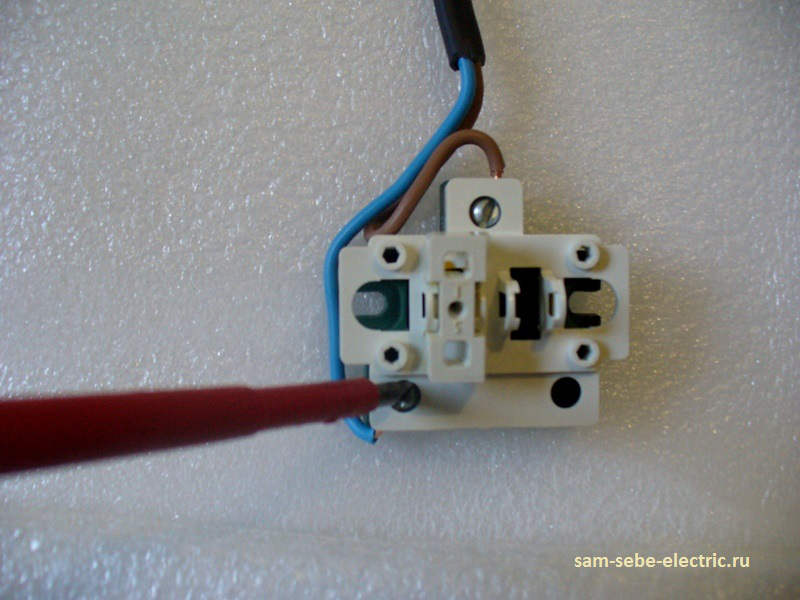
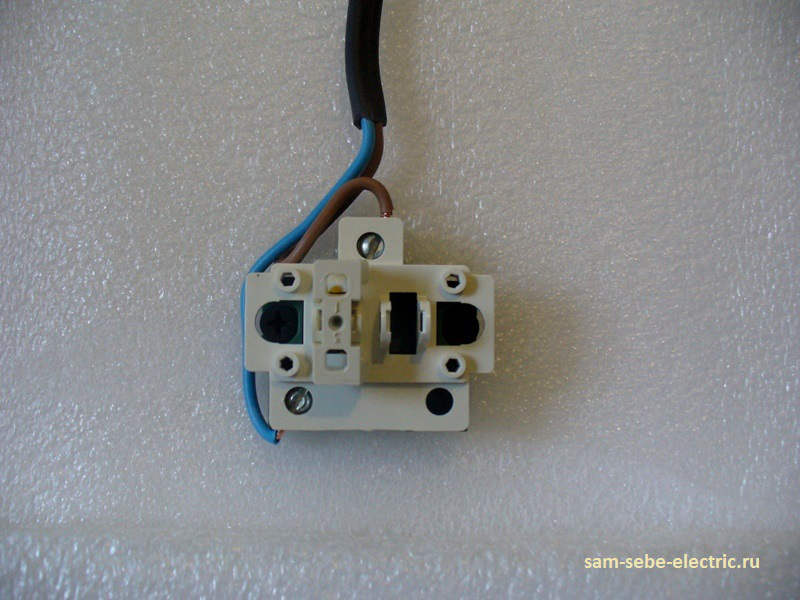
Now it is necessary to remove the switch case. To do this, unscrew the two screws with a screwdriver ...
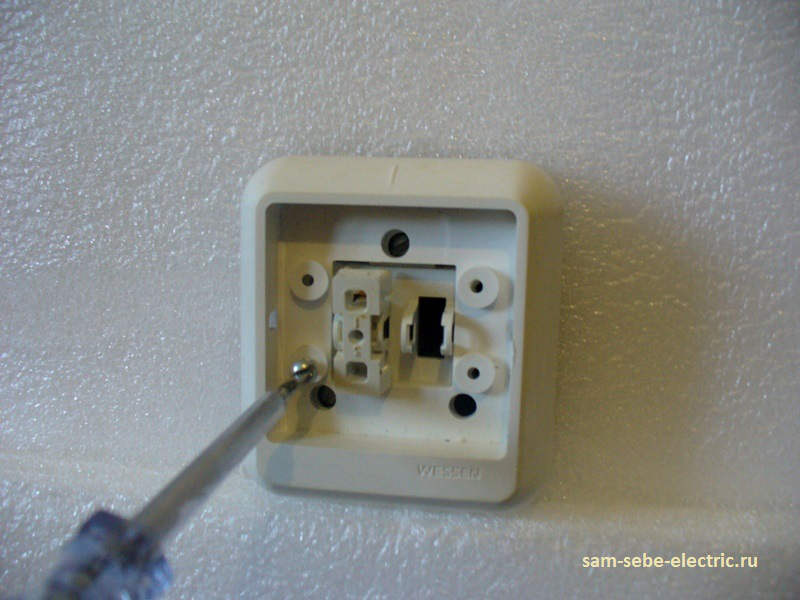
So we got access to the contacts of the outdoor switch. There are only two of them, since the switch is one-key. One residential area will have a phase with junction box, and the other dwelling will go the same phase to the lamp itself (chandelier).
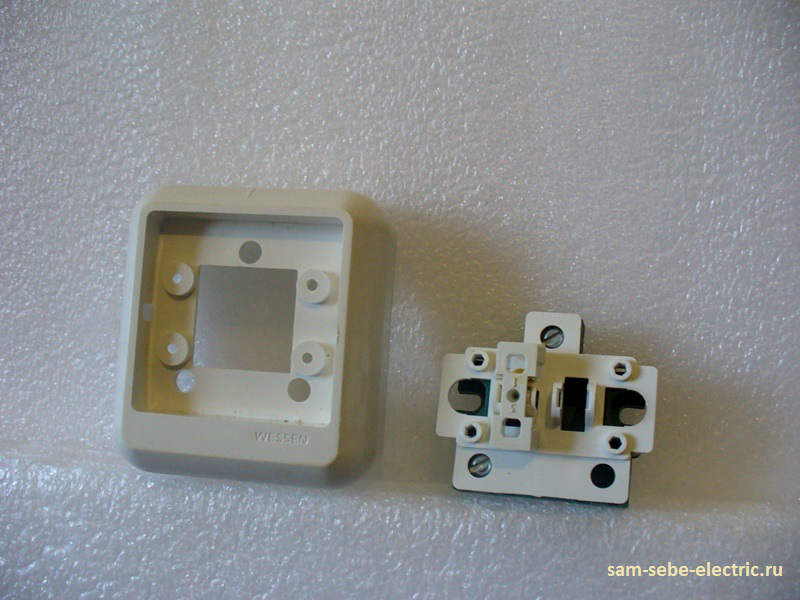
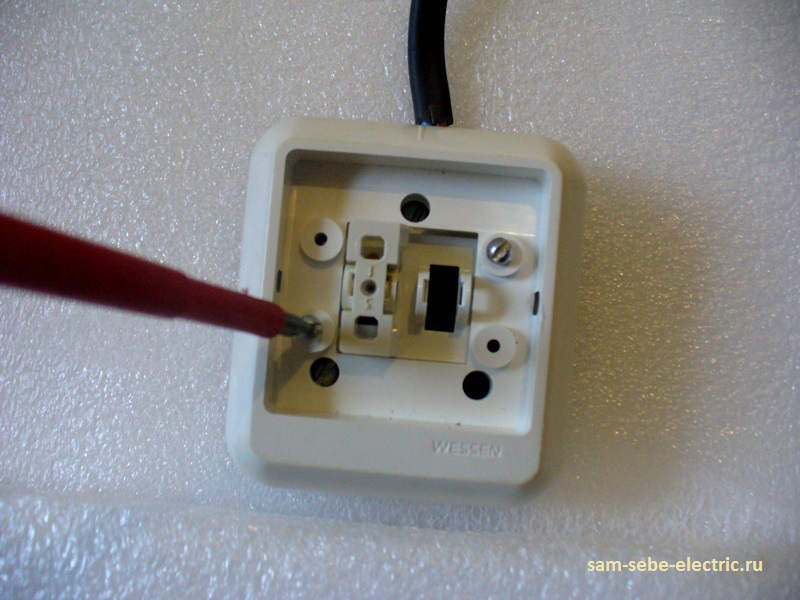
We start the installation of the external switch by connecting the wires. Polarity here does not really matter. In our case, the wire to the switch is above. The wire itself needs to be hidden in the cable duct. So it will be beautiful and safe. Also, the wire can approach the switch from either side or from the wall itself.
Now you need to fix the outdoor switch to the wall. If the wall is concrete or brick, then fastened with dowels, and if wooden and the like, then we fix it simply with screws. Why did I first describe the connection of the wire to the external switch, and only then its attachment? It seems so convenient to me. Wires to connect to the pins are easier when it is on weight. So they can freely maneuver during the connection of wires and then they no longer interfere with its attachment.
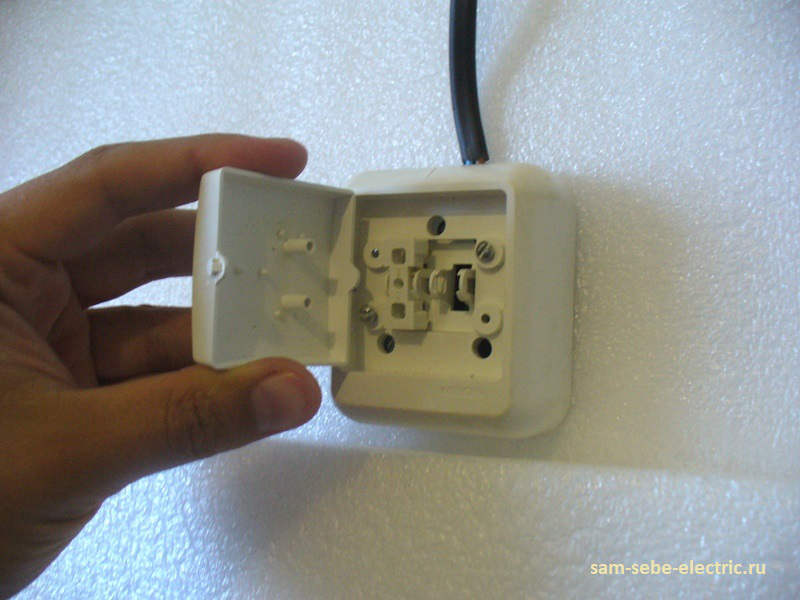
Now we need to put in place the body. If the wire is approached from the side, then the case does not fit into place. Here it is necessary to cut out a small opening in the case for the passage of the cable.
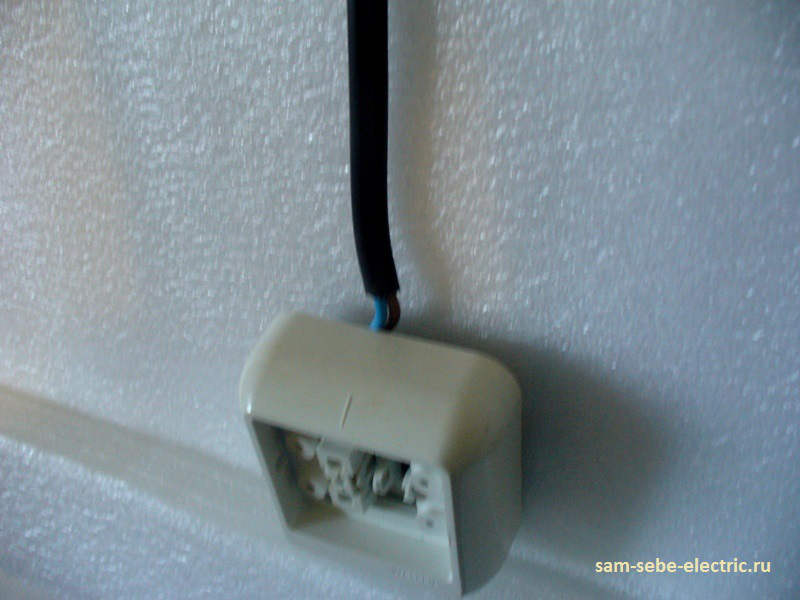
For this, there are special labels, where the thickness of the plastic is quite thin, which facilitates its removal.
After we cut out the opening, put the body in place and bolt it ...
At the final stage of the installation of the external switch, put the key in place. See that the tabs on the inside of the keys hit the switch itself ...
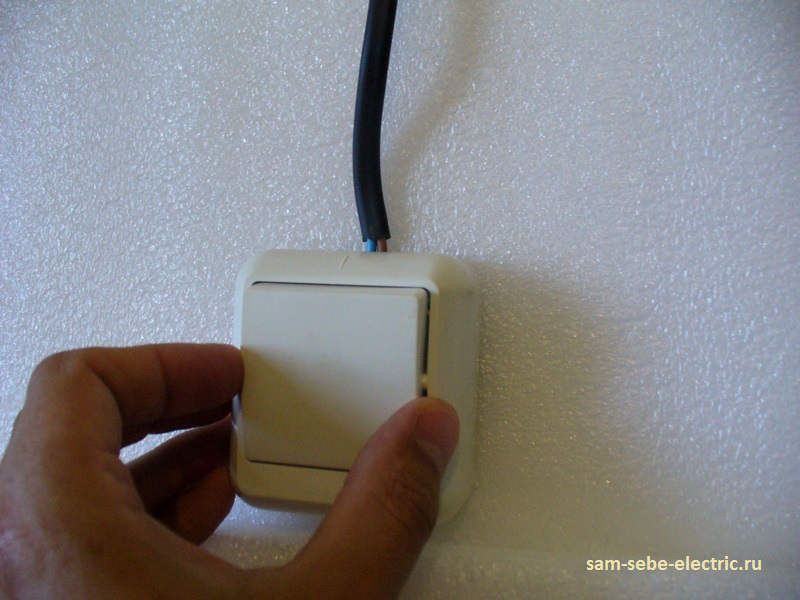
That's all we installed the outdoor switch. It is dismantled in reverse order.
Do not forget to smile:
Sunday school is a lesson
Father: - And tell me, how does electricity flow through the wires?
Disciple: - With God's help!
Father: - Well done - sit down
For commutation of various types of load, starters, switches, switches are used. These are electrical products that have certain parameters, characteristics, features. When self-installation you need to make sure that the type of appliance used corresponds to the consumption parameters. Otherwise, it is possible to overheat the switching equipment and, as a consequence, a fire.
Purpose of the switch
The electric billboard electric switch is designed to connect devices that use electric current to the power source. Usually this is a simple switching equipment that, when switched on, closes or opens the mechanical contacts, supplying or removing the voltage from the device.
The bill on the waybill differs in the way of installation. It is installed outside the surface.
Types of switches
The industry produces many types of switches:
- external or invoices;
- internal or embedded.
By type of switching they are:
- keyboards;
- sensory;
- rope;
- wireless and others.
According to the principle of work:
- termination switch;
- overhead.
Installation Methods
Depending on the method of installation, the switches are internal and external.
Internal requires preparation of the installation site. In the wall it is necessary to drill out or use another method to prepare a hole. In it, immerse the dielectric box, into which the internal switch will be subsequently installed.
For external training is not needed. This method of installation implies the installation of a surface-mounted switch directly on the surface.
To perform the work you need tools:
- knife;
- a screwdriver is flat;
- phillips screwdriver;
- pliers;
- nippers;
- electric drill.
Installation of switches
Overhead outlets and switches are installed according to the same principle.
Installation of the overhead circuit breaker must begin with the calculation of the conditions of consumption. The following parameters are taken into account: working voltage, power consumption of the system, which must be serviced. The power draws the current consumption. If all the parameters of the circuit breaker are greater than the consumption parameters, it is possible to carry out overhead installation.
Switches are placed on a dielectric gasket installed on the wall surface. In case this device is used on fire-hazardous surfaces (wooden, combustible plastic), this gasket serves as a heat insulation preventing fire from overheating of the circuit breaker in case of overload. Its second purpose is to ensure a reliable fastening of the switch to the mounting surface.
If the holes on the dielectric pad are prepared for fastening, this will facilitate installation. If they are not, then you need to drill a hole of a suitable diameter and fix the switch on the gasket on the gasket. To do this, disassemble the switch and fix it to the wall with screws or screws.
An example of how the one-key bill-on switch is installed is considered. If necessary, you can do the installation of two-, three-key switches in the same way. To do this, the zero conductor is laid directly to the source of consumption. The phase wire is connected to the common bus of the switch. Each output contact is connected to the conductors of consumption (2-3 contacts).
Mounting Features
The installation of overhead switches has its own peculiarities for different types of wire fastening.
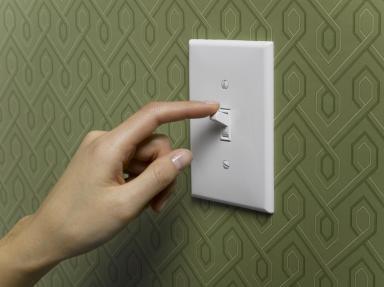
If fastening under the screw, it is necessary to remove the insulation by 1-1.5 cm and fix the conductor to its original place with the help of screws. This process can be seen in the figure below. One end of the switch is to the incoming conductor, the other end to the chandelier, lamp or other consumer of electricity.
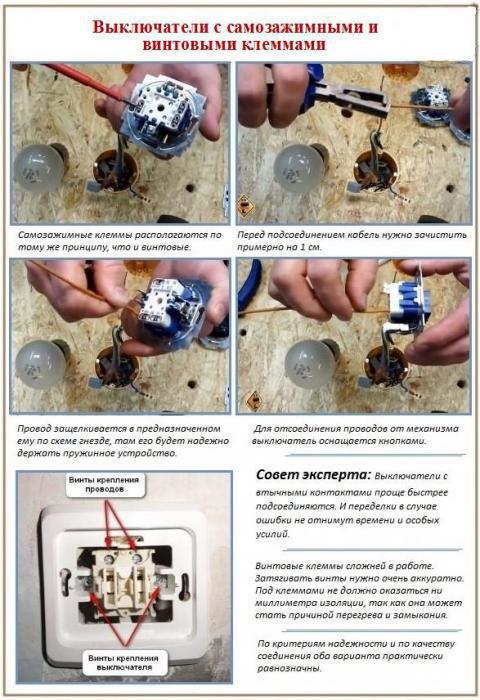
There are models of switching devices that do not have screw connections for fixing the wires. On the rear panel there are only holes for the insertion of conductors. The order of the work is as follows: clean the conductor by 1 cm and insert it into the hole until it stops. The self-clamping contact must secure the connection automatically and, when trying to remove the conductor, holds it tightly. Do not apply a large force to check the strength of the connection to avoid breakage of the switch. The fastening system has been worked out by the manufacturer and is reliable enough for small current loads. A huge advantage of this connection is the lack of a special tool for connecting and simplicity of work.
Important! For correct installation It is required to determine the zero conductor and the phase conductor using the instrument. Zero is connected directly to the lighting device, and the phase connection is connected via the switch of the delivery note. Thus, we get: when the switch position is off, there is no voltage on the device, and when the phase is switched on, the phase is switched on.
Safety during installation
It is not recommended to perform work on installing lighting fixtures without de-energizing, because there is a risk of damage electric shock. Therefore, the installation should be carried out by a specialist with an appropriate tolerance group for work in electrical installations.
If the work is done on its own, then the following safety measures should be taken into account:
- turn off the supply voltage;
- check with the aid of the instrument or the indicator that there is no phase at the ends of the conductors;
- perform work by combining all the links according to a pre-compiled scheme, taking into account phase and zero wires;
- apply voltage automatically through the machine with the appropriate tripping current;
- check the operation of the mounted circuit (in case of incorrect installation, it will work circuit breaker);
- if the circuit-breaker has tripped, check the correctness of all connections, make an adjustment and again check the operation of the circuit.
Everyone sooner or later meets with a situation when it is necessary to replace an outdated or broken switch in the house. It would seem that there is hard or difficult? But there are some nuances in this matter.
We choose the switch single-key
It is advisable to buy the device in shops specially designed for this equipment, where you can choose a switch you like in appearance and functionality.
When choosing a device, you should pay attention to what parameters of power and amperage it is designed for. For example, a switch whose contacts are made of cermet with silver, can qualitatively work with a current strength of up to 4 A.
Buying a one-key switch, look attentively at it design features: it can be ceiling, push-button or key, flip-over or rotary, inserted into electrical appliances or connected directly to the wire and so on.
So, the one-key switch for hidden wires allows connecting the wiring after the mechanism is installed in the wall. For external wiring, the mechanism is mounted on special wooden or plastic fire extinguishers, which are installed over the wall.
And finally, you should carefully check the build quality of the product.
Single-key switch
This type of mechanism is usually installed in places where it is inconvenient to control the process of turning on and off the light. We are talking about long corridor rooms, staircases, tambours, large factory workshops and the like.
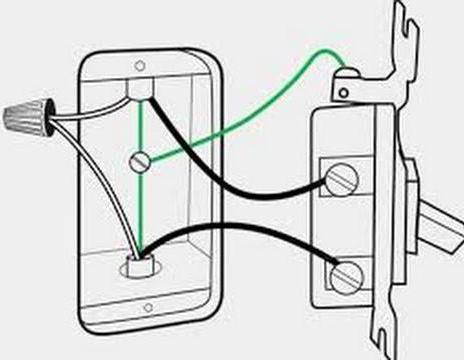
In these places it is recommended to install and connect special single-key mechanisms having three contacts. During the operation of the product, the electrical circuit is not broken, as in conventional devices, but there is a switching between two contacts. The circuit of the one-key switch, called the pass-through switch, is shown below.

Buying a pass-through switch, pay attention to its type and features, which can correspond to which wiring (internal or external) the device will be connected to. Also it is necessary at sellers to be interested in internal parameters of the mechanism, on what force of a current and loading it is calculated.
Differences of an ordinary switch from a through
These two types of devices differ from each other in their internal features. The feedthrough switch has a special mechanism that provides switching of the electrical circuit to three contacts. While conventional switch one-key interrupts (does not switch) electrical circuit on two contacts.
In everyday life, in modern houses and the apartments are still installed and continue to install just simple switches. We will talk about them further.
Features of a single-key mechanism
Switch single-key ordinary - a common and well-known component of indoor lighting. They use it in an electrical circuit with voltages up to 1000 V. Such devices do not have protection mechanisms against overloads and short circuits, but they are simply arranged and easy to install and connect.
Household switches are of the following types and modifications:
Internal;
External;
Modular;
With protection from moisture.
External mechanisms
The switch single-key open installation It is used when it is necessary to connect it to the external wiring that goes along the wall in a special plastic or metal protection. The device, according to the latest rules of fire safety equipment, must be mounted on a fire-prevention base made of non-combustible material. Previously, such switches could be installed on a wooden base.
Internal devices
When hidden wiring It is necessary to know how to connect a one-key switch of the appropriate design. To begin with, you need to make a niche in the wall where the ends of the wires will be removed and the switch installed. Then in this niche a special plastic hollow cylinder is mounted, which should enter the wall niche as tightly as possible.
And already in this cylinder is installed a switch, which was previously connected to the electrical circuit by means of the early output ends of the wiring. In the cylinder, the switch is held by means of metal "legs", which are screwed.
Modular single-key switch
The installation of a single-key switch of this type will be practical and useful for some types of cables. These devices are mainly used in office and industrial premises, as well as in commercial buildings. Products are manufactured only for cable channels.
Waterproof mechanism
These switches are installed in places of high moisture content: bathrooms, cellars, saunas and baths, kitchens. Also, these devices are placed in rooms where water can enter products, for example, in swimming pools or on the street. They are made both external type, and internal.
Important features of the device connection
Connecting a single-key switch is very important. This device should only be supplied with a phase. This should be done in order to make a safe replacement of lamps in chandeliers and luminaires, since only the phase beats the current, and the switch turns it off. Therefore, before connecting the wires to the device, determine the indicator on which wire the phase is.
If the connection is incorrect, there is a high probability of quick failure of the light bulbs, especially for energy saving and LED bulbs. When connecting these luminaires, the phase must necessarily be interrupted.
Circuit-breaker arrangement
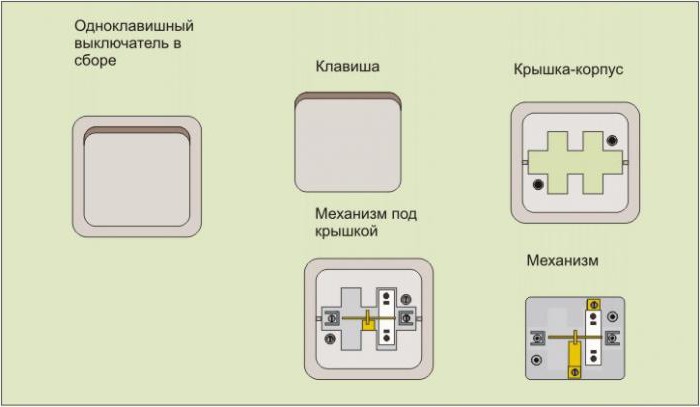
The mechanism consists of external protective plastic elements and internal working components. From the plastic, the rim of the switch is made and a key that interrupts the electrical circuit, i.e. switches on and off the light in the room.
Under the key is a protective frame, which is fixed to the main body with plastic latches or screws, depending on the model. Under the frame is already the working device itself. On the sides of the internal component there are spacer "paws", necessary for fixing with special screws to the sub-machine. Or instead of "legs" can be used metal bars with holes for self-tapping screws.
There are two contacts on the switch: the lead, where the wire with the phase is connected, and the outgoing, where the contact coming to the luminaire is connected.
At the same time many switches do not indicate where this or that wire should be. But this is not terrible, since for single-key mechanisms it is not important what kind of contact to bring the phase to.
Outcomes
We got acquainted with single-key devices of various modifications. Now we know their features and nuances. It is clear that there is nothing difficult to install and connect switches. But this in no way negates the responsibility for the selection of these mechanisms in our homes and apartments. After all, most people often prefer to install at home some "advanced" lighting control devices, technologically new and modern, while not much representing them internal organization and connection parameters. Well, if the owner of the apartment will call for the installation of such a switch master, who understands all the intricacies of new devices. Especially when the circuit-breaker is single-keyed, in which there are not two contacts, as in conventional devices, but three.
But most people consider themselves to be large specialists in household appliances and electronics, try to save money on a specialist and mount a modern switch in the wrong way, which leads to sad consequences.
Therefore, you should not chase the "advanced" switches, if you do not understand how to install and connect them. You can buy an ordinary single-key mechanism, high-quality and accurate, properly mount it, and it will serve for a long time and reliably.