How to work with a welding machine. Basics of welding works - self-instruction manual for a novice welder
If you do not know how to learn how to cook a welding inverter, video and prepared step-by-step instruction will help to understand all the nuances of this process. It is not uncommon for novice welders to pick up the machine to weld the car body, patch holes in metal structures, etc.

Learn how to cook car bodywork or other details to novice welders using an inverter. Properly using a welding inverter is not as difficult as many think. Even if you have never picked up this tool, and do not understand the types of electrodes, this will not be a hindrance to self-repair of a car or the manufacture of a metal structure.
The reasons for learning how to cook inverters are a lot. Having at the disposal of Svaris 160, Svaris 200 or any other good machine, mastering the welding business will be even easier. Not the least role is played by the apparatus used in the welding process.
The whole process is divided into three main stages:
- Preparation;
- Inverter arc ignition;
- Welding.
Preparation

The inverter is a welding device. This device provides the connection of metal elements by welding them together. So you can correctly weld the body of your car, fix holes in the metal fence, fix the grilles on the windows and perform a number of other household tasks.
Preparation consists of several steps.
- Place the welding inverter. Determine in advance the space where your Svaris 160 or 200 will be located to perform welding activities. To do this, you need to clear the territory of garbage, wooden, paper items that can catch fire because of a flying spark. It is best to cook by placing the inverter on a concrete floor.
- Connecting the inverter. Usually a single-phase circuit is used to connect a household inverter. This allows the inverter to operate from a 220V outlet. The whiskers of the inverter have terminals plus and minus. On the negative electrode goes, and plus is connected to one of the treated surfaces.
- Protection of the employee. An important point that directly affects your safety. Can I work without gloves? In no case. You can cook only with a full set of protective equipment - gloves, mask, tight suit, rubber shoes. The body must be completely closed.
- Turn on the device inverter. Take the terminal in which the electrode is mounted. A special toggle switch turns the device on and you can start the ignition process. Pre-set the required welding current. If the electrode for the inverter has a diameter of 3 mm, the current will be 100 A. It will be correct to first study the technical documentation that your Svaris 160, 200 or other model of the inverter was equipped with. It is extremely important for beginners to understand how to cook the same car body. But it is better to get the first experience on simpler surfaces. Just try to weld a pair of metal pieces together.
Inverter arc
The next stage is the ignition of the inverter arc. Here, stick to a few recommendations, so that the device does what you expect of it.
- It is not difficult to learn how to ignite an inverter, but it will take time. First you can face some difficulties, but soon it will take a minimum of effort;
- For all novice welders, the main difficulty begins precisely with the ignition of the arc. Therefore, it is not right to think that only in you everything is so bad;
- To ignite the arc of the inverter during the first welding with cold metal, use a twiddle. This method is similar to lighting a match about boxes;
- Carry the electrode over the workpiece, slightly touch the surface of the part you are going to brew;
- The first time you can encounter sticking, that is, the electrode will just stick to the metal. To fix the situation, just tilt the terminal to the other side. So you'll crack the web. If it does not work, just unplug the inverter from the power;
- You need to scry until the moment the arc appears. In no case do not begin to chirp, not dropping on the face of the mask. Looking at an arc without light filters is detrimental to vision;
- To maintain the arc, you need to fix the tip of the electrode at a distance of 3-5 millimeters from the surface to be welded;
- Here, in novice welders, another difficulty arises - exposure of the required distance. If you zoom too far, the electrode will stick. When you delete, the arc is lost, so you have to perform the ignition again;
- During welding, the electrode will be gradually consumed, and the coating will burn out. Metal will begin to fill the space on which the welding process is performed. Therefore, do not forget to gradually move the electrode along the seam.
Weld
Addition welding seam, you need to understand the essence of the welded bath. Only in this way can you achieve the desired result.
- When the arc is ignited, a pool of molten metal is formed. It is called a welded bath.
- To connect the parts, weld the car body, the electrode should be gradually moved along the boundaries of the two welded elements.
- Behind the electrode will move the bath, which is called the zone of liquid metal.
- To achieve the desired quality of joining parts, the welder must perform oscillatory movements of the electrode relative to the seam created.
- If you lose an arc by starting welding, you can not worry about the need to re-ignite. Now it is easier. To do this, approximate a few millimeters of the end of the electrode to the surface.
- Special masks are good because through them you can see a bright arc and welded bath. The direct contact between the electrode and the surface is seen worse, but you can not remove the mask with filters.
- When the length of the rod remains literally 5-6 cm, welding should be stopped. Turn off the inverter by turning the inverter, change the electrode, and then you can re-enable you to Svaris 160 or 200.
- After completing the welding operation, restoring the car body, be sure to tap the seam with a hammer. So you remove the formed slag from the surface. Determine the cleaned surface by its appearance. The seam free from the slag shines.
Movement of the electrode
Many beginners, who are brewing for the first time, mistakenly think that Svaris 160 or 200 will do all the work for them. We do not argue, Svaris 160 and Svaris 200 are really good inverters. But there is not enough quality equipment to do the right job.
The main mistake is straight-line movements when creating a seam. Professionals do not cook this way. In order to repair the car body or perform a number of other operations, you need to learn how to properly use the machine, and observe the seam.
- Having prepared the body of the car for welding, and having included your Svaris 160 or Svaris 200, you must gradually move along the planned seam line.
- The movements are zigzag, spiral, green - that is, a return path is used. This achieves the desired quality of melting, minimizes the risk of formation by skipping.
- The speed of movement depends on the weld surface formed - the thickness of the weld, width, depth, etc.
- When you finish the line, hold the last point for a few seconds. This will make the seam complete, prevent the formation of craters - depressions. Only after this change the electrode.
So, if you are new to welding and thanks to TD "Doc" have just purchased an excellent inverter type welding machine and a wonderful "chameleon" mask, then this article is for you.
Before proceeding with welding, I would like to talk about safety rules when working with welding equipment. Do not ignore this moment. It is strongly recommended to study PUE (Rules for the Operation of Electrical Installations), Chapter 7.6 "Electric Welding Plants". Be sure that from this document you will get a lot of useful information not only about the safety rules when handling welding equipment, but also about the electrical safety of your entire a country house, country house.
Next you will definitely need quality welder gloves (leggings) and clothing made from non-flammable material. Many people try to cook in household (garden) gloves and sometimes even in sleeveless clothes. Believe me - burns from splashes of welding are very painful and heal very long. Also, be sure to fasten all buttons and wear quality shoes. Especially memorable cases were with the flying of red-hot metal and slag by the collar and into boots with pants stuffed in them. Screams, dances, wonders of dexterity of novice welders.

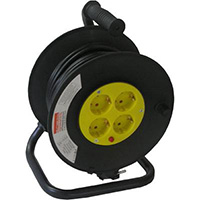 Try to avoid as far as possible the use of long carryovers, as this leads to significant losses in the power of the welding machines. If you still use such a carry, unwind the cable from the spool to the end.
The electrodes must necessarily be dried, if necessary, calcined. As a novice and so it will probably not be easy to kindle a welding arc, it is more difficult to do with uncalcined electrodes. The modes (temperature and time) of the calcination are indicated on the package of electrodes. In our store there is all for welding , so if you decide to buy a stove or a box for calcining the electrodes, we will be happy to help you with your choice.

Mask "chameleon" must be configured for a specific type of work and the value of the welding current. Be sure to carefully read the passport or the operating instructions for the welding mask. Do not start welding without making sure that the filter is working properly. Some forget to transfer it from the position of Grind (sweep) - get a decent "rabbit".
 The welding current must be selected in accordance with the type of welding connection being performed, do not forget that in the lower position it is always higher by 20-30% than in the ceiling and by 10-20% than in the vertical one. Approximate current strength is indicated on the box with electrodes.
For beginners, it is desirable to start cooking with rutile electrodes of the type MP3-C.
Do not immediately try to cook the product: a tank for a bath, or put a fence, etc., despite the fact that it is generally not very difficult. Remember that the main weapon of a soldier-recruit is a shovel, and a novice welder - angle grinder, she is also a "Bulgarian". Therefore, in order to reduce the use of the main gun to a minimum in the future, it is necessary to begin with the overlaying (surfacing) of the test rolls in order to "feel welding".

It is desirable for the first training to find a thick metal plate of sufficient size. Strip the metal surface to a metallic shine with a metal surface and place the test roller in the lowered position forward, without oscillating the electrode from left to right if you are right handed and left to right if left-handed.
Experiment with the value of the welding current and the manipulation of the electrode.
 Then fuse the rollers, producing oscillatory transverse motions. Usually, the geometry of the manipulations of the electrode is represented by the options shown in the figure below. The roller should be made even with uniform scales. General rule for professionals: the welding current should be as high as possible for a high quality cook and appearance.
Try to keep a short arc, i.e. the electrode should be permanently 2-3 mm from the weld pool, for this it must be gradually fed into the welding zone, proceeding from the speed and current value. This, too, must be experienced.
The earthing terminal or "ground" should be mounted as close as possible to the welding location. The electrode is clamped tightly in the holder. Make sure that the cake is not less than 10 cm, do not burn the electrode further.
Watch the welding bath. Learn to distinguish metal from slag. Slag through the welding mask, looks like dark spots in the sun.

 After the end of welding, carefully tap the slag with a special hammer. I emphasize carefully, do not hollow with all the foolishness, the cases of not getting cold slag on the exposed areas of the skin and in the eyes abound, and, as a rule, it is the newcomers who suffer. If you have a mask "chameleon" then it is desirable to not raise it at all during this operation.
Light the welding electrode either by tapping lightly, or by "chirk" as a match.
If the electrode sticks and after you tear it off, it does not light up, then it is necessary to slowly break off the clay by hand, since in such cases the electrode rod usually burns. If you knock on the electrode, that there is urine, then on the contrary, the coating will fly off more than necessary and the naked rod will remain, and again the probability of sticking will increase exponentially.

We also recommend experimenting with the arc force Arc Force (forcing the arc) on welding machine . It is designed to adjust the "rigidity of the arc". "Soft arc" provides a small spraying in the case of a small-drop transfer, and "hard" allows obtaining deep penetration of the welded seam. Also, the adjustment of Arc Force many welders "in the subject" is used to prevent sticking of the electrode. Usually in such cases at the beginning of welding, unscrew it to full, and after ignition, the arcs are returned to the required position.

The next stage of the course of the young fighter is vertical rollers.
We seize the plate, for example, to a fence, and we try to put vertical seam. Welding direction from bottom to top. If the electrodes are rutile, the welding is done in the "separation", otherwise the welding bath will "flow".
In principle, if you successfully completed the surfacing in an upright position, you can slowly proceed to "fence building". For beginners, this will be enough, and the rest will learn "in battle."
But for the particularly inquisitive, you can practice in horizontal and ceiling positions.
Of course, not many people will immediately get a good roll on the ceiling, but this will give you food for thought as it forms weld seam, how the metal behaves when welding, etc.
For a successful "fence building" it is necessary not only to possess welding, but to properly adjust, prepare for welding.
Take into account that when welding metal always "shrinks", it also leads to the side with which you are cooking. Consider leashes and tightening when welding, as this can greatly affect the size of your designs. We recommend, if possible, to assemble the structure on stitches, to apply special devices (clamps, etc.), then after that it is necessary to again check the dimensions and geometry, and to scrape the "tightly" design at the very end. If the seam is long, then I strongly advise you to cook it from the center to the ends with short seams "in a runaway", in checkerboard pattern, if the seam is two-sided. The principle of "seven times measure, one cut" - in the case of welding works is as relevant as ever. This will help to avoid the problems described above.
If something does not work out, do not despair - it will definitely work later. Welding loves the patient and persevering, teaches to be so. In any case, TD "DOCA" wishes you good luck!

Before you try to learn how to cook, you need to familiarize yourself with the parts of the inverter, as well as visit a few practical exercises (you can see how to properly weld welding video). The welding inverter consists of the following parts:
frequency converter; control system; network filter and rectifier; high-frequency transformer; power rectifier.
Typically, the dimensions welding inverter are small, this allows you to carry it even on your shoulder during the whole working day.
How to learn how to weld welding inverter, anyone can learn. To do this, you need to use welding electrodes, which are of three main types:
- high-alloyed;
- carbon;
- alloyed.
Thanks use you can get a good quality seam. The frequency of the current in inverter welding should not exceed 60-85 kHz.
Welding inverter is very economical, which is a very big plus for the device. And the size of the equipment, and its cost-effectiveness are determined by European standards, which create a rather rigid framework for energy consumption.
To know how to properly weld welding (video), you must at least assume what additional equipment may be needed: (choose a convenient mask that will be conveniently attached to the head), holders, protective gloves and a suit.

What welding machine to choose for welding?
To cook with inverter welding, first of all, you need to choose the device for welding. In the modern market, there are many different models of welding machines, as well as many video materials in the section on how to work with video welding.
To find the most suitable unit, you need to familiarize yourself with the features of each model. First of all, when choosing an inverter, you pay attention to the range of welding current adjustment. For example, for welding work at the dacha the machine with an index of 160-200 A will go well.
How to weld welding "video on inverters" certainly contains information about the indicator, such as PV - duration of inverter shutdown. This indicator is always indicated in technical characteristics welding machine (in%). For example, if the PV is 40%, then the operating time, respectively, will be 60%.
You can do it yourself, only before you can weld yourself, you will have to study a lot of information.
Idling voltage and power consumption are two factors that also play an important role in the selection. The voltage should be 50-90 A, and the power consumption should not exceed 16-25 A.
Also, the section "How to work with welding video" contains information about the dust and waterproof properties of the device's enclosure.

Electrode selection for welding inverter
The material "how to properly weld welding video" also necessarily contains information about which electrodes to buy for welding inverter type.
The choice of electrodes in the first place depends on the materials with which the work will be carried out (low-, medium-carbon steels, low-alloyed, stainless). For example, for welding and working with special steels, high-alloy electrodes are used, for welding alloy steels-alloyed electrodes.
The choice of electrodes also depends on the type of work. For example, in a dacha where welding is carried out mainly without critical loads, electrodes of the MP-3 or ANO class can be used. If more complex welding operations are carried out, it is better to use electrodes of the OUNI class. In addition, it is also necessary to take into account the diameter and the mark of the electrodes.

Welding Elements for Beginners
Before you start welding critical parts, you must try to weld something unnecessary. Even if the welder does not have experience at all on such products, he will be able to figure out how to learn how to cook with welding.
It is necessary to fill the electrode in a special holder, fix the clamps on the workpiece to be welded.
The electrode should be made at an angle of 65 ° to the product and to try to always keep a small distance between the electrode and the workpiece when welding. After laying the seam along it it is recommended to knock with a hammer so that all the slag completely falls.
How to properly weld welding video contains information where three main types of seams are distinguished:
- vertical;
- horizontal;
- ceiling.

For successful work, several rules should also be observed:
- it is necessary to learn how to properly hold the welding electrode;
- you can get a welding arc in two ways: by lifting or scaling;
- receiving of the arc is accompanied by the supply of a second wire (mass), which moves away from the inverter and is connected to the workpiece to be welded;
- the optimal distance from the electrode to the part is 2-6 mm;
- if smoothly and evenly along the entire length of the junction, the ditch that is formed when the arc is exposed to the metal surface will be filled with molten metal (how to weld the video contains detailed material).
The welding equipment Resant, like any other, is susceptible to failure due to various reasons. Depending on the type of welding device, the set of common breakdowns is different ....
Welding works are simpler and more accurate, thanks to the use of magnetic corners, so this element is recommended by many specialists in the field of welding. If you use magnetic corners for welding, ...
Today, the profession of electric welder is quite rare. To accurately perform welding work requires diligence, great patience and, of course, a responsible approach on the part of the employee. Welding lessons should take place in specialized educational institutions, where students are described in detail the entire technological part and conduct practical classes.
Welder must be well versed in, because the seam turned out to be reliable and durable you need to comply with many conditions. Welding for beginners should first of all begin with safety precautions.
In the work there is formed such a powerful bright light that it is easy to burn the retina of the eye. Therefore, before proceeding to welding operations, it is necessary to take care of the protective mask. The filter for the mask is selected depending on how much current will be used during welding. In addition, it is much easier to cook metal, when you clearly see the whole front of the work.
To avoid burns to the hands and whole body, always wear protective clothing. Welding training always begins with the basics. To deal with welding machine, it is necessary to study the principle of its action well.
There are aggregates of alternating and direct current

It is the second kind that welding professionals prefer to use. In the welding machine there are two branches, which have different polarities. From what polarity will be chosen for the processed product, all further work depends. Correctly connect the positive pole to the product, and negative to the electrode, then the direct polarity will be observed.
Where to begin
Before starting work, it is necessary to fasten the "grounding" clamp to the part that you want to weld. Then the current of the desired value is set on the welding machine. Its size directly depends on how deep and strong the seam needs to be made, and also what kind and thickness of the metal is required to cook. On the welding machine there is always a special toggle switch, turning which, you can achieve the desired current parameters.
Also, a special approach requires the selection of an electrode for welding operations. A highly qualified specialist has to use electrodes of various lengths and diameters, depending on the complexity of the forthcoming work. Usually on the package there is always a table with reliable information about what current is needed for each type of electrode.
In order to start the work, it is necessary to properly light the arc. It is necessary to bring the electrode to the place of the future seam and, as it were, to strike them against the surface. After the flame has ignited, it is necessary to raise the electrode tip no more than 5 millimeters from the surface. Now you can start working. If you hold the electrode a long distance from the surface, you can get a too convex seam, which does not connect the welded surfaces. The size of the arc should also not be small, since the seam will be too pressed into the surface, and, therefore, will be sufficiently brittle. In addition, throughout the entire operation, it is correct to keep the electrode at the same distance from the metal surface, otherwise the seam will be uneven and will eventually deform.
The best way is to cook the metal at an angle of 60 degrees to the surface. However, it is not always possible for a welder to observe such conditions, as welding work is often carried out in a very hard-to-reach places. However, the depth of the seam depends directly on the angle of inclination of the electrode, and hence its reliability. That is why technical universities practice welding training in hard-to-reach places. , first of all, depends on the correct movement of the ignited arc. There are several ways to properly move the electrode along the seam. 
Welding training, as a rule, requires certain skills and long practice. You can move the electrode by sickle-shaped, loop-like, zigzagging and some other trajectories. It is easiest for a novice to use an ordinary zigzag. However, in this case, it will be correct to take into account the position of the surfaces to be welded together. You can cook horizontally, vertically, and also create a trapezoidal, butt, corner outer or inner seam. Therefore, in each individual case, the electrode motion pattern is selected individually. 
In order to learn the welding lessons well, it is necessary, first of all, to understand. Under the action of a current of a given value, the surface itself, the inner core of the electrode and its coating are melted. The coating of the electrode during combustion forms a gas cloud, inside of which there is no oxygen completely. Thus, the metal ceases to come into contact with air and a weld pool is formed under the electrode, where the molten residues of the treated surface and the electrode itself accumulate. The coating of the electrode forms the so-called slag, which, after setting the seam, covers it. To clean the slag from the surface of the seam it is necessary to use a special hammer.
Many start to get frightened of the appearance of the work done. However, if the remnants of the electrode coating are repelled correctly, a beautiful, uniform seam can be found under the slag. It is he who speaks about the quality of the work performed and the professionalism of the welder. Soon it will be much easier to boil the metal, because each next job will be much better than the previous one.