The tap does not allow water to pass through. What to do if the kitchen faucet leaks from the bottom of the spout
- The lower part of the gander
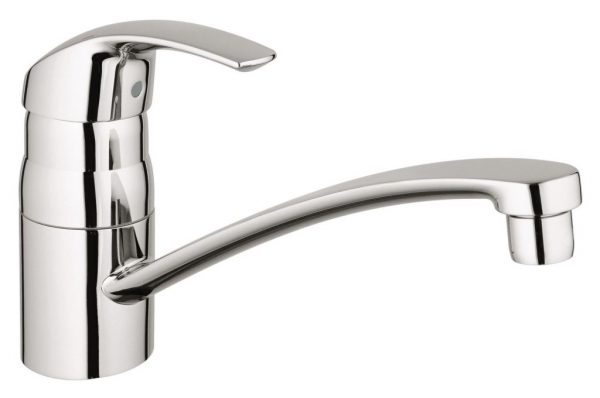
- Single lever mixer
- Switch from the tap to the shower
- Leakage from the valve
Even the best quality plumbing begins to flow with time. Under the influence of moisture and constant physical impact, both metal and rubber elements wear out. So what if the mixer flows? The easiest way is to contact the plumber. But if you have the tools at your fingertips, you can do all the repair work yourself. In addition to saving money, you also get the confidence that all the work has been performed qualitatively.
There are several types of mixers, as well as many reasons for leaks. Each situation requires an individual approach, but the set of necessary tools is always the same. If the water flows from the mixer, then you will need:
- adjustable wrench;
- screwdrivers;
- FSM tape;
- rubber gaskets;
- pliers.
Regardless of the type of failure, water must be blocked before starting work. If the riser is blocked only at the entrance, do not forget to warn the neighbors. In this case, it is better to have at hand all the tools and materials to finish all the work as quickly as possible.
The lower part of the gander
The simplest for eliminating the breakage of the mixer is the percolation of the gander. In most cases, it flows due to the wear of the gasket. To eliminate such a breakdown, you need a ¾-inch gasket. The repair procedure should be as follows:
- With the help of the adjustable wrench, the nut is loosened, which keeps the gander on the mixer.
- The gander is separated from the mixer.
- The gaskets are replaced. It is best to insert a gasket from the paronite.
- FUM tape is wound on the thread.
- The gander is inserted into place and pressed with a nut.
The whole procedure takes no more than 20 minutes, and if done correctly, it will have to be conducted no more often than once every 5-6 years.
Back to contents
Single lever mixer
If you have a flowing mixer with one lever (sometimes called a "joystick"), then, most likely, it exhausted the cartridge's life. It is possible to eliminate the leak in it, only by replacing this one. Cartridges are sold in many hardware stores, but their design may differ. You can remove the leak by doing the following:
- Carefully remove the cap from the front of the lever (usually a red-blue circle).
- The clamping screw is twisted. Most often it is hexagonal.
- The lever is removed from the tap.
- The old cartridge is removed and a new one is installed.
- The mixer is assembled in the reverse order.
Since the cartridges can have a different design, it is better to remove this part before going to the store and taking it with you. So, you can avoid the situation with the wrong choice.
Back to contents
Switch from the tap to the shower
When the gasket is worn between the lever and the mixer body, sometimes water flows from the switch. This place is most often used gasket size of 0.5 inches. To replace it, you need to do the following:
- The fixing screw is loosened.
- The lever is removed from the mixer.
- The gasket is replaced.
- 2-3 layers of FUM tape are wound on the thread.
- The lever is installed and fixed with a screw.
Despite the fact that the FUM tape seems very thin, do not wind more than three layers, otherwise the screw simply will not spin.
Many faced with when a mixer drips in the kitchen. This problem is very common and sometimes the sound of dripping drops from the mixer can be very annoying. But such a breakage of the mixer can be repaired. The first thing to do is to determine correctly what is causing it to drip. Let's consider the probable causes.
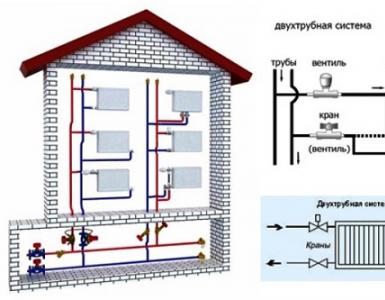
In the first case, we will consider malfunctions of the rotary valves. To detect faults, the water supply to the mixer must be cut off. To do this, the tap is turned off, which is usually in the drawer under the sink, but if you have one main water pipe to both the kitchen and the bathroom, then the valve can be located in the bathroom, and it blocks the flow of water to both the kitchen and the bathroom. To identify the problem you need: a screwdriver and a set of keys, if there is no set of keys, then you can use a swivel key, and you will need a tape-tape.
In this type of mixer can be two options for malfunctions.
The first is when the valve itself does not hold water, and because of this constantly flowing or dripping water. The reason for this is worn seals on the crane-buks.
After replacing the seals, the leakage problem is eliminated. If you have ceramic crane , it will be necessary to replace it completely, because such crane-axle boxes are not repaired.
The second and most common reason that the mixer starts to leak is its leakage from under the valve itself. To eliminate leakage, you need to remove the handle, this will require a screwdriver. And visually determine where the water comes from. If the mixer flows from the thread of the axle crane, then it will be necessary to unscrew it and, after winding several layers of the ribbon tape on the thread, turn the tap-off screw back into place.
IMPORTANT! "Yuri Nikolaev: How I got rid of alcohol dependence for 7 days …

Malfunction of the Sharovgo Mixer
Recently, in kitchens, many install single-lever mixers. What if it flows in the kitchen? Consider the reasons and their solution.
The reason that the mixer in the kitchen has flowed is the wear of the so-called cartridge. There are two types of cartridges in such mixers, ceramic disc nowadays is found in almost all mixers and ball.
AT ball cartridge There are 2 saddles, which are made of high-strength rubber, and they have a metal ball. It is tightly pressed against the rubber saddles due to the water pressure. In the saddles, holes are made through which they pass hot and cold water. Accordingly, one saddle passes cold water, and the other is hot. With the help of the mixer lever, the water supply to the bowl is regulated, by combining its openings with the holes that are in the saddles. The reason that the mixer began to drip in this case, as a rule, are mote, debris or scale from the water pipe. Eliminates such a leak by cleaning and rinsing the cartridge.
In the second kind of cartridge-disk or as it is called ceramic there are 2 metal-ceramic discs. They are two very tightly ground metal-ceramic plates. They are very well polished, and because of this they provide good tightness. Adjustment of the temperature and pressure of the water at the outlet is ensured by the position of these cermets (disks). When the lever is operated, the upper cermet disk is displaced and occupies a position relative to the lower disc.
Total leakage
As a result, the temperature of the water at the outlet of the mixer depends on the level at which the upper disc overlaps and limits or vice versa increases the pressure of the cold water relative to the level while the hot water pressure is limited or the pressure of the hot water increases depending on the position of the lever.
The reason why the mixer in the kitchen with such a cartridge has flowed may be the same-it is poor-quality water that has been poorly cleaned of mechanical impurities. Because of this, the parts of the cartridge get sand particles, which also leads to leakage.
The problem is solved by rinsing and cleaning the cartridge. If this does not work, you will just need to replace it. And when choosing and buying such a mixer it would not be superfluous to purchase one or several spare cartridges at once, but if you did not, do not despair, now in sanitary ware shops a huge selection of spare parts for mixers. So the likelihood that you will not find a replacement for your old cartridge is very small.
We begin to correct the leakage of the mixer
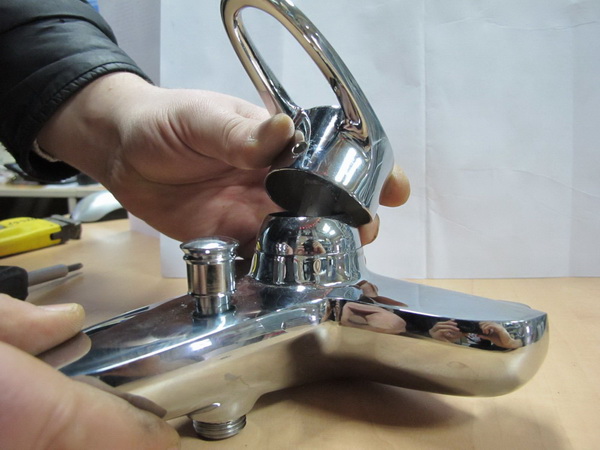
So, how to fix the mixer in the kitchen, and to be exact how to replace the cartridge? First, you need to remove the decorative plug, then you need to unscrew the screw that holds the handle of the mixer and remove it. The next step is to remove the handle. Underneath it you will see a nut with which the cartridge is attached. Select the size of the key or twist the nut with a swivel key and that's it.
Next, you just need to remove the old cartridge and replace it with a new one. During assembly, all operations are repeated in reverse order. The main and important condition for replacing the cartridge is its correct installation, so pay special attention to this, and remember how it originally stood, but rather take a picture or make a sketch.

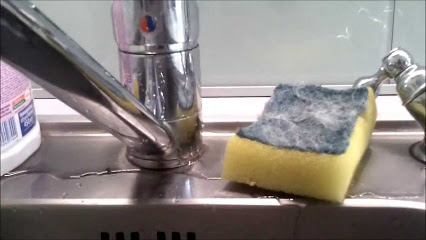
If the mixer moves in the kitchen at the base
Leak in the ground spout , is also not uncommon. What to do if the mixer leaks in the kitchen at the bottom. The reason for this failure is a pair of oil seals in the bottom of the spout. To reach them it will be necessary to remove the mixer by unscrewing the hoses of hot and cold water and the screw with which the mixer is attached to the sink. Of course, we do not forget to close hot and cold water before performing this operation.

Next, remove the black rubber sealing ring, which prevents the penetration of water under the sink. After that, you need to unscrew the brass ring, under which is the fluoroplastic white ring. In general, there are 2 top and bottom spouts.
Now the swivel spout of the mixer can be freed from the base. Under the spout and there are these stuffing boxes, which must be replaced and assemble the mixer in the reverse order, by installing and connecting it. That's all, the problem is solved.
We have analyzed the cases in which the tap is flowing or dripping. But what if it flows from under it? That is, the water flows from below under the sink. The cause of this phenomenon can be the wear of seals on hoses that are screwed into the base of the spout to supply water from the water pipe or insufficient tightening of these hoses.
Repair such a breakdown by tightening the hose key or replacing them with new ones. The wear of the sealing black ring at the base of the spout, which was mentioned above, can also cause a leak under the mixer. Replacing the sealing rubber ring at the base will eliminate leakage, but for this you will need to remove the mixer completely.
Conclusion
To summarize, it can be said that repairing the mixer is not a super complicated task, and any person who is more or less familiar with a screwdriver and a wrench will be able to cope with it. We really hope that our article will help you to eliminate the mixer leak in the kitchen without problems. To do this, you need a minimum of tools and patience. The main thing in solving such a task is to know what and where to unscrew and how to replace or repair the failed part, and this we have covered in our article.
To begin with, you need to understand what exactly the specific person means by saying the phrase "ball valve".
The fact is that different people use this phrase to designate various plumbing mechanisms.
Some refer to the ball valve, which is a locking mechanism and is intended solely to cover the water, which is usually installed at the entrance to the house or apartment. It is necessary to ensure that in the event of an accident on the water pipe, it is possible to quickly shut off the pipes and make repairs.
 The latter mean, which serves as a water-separating device. Usually these are single-lever mechanisms, very often used both in the kitchen and the bathroom.
They are arranged in different ways. The only uniting part of them is a ball, designed to pass water in the open position and to shut off the flow in the "closed" position.
There are two ways to solve the problem:
- repair of the valve;
- replace it with a new one, prepared in advance.
 The first option is more suitable for owners of private houses because the valve that will supply water to the house will have to be closed to repair the valve. In this case, only one family will remain without water, so you can safely remove it, disassemble it, check the integrity of the crane saddle, the ball itself, the sealing gaskets. Next, you need to bring all the parts in line or, if necessary, replace them. After that, the valve is put in place and a trial run of water is made to determine its operability.
In the case of a multi-storey house, it will be necessary to cover the entire riser for the repair of the valve, so the neighbors from below and from above will remain without water. In this situation it is easier to replace the valve with a new one and give water than to disassemble the valve and try to revive it.
In addition, following the manufacturer's instructions for ball valves, only in the simplest cases.
Repairs can be done:
- when leaking through a stuffing box seal, which is easily removed by tightening the nut fixing it;
- in the case when the handle of the valve is loose - then you need to tighten the screw holding it (nut).
All other malfunctions should not be eliminated at home.
Since the mixer is much more expensive than the valve and at the same time it can be repaired as long as possible without disturbing the neighbors, it is worth trying to repair it yourself. There are several causes of malfunctions, excluding mechanical damage to the case.
The main causes of mixer problems are:
- water leaks from the mixer;
- difficulty with adjusting the water temperature;
- weak pressure on the supply line.
Before dismantling the mixer, it is advisable to at least approximately familiarize yourself with its device with a passport (if it is preserved) or look at the drawings on the Internet.
Often the cause of leaks are mechanical particles present in tap water. They lead to mechanical wear of the ball and seals.
Therefore, at the input to the apartment it is desirable to install a coarse water filter.
Procedure:
- Carefully use a flat screwdriver to remove the plastic decorative cover on the crane arm.
- In the opened hole there is a screw fixing the lever of the mixer. It needs to be turned out.
- The lever is removed from the tap (if it goes tight, it will have to be pulled together with a simultaneous shaking in the horizontal direction).
- Then, using a screwdriver, remove the threaded screw.
- After that, the dome of the mixer with the plastic seal is already quite easily dismantled.
- The plastic element is removed and inspected for the presence of deposits and deposits caused by the operation of the mixer. Both must be deleted.
- If visually noticeable that the seal is worn out, it must be replaced.
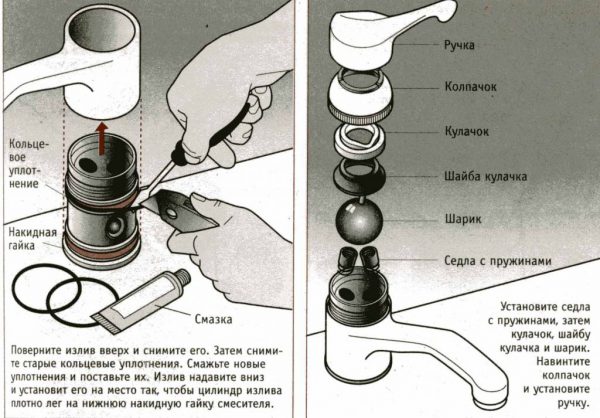
- Next you need to remove the ball itself - it is hollow and has three holes, two of which are designed for cold and, and the third - outlet. The ball should also be rinsed and examined carefully. If it is damaged, you will have to replace it with a new one. In practice, it is very difficult to find a new ball on sale, so such damage is likely to cause a mixer replacement.
- In mixers of this type, the ball is fixed by means of two sealing elements with springs. They are easily removed with a screwdriver with a thin sting. Damaged gaskets and loose springs need to be replaced.
After revising and applying a special grease to all seals, the mixer is assembled in the reverse order.
The brand of lubrication must be carefully considered - different manufacturers give different recommendations on this matter.
After assembling the mixer, it must be checked for leaks by turning on water.
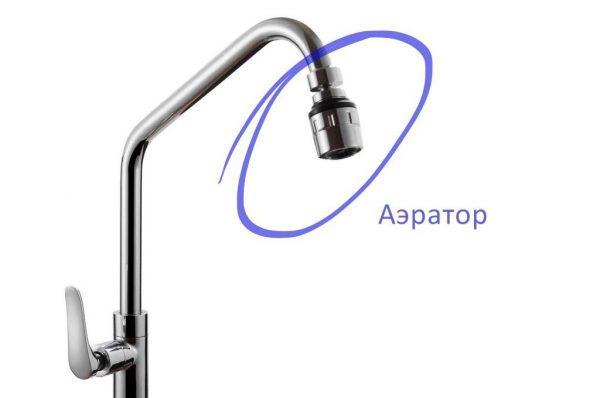
After revising the mixer, problems with adjusting the water temperature are most often solved by themselves. 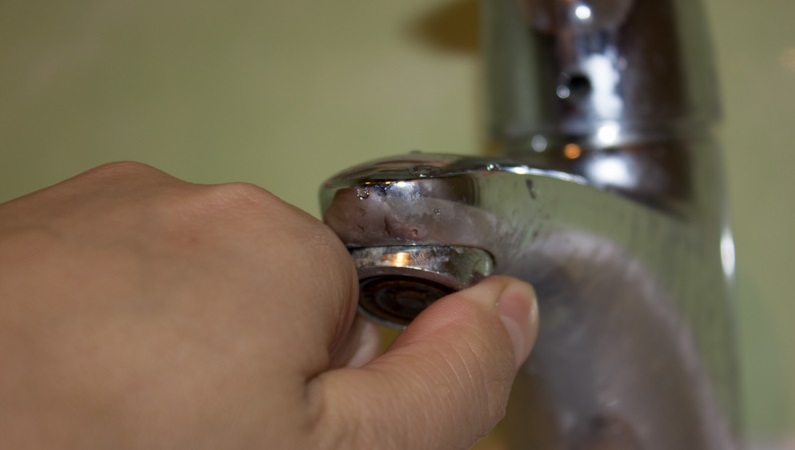 But if the problems with pressure, you can try to adjust it by changing the position of the rod connecting the ball to the lever. This allows you to change the position of the ball holes in relation to the supply pipes and thus achieve the desired head. Although, before tackling the rod, it is necessary to remove the aerator from the tip of the spout and rinse it - often it, which also reduces the pressure of the water jet.
Repair of the mixer with the ball mechanism is not complicated even for the person far from the sanitary engineering. The main conditions here are the thoroughness of cleaning the parts and the accuracy when disassembling and assembling the mechanism. To be prepared for repair work, it is advisable to stock up in advance the sealing elements and lubricant.
It happens that even after the revision mixer still flows, then there are no options - it will have to be replaced. Try not to purchase such equipment in spontaneous markets and in questionable outlets. It is better to do this in a proven plumbing store, where the guarantee is given for all purchases. This will help you out if the factory mixer is found in the new mixer. Then you can return it to the store, get the money back, or replace it with equivalent.
Modern plumbing constantly changes its appearance, uses more advanced technologies and materials, so it is not just functional and convenient, but also durable. Thousands of companies around the world develop long-lasting appliances that are easy to use and easy to maintain.
For example, to replace two-valve cranes, adjust the comfort temperature in which it is problematic, came single-lever models, easily opened with even one hand. In this article we will tell you what the device is and how the ball mixer for the bathroom is repaired by yourself.
Design
Mixer for a single-arm bathtub is structurally different from a two-valve bath. It has only one lever-lever, by means of which the temperature and power of the water pressure in the crane are regulated. This type of mixer is also known as "one-armed bandit", ball, hinged, joystick. It performs three main functions: mixing the optimum temperature water, forming the jet and changing its power. The mechanism of its action is quite simple:

Note that the single-lever mixer consists of the following components: a rotary handle, a faucet cover, a spout with a mixer body, an inner chamber or a cartridge, and several gaskets and seals.
Kinds
Inside the mixer, as can be seen even from the name of this plumbing device, mixing of cold and hot water occurs in order to obtain a stream of optimum temperature. This process is carried out using a ceramic cartridge or a ball mechanism. By the arrangement of the inner chamber of the mixer, there are two types of instruments:
Important! Despite differences in the internal device, the models with the ball mechanism and the ceramic cartridge look and function approximately the same. However, there are also differences: the cartridge is better protected from the accumulation of calcareous deposits, and the "ball" is resistant to impurities contained in tap water.
Advantages and disadvantages
Many homeowners pay attention to single-lever mixer, because its device and repair, as well as installation are simple, but at the same time very effective and functional. These more modern instruments differ from the two-ventilators not only with a more aesthetic appearance. They are also very convenient to use, they allow you to more accurately and quickly adjust the water temperature, reduce its consumption. But they also have disadvantages:
Remember! To increase the service life of the single-lever mixer, it is possible to improve the quality of tap water by installing a special filter, and also to make timely preventive maintenance of the device.
Problems in operation
Even high-quality plumbing fixtures fail over time. The service life of the mixer depends on the material from which it is made, the quality of tap water and the intensity of use. The most common problems encountered in the operation of single-lever models are:
Important! Whatever the high quality of the mixer, it needs preventative maintenance. Even if there are no problems during operation, it is necessary to disassemble the device once every 2 years, to clean it, and also to replace the gaskets. Indeed, even a small mote that has fallen under the sealant can cause leakage.
Repairs
Many home-based craftsmen are interested in how to repair a single-lever ball-type mixer if it becomes poorly run. Experienced plumbers claim: if the device has become unusable, it can only completely replace the cartridge or clean it, and replace the gaskets. To do this, proceed as follows:
Take into account, each plumbing fixture has its lifespan, which depends on its quality and intensity of use. However, this period can be extended if the quality of tap water is improved with the help of a cleaning filter, as well as regular preventive maintenance of the device. For a single-lever mixer, maintenance consists of periodic disassembly and cleaning, as well as the timely replacement of rubber seals.
Video instruction
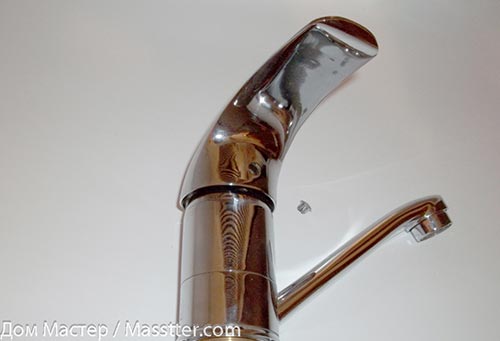
The tap is running! This is probably the most common expression in the repair of sanitary ware. In this article, we will discuss how to fix a single-lever or, as it is called, a flask mixer.
Got a lot of distribution because of the ease of use, and most likely, you use it they are in the bathroom and in the kitchen.
The main control element of such a mixer is the cartridge, and if water flows from under the lever of your tap, then it's time to change this element. It does not present any difficulty, it is enough to know the order of work.
Let's get started!
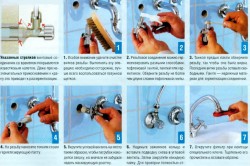
Repair mixer in photo examples
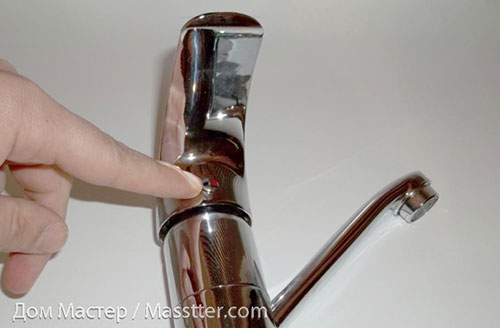
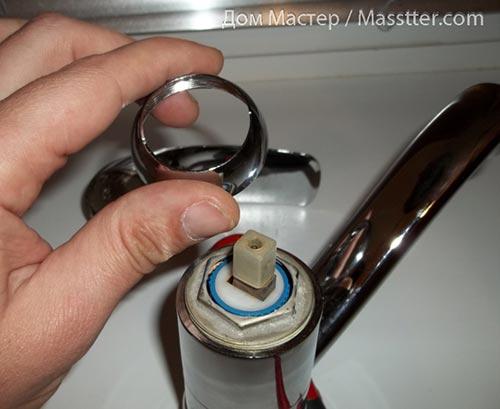
First of all, you need to remove the decorative cap - the plug, which with the help of colored marks indicates the position of the lever for the supply of cold and hot water
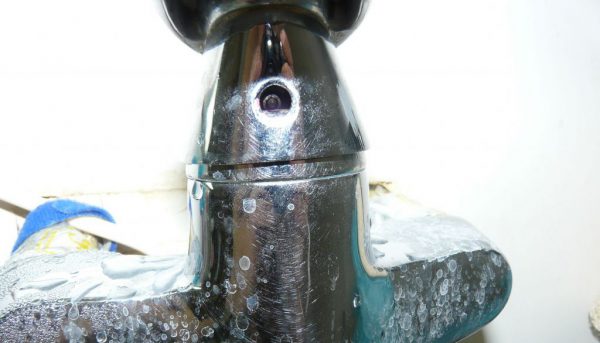
The opened opening opens access to the fixing screw, which fixes the cartridge and the lever
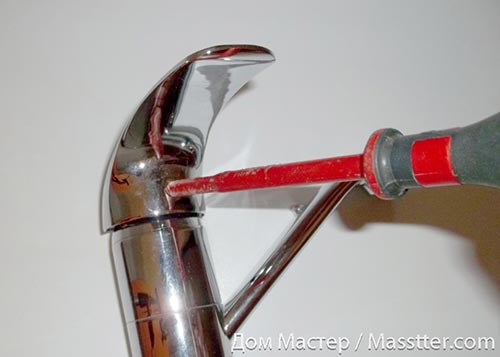
Using a screwdriver (usually minus, but not always), unscrew the screw and remove the lever
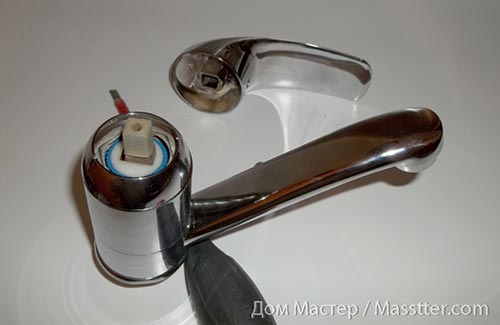
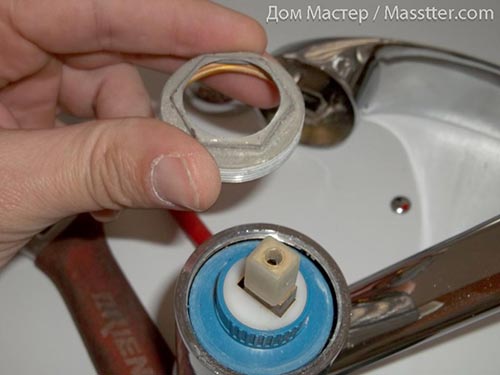
Then unscrew and remove the decorative cover, which is attached to the external thread of the circular nut
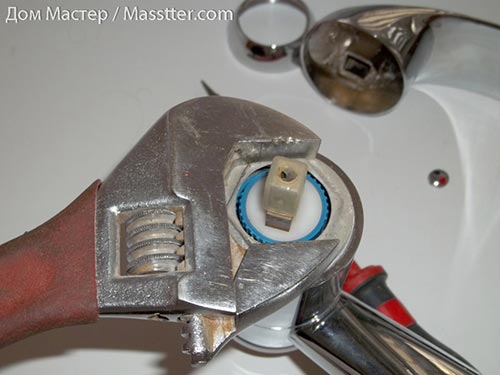
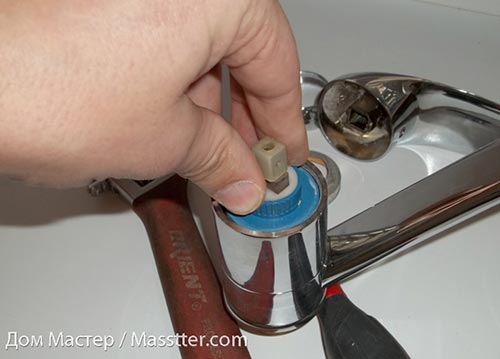
Using a key, unscrew and remove the circular nut
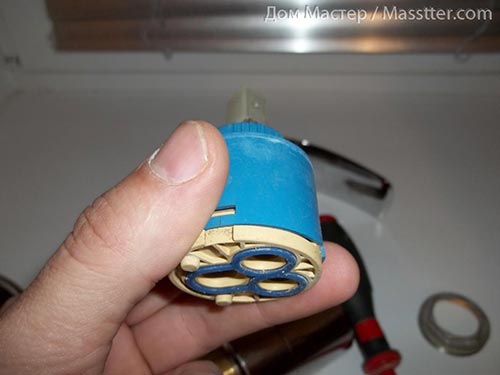
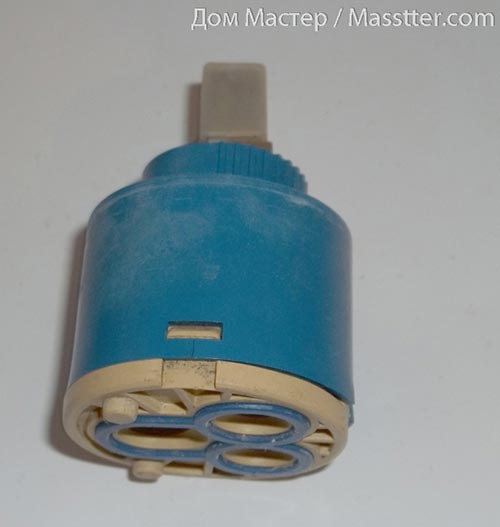
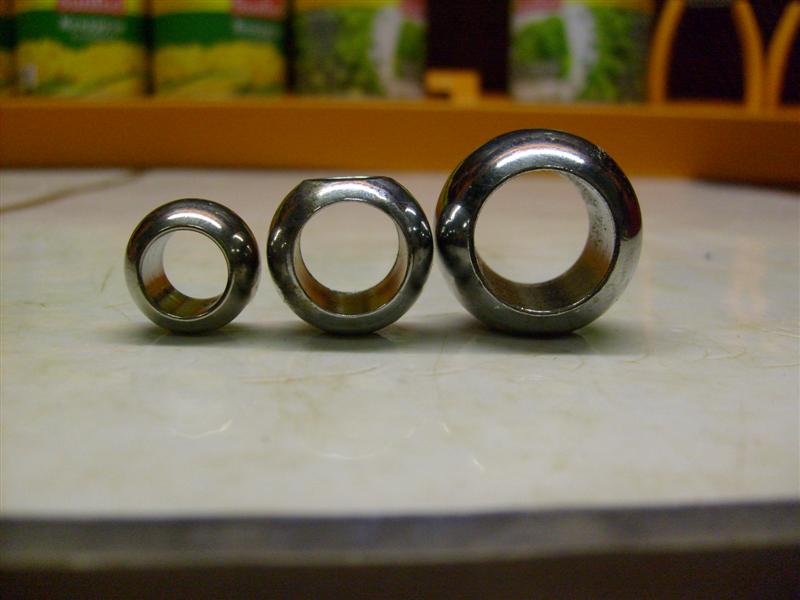
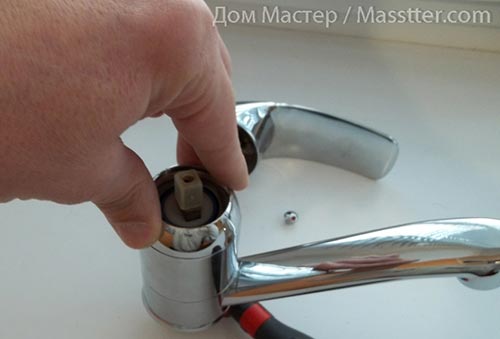
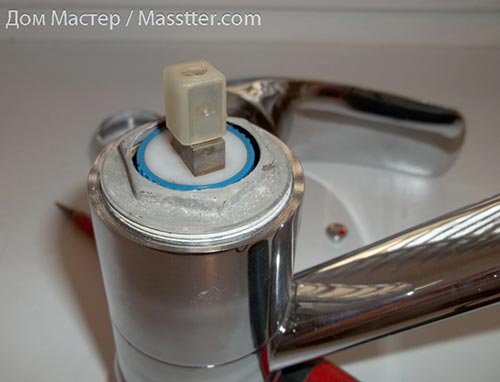
We take out the damaged cartridge and change it to a new one of the same size (the common diameter is 35 mm and 40 mm)
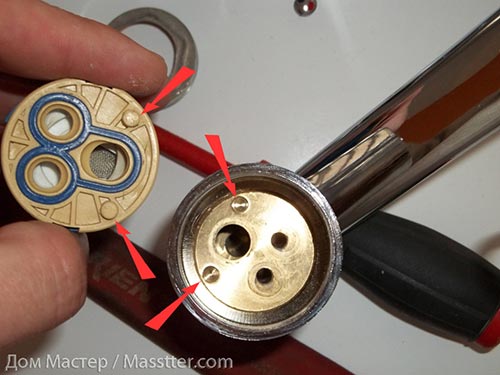
The cartridge has two conical protrusions, which play the role of guides, they must coincide with the place of their landing in the body of the mixer.
Reassemble the mixer in the reverse order. If the case is not damaged by corrosion (happens) and has no mechanical damage, the cause of the leak is eliminated!
Leverage and have a similar structure, so leaking from under the lever is repaired equally, replacing the cartridge.