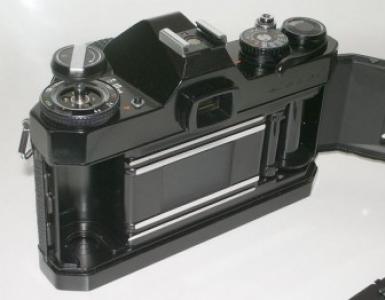
Mixer on the side of the bathtub how to install. Necessary tools and materials. Step-by-step installation instructions
Bathrooms are equipped with modern fixtures, look stylish and modern. At the same time, every detail enhances the functionality of the bathroom, ensuring maximum comfort for its intensive use. It is necessary to include such important details as a mixer mounted on the side of the bathtub, which differs from the usual mixing devices not only in appearance, but also in the structure, as well as in the way of connection to the water supply system of the facility.
By installing a cascade mixer on the side of the bath, you get the opportunity to arrange a real waterfall, controlling the falling flow with a joystick, touch pad or a half-turn lever. Attracts in the mixers of this type and the method of attaching the shower head, in which its hose is under the bathroom.
If necessary, the watering can is pulled out, and then after use it returns to its original position. This allows you to minimize the number of communications that are visible, thus increasing the ergonomics of the limited space of the bathroom.
Mixers, fixed on the side of the bathroom, differ from the wall models in a modular design. Manufacturers produce monoblock type mortise mixers, but they are inferior to modular products in terms of beauty, design and functionality.
The leading role in the construction of the mortise mixer is assigned to the water flow control unit, called a crane. This unit has a separate housing with several (usually three) outlets, two of which are connected with cold and hot water.
To the third outlet, supplying mixed warm water, connect a spout device located near the tap or at some distance from it.
The location of the mixer modules is selected by the user independently, based on the design project and personal experience.
The shower head is also located separately from other devices, but is connected to the spout housing. With the help of a special lever provided on the body of the spout (spout or cascade), water is redirected to the shower head. In this case, the hose is pulled out from under the side of the bathroom, where it then safely returns after use.
Having finished taking a shower, a person does not have to manually turn off the watering can, since the mixer will react to the end of the water procedures.
On sale there are models of mixers embedded in the side of the tank, in which the spout and the shower head are combined (as they say "two in one"). However, in practice, these structures have not received adequate support, so it is better to buy modular faucets.

Mixers, built in the side of the bath, are arranged so that they are convenient to use during the reception of water procedures
The mixers are made of durable brass with chromium-nickel coating, which gives the product an attractive appearance, a mirror gloss, and also protects the device from corrosion. Guarantee on quality models can reach five years. For fastening to pipes, so-called eccentrics are used, having a standard half-inch thread.
Models of well-known brands are able to withstand the most powerful hydraulic attacks, reaching a force of pressure up to 9 bar. Modern mixers are equipped with wear-resistant ceramic cartridges, the life of which is half a million cycles.
What to look for when buying a mortise mixer?
Just wanted to say the bitter truth - a good mixer can not be cheap. Quality is worth the money, so be prepared to spend money on purchasing wear-resistant equipment that can withstand heavy workload. Saving here is useless. Among other things:
- Choose a mixer based on the design of your bathroom. The equipment should be combined with the interior of the room, as well as be convenient to use.
- The weight of the quality mixer is considerable. Weightless products are made of a dubious alloy, which is not able to cope with the functional loads.
- Advanced models of mixing devices produce minimal noise even with a strong water jet.
- The presence of an integrated temperature limiter in some mixers avoids the possibility of burns of the skin.
- The function of the thermal control ensures the supply of water of a certain temperature. This is especially true for families with children.

And some modern models of mixers can reduce water consumption, which will have a positive effect on the amount for utilities in receipts sent monthly by the management companies
Than such a mixer is better than others?
To the pluses, all users who installed similar equipment in their bathrooms, include:
- faster filling of the bath with water;
- no splashing;
- fashionable design;
- ease of operation;
- masking the shower hose under the side of the bath.
The minuses include the difficulty of replacing the shower hose and other mixer parts. Alleviate this shortcoming is possible through the acquisition of quality products produced by the famous brands in the sanitary ware market.

A cascading faucet with illumination will decorate the interior and allow you to enjoy a broad jet of water falling into the bath
Technology of installation works
At first glance it may seem that the installation of this mixing device is very complicated. In fact, the technology of installing the mixer on the side of the bath is not particularly intricate. All operations can be done in a couple of hours, provided that a person has experience in conducting plumbing work.
The beginner, of course, like in any case, will have to spend more time studying the instructions that come with each mixer in the kit. Moreover, the master does not have the right to make a mistake, since all connections are in hard-to-reach place and the probability of replacing them should be minimized.
Therefore, experienced plumbers give preference only to high-quality spare parts and auxiliary materials produced by trusted companies.

The use of flip-up screens will provide not only free access to communications, but also will allow to organize places of storage of various trifles
Stage # 1 - preparation of tools and consumables
The following tools will be required to mount the mortise mixer on the side of the bath:
- an electric drill equipped with a special nozzle - a crown cutter, which makes holes in the bathroom of the desired diameter;
- adjustable wrench;
- screwdriver.
Also need to stock up flexible hoses of different lengths and fasteners. Some masters replace flexible hoses with pipes to extend the life of the connected plumbing equipment.
Part of the tools may not be required if you buy a bathtub with holes in the beads intended for mounting the mixers in question. At the same time, the amount of work and time of its implementation will be significantly reduced.
Step # 2 - drill holes
Use the advice given above, it is not always possible, because there may not be a bath of suitable size for sale, or the holes made by the manufacturer in the ledge will be located not in the place that the consumer needs. Therefore, we will analyze the stages of mounting the mixer on the side of the usual bath (acrylic, steel and even cast iron), which are carried out according to the same scheme.
- prepare the bath for the drilling process by selecting suitable locations for installing all mixer modules;
- when choosing a location, remember that it should be easily accessible not only for the primary connection to the hot and cold water supply system, but also for repair and replacement of parts that have failed;
- make a clear marking on the side of the bath;
- fix the nozzle, which has the form of a crown cutter, to the electric drill, and drill with it the holes of the selected diameter;
- clean the edge of the hole, finally fitting it to the desired diameter, armed with a file or other suitable tool for this purpose;
- before inserting the mixer into the prepared hole, do not forget to put a special gasket under it, which, as a rule, comes complete with a sanitary ware;
- fix the mortise mixer on the side, screwing under the bathroom special clamping nuts.
If you are installing a single-lever design, then at the bottom, screw at first a special stud, which secure the steel half-cup, and then tighten the nut. At the same time firmly press the mixer to the plane of the side of the bath through the half-washer.

A nozzle for an electric drill, which allows you to make a neat round hole in the side of the bathtub under the mixer
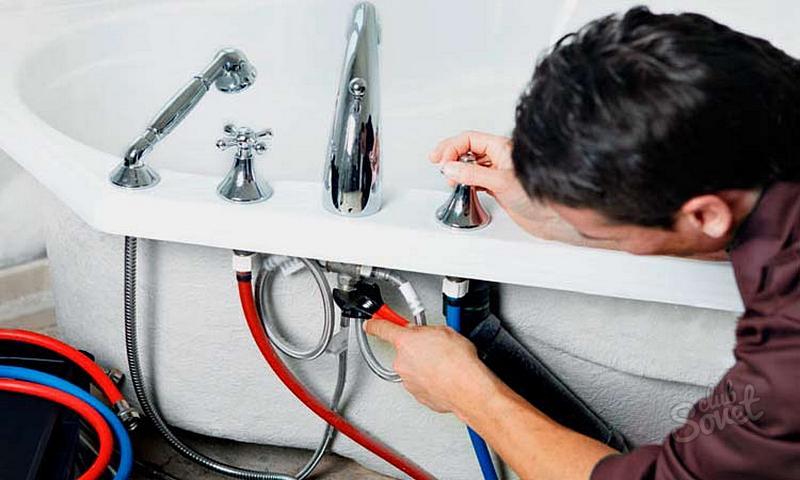
Step # 3 - connect flexible hoses
Flexible hoses allow connecting the mixer to the outputs of the hot and cold water supply systems. To do this, you need adapters, threaded on which is wound with a small tension FSM tape, which provides a tight connection of the elements.
In order to screw the adapter into the thread of the output of the DHW system or the HPC, the FUM tape is not wrapped, it must be screwed in a counter-clockwise direction. The thickness of the wrapping tape should be such that the thread of the part is hardly probed.
Having cut off the FUM tape, the adapter is screwed clockwise into the outlet until it stops, using a suitable diameter head for this purpose. The FSM tape can be replaced with special rubber gaskets supplied by the manufacturer along with the main product.
Connection to the adapters is performed last, when all hoses are already connected to the modules of the mortise mixer (retractable watering can, single-lever water supply control, cascade spout). Performing these connections, they follow the instructions supplied by the manufacturer to the mixer installed on the side of the bath with a shower and a cascade spout.

The scheme of connection by flexible hoses of different modules of the mixer, cut into the side of the bath, indicating the linear dimensions of the parts
Stage # 4 - final installation of the bathtub
After connecting flexible tapping hoses to the faucet faucet, connect the discharge branch pipe to the sewage system. Then put the bath in its place, closing the empty space under the product with a false panel.
In this artificial structure, there is a large inspection hatch, through which the mixing device will be arranged.
This video shows in detail the process of installing a built-in mixer in the side of the bath. A wizard who performs not the first time, such operations clearly explains the step-by-step installation of equipment.
Do I need the mounting plates and brackets?
Manufacturers of mixers and accessories built into the side of the tank offer consumers special mounting panels and laths, which are designed to strengthen the drilled design of the side of the bath.
According to some masters, the holes made in the side of the bath adversely affect the rigidity of the material (acrylic). Therefore, for its amplification, it is suggested to use additional panels.

Mixer with a shower head and two faucets, fixed on a decorative strip, which promotes uniform pressure distribution on the side
The question of installing the reinforcing bar in each case is decided individually. In practice, experienced master plumbers prefer to do without installing such additional panels. They do not want to bother with these details, as they, as a rule, need to be filed and cut, adjusting to the size and shape of the bath.
If the rim has a rounded shape, then making such a fit is almost impossible.
Should I take up the work myself?
Replacement of faucets is carried out at the stage of repair of the bathroom or beautification of the purchased apartment. It is not very easy to do such a job qualitatively. Having understood the intricacies of technology, you can repeat all the steps in practice. To do this, turn off the water by closing the hot and cold water.
If you do not do this, you will arrange a flood in the apartment. Next, dismantle the old equipment, redecorate the premises, transfer communications, if required by design. Then you can start installation work on installation and connection of a bath to water supply and sewerage systems.
To make everything with your own hands, of course, you can. However, some skill in the case, most likely, will be required. After all, the equipment is connected in a remote location. Remember that all pipe junctions must be tightened securely with hose clamps (nuts). Do a test run to avoid the possibility of leakage.
If there is such a problem, tighten the connection key, replace the gaskets, wind the FSM tape or use silicone sealant
If you are afraid of doing something wrong, then it's better to seek help from professionals.
To new faucet long pleased you with his beautiful appearance, do not forget to look after the body of each individual module. In time, wiping the shiny cover of the mixer with a soft cloth using soapy water or neutral detergents, borrowed in the kitchen, you will retain an attractive appearance of installed equipment.
Despite the successful development of modern housing construction, a modern bathroom and a small bathroom remain a disappointment for many apartment owners. Where almost everyone on the account square meter, some of the problems can be solved by installing a mixer on the side of the acrylic bath. Such a novelty has a huge number of advantages, although its drawbacks are present.
Advantages of this mixer
First of all, this is an opportunity to save space - not the only advantage of such a device. The mixer model, which is installed above the bowl of the bath, fills it almost without splashing, which can leave stains on the walls and other elements of the interior. As a result, cleaning will require much less effort.
Those models that are mounted directly on the board, as a rule, are characterized by high performance. Therefore, the bathroom fills up faster, and the level of comfort increases markedly. Mediocrely this solution allows to save a little: if the bath quickly fills up, the water in it simply does not have time to cool down and accordingly the heating costs will be significantly reduced.
These mixers are distinguished by a wide variety of functions and stylish design. For example, you can select a model whose elements are installed separately. The control panel is placed directly on the headboard so that it is at hand, the shower head in the corner, pouring out - in the center of the long edge, etc.
Also mixers of this type look more than stylish, they provide an opportunity to decorate the bathroom interior. A shower bowl is installed directly on the side, and its step is hidden between the rim and the wall or behind the falsh panel. Interior design from this solution only wins. Another feature is the low noise level during mixer operation.
Let's list some disadvantages
Despite all the advantages that have already been repeatedly advertised, before buying a mixer for the rim it is worthwhile to think about many problems, especially if the owner plans to install it by hand. We do not recommend buying an inexpensive model, because due to operational features such plumbing devices are subject to high loads. Very soon a substandard mixer will have to be replaced.
The most problematic element of this mixer is the shower hose. Most of the time the hose is curled, so it can deform. Shortly there are cracks on it, it flows and requires replacement. Unfortunately, even high-quality and expensive mixers are not immune from hose problems.
I'll have to accept the fact that the hose will have to be changed from time to time. Attentive buyers will immediately choose a spare hose to make this simple repair immediately when it becomes necessary. In this regard, particularly vulnerable mixer models, in which the spout is also used as a shower head.
Masters who do not have much experience in plumbing work should remember that with their own hands it will be easiest to install a mixer on the side of the acrylic bath. Working with a product made of steel or cast iron is likely to damage the enamel, which will provoke corrosion. As a result, the bath must be completely replaced or repaired.
It is better for a beginner to entrust such work to a professional. An alternative way to solve the problem will be to purchase a bath already with a ready-made hole, intended for installation of the mixer. Usually with this option, acrylic baths are sold. Of course, when choosing a mixer, one must take into account the dimensions of such a hole.
Mortise mixer design
Most often for installation of the mixer on the side of the bathtub manufacturers offer modular models, although the option is offered in the form of a monoblock. Before proceeding with installation, it is worthwhile to carefully study the design of the mixer and the manufacturer's recommendations for its installation and subsequent operation.
Usually monoblock models are delivered ready-made, but modular devices include several elements. First of all, this faucet is the central part of the sanitary equipment, on the case of which there are three outputs:
- for cold water;
- for hot water;
- for spout.
Separately, you need to allocate space for connecting the shower head. These inputs have standard sizes, so the buyer can decide independently where the shower head and spout will be located. The connection to the pipes of cold and hot water is made with half-inch eccentrics.
Quality mortise mixers from popular brands have the ability to withstand severe water hammering. In other models, a separate shower head is controlled by a lever that is located on the spout housing. This design automatically switches the water from the shower to the spout, when the watering can again be put back in place.
How to install the mixer on the side of the acrylic bath? The main stages of work
To perform the installation of the mortise mixer, you need to implement a number of measures. Here is their sequence:
- Mark the mounting location of the mixer.
- Drill a hole of the required dimensions.
- Install the mixer.
- Its position can be fixed with the help of special fasteners.

- If necessary, you can install the remaining components of the modular system.
- Secure hoses for cold and hot water.
In words, information on how to mount the mixer on the side of the bathtub looks very simple, but in practice it often happens in a different way. There are many important points and nuances that you should pay attention to even before installation and may even before buying a mixer.
Preparing for the installation of the mortise mixer requires three steps:
- buy a suitable mixer model;

- prepare all necessary materials and tools;
- choose a suitable place for installation.
Of course, models of mixers of this type can be very different. And yet there is a mass general requirements, which are worth considering. Do not buy a suspiciously cheap mixer. A low-quality model will have to be replaced very soon. It is better to overpay a few, but do not remember the proverb about miser, which pays twice. It is worth giving preference to a mixer from a well-known brand.
It is not superfluous to have recommendations for installation, product passport, and, of course, warranty obligations, which are certified by a seal and a signature. If there is no desire and need to save, it is better to choose a mixer with high-quality execution and simple design. Exactly the same principle should be followed when choosing the consumables: let them be somewhat more expensive, but more reliable.
The following tools and materials will be required:
- electric drill, household or professional;
- special drill bit (crown cutter);
- fasteners;
- screwdriver;
- adjustable wrench;
- flexible hoses for hot and cold water supply.
Usually the fasteners are sold complete with a mixer, but it does not happen in all cases. The diameter of the nozzle should correspond to the dimensions of the device. You can do without a cutter and a drill if you buy a bath in which the hole was made in the factory. Replace flexible hoses can be water pipes made of PVC. Their installation will be more complicated, but such designs last longer than flexible wiring.
Typically, the mixer is mounted in the middle of the bead, at the corner or at the end. When choosing a place, do not forget that part of the communications, including the shower hose, must necessarily be hidden. To do this, provide space. In some cases, you have to mount a false panel, which allows you to hide all communications. Everything depends on the situation.
Another important point is the provision of free access to communications. Mortise hidden communications periodically need to be serviced, replaced, and repaired. Therefore, it is necessary not only to find a spacious place, but also to make it so that communication can really be reached.
For example, if you use a false panel, it should be made removable. You can provide access through a removable decorative screen, which closes the entire bath.
Mixing stages
First on the side is worth markup. To do this, you can use a special marker or some writing tools that will leave a visible mark and which in the end will not be difficult to erase. Then you can start the drilling process itself. An electric drill is put on a crown mill and drilling is done by marking.
Once the hole is ready, you need to perform the processing of its edge, cleaning it with a file, sandpaper or other device. This will not only make the edge smooth, but also allow better adjust its diameter.
The plumbing device is put into the hole by means of a special gasket located between the device and the side of the bath. The gasket serves as a seal and shock absorber. If such an element does not go along with the mixer, it should be purchased separately.
Then this mixer is fixed with a special fastener. This can be a special stud or clamping nut in combination with a nut and a clamping hem. Everything depends on the device of a certain model.
Further, separate elements of the mixer are installed: a shower bowl, spout spout, controls, etc. The manufacturer's manual describes the details for specific models. When the mixer is installed, it is just to bring cold and hot water.
Typically, flexible hoses threaded connection. When mounting to the thread, it is necessary to reel a special sealant, FUM tape or linen thread. Do not apply too much sealant, as this may damage the thread.
However, too little of the seal can not provide a normal level of sealing of the joint. Calculate the optimum layer of the sealant can be as follows: if the relief of the thread is hardly probed through the seal, it is necessary to stop winding.
Normal situation will be when, after screwing, the sealant protrudes somewhat from under the nut. To ensure that it is easily and correctly unwound during installation, it must be wound counter-clockwise. In some cases, special gaskets are used instead of the FSM tape. Such elements will have to be replaced from time to time so that the connection does not leak.
Some useful recommendations
The best time to mount the mixer on an acrylic bathroom is the period of installation and repair of a new bath. Installation of the device is made before installing a decorative screen and connecting the bath to the sewer. If you decide to replace a simple wall-mounted mixer with a mortise model, you will have to perform some finishing work after dismantling and installing an old mixer.
It may be necessary to install and dismantle the entire bath again. With such expenses of forces, time and money it is necessary to be considered. If you need to install a non-removable version of the decorative screen, it can be equipped with a manhole to ensure easy access to communications.
When installing the mortise mixer on the side of the acrylic bath, the manufacturers advise to use a special bar. In fact, acrylic is not as durable as steel or cast iron. According to manufacturers, the presence of a hole in the ledge significantly weakens competition. Panels and bars act in order to prevent deformation or strengthen the rim.
Masters do not attach importance to this in practice and do without planks. This element is often cut and adjusted to the shape and size of the rim. Usually the rim has a rounded shape, which significantly complicates this fit. To long not to bother with such a problem and not waste time, craftsmen disregard the advice of the manufacturer.
Fortunately, information about the collapsed mixer, installed without a bar, has not yet been received. And yet it is worth remembering about this danger and assessing the cost-risk ratio for installing a special reinforcing bar. In the event that its shape completely coincides with the shape of the rim, it makes sense to perform the reinforcement of the structure.
Features of drilling on enamel
Specialists do not advise newcomers to make a hole in the edge of a steel or cast iron bath by themselves. This problem is provoked by the presence of enamel, which performs not only decorative, but also protective functions. In the case of incorrect drilling, there is a high probability of irreversible damage to this layer. But anyway, there is a technique for doing such drills at home, and an experienced master will easily cope with it.

In addition to ordinary instruments like roulette, a marker, a drill and a screwdriver, you will need a drill bit, which is designed for drilling ceramics and glass, as well as a piece of plasticine and transparent tape. After completing the note, the place of drilling should be carefully sealed with adhesive tape.
Next from the piece of plasticine you need to make a round border, which is glued along the circles so that the place for drilling is in the center. The area bounded by the plasticine edge must be 3 times the parameters of the hole for the mixer. As a result, we get an even round area with a side. It is necessary to pour water into it.
Then you can start drilling in the center of the markup. It is necessary to use a drill with a diameter of 6 mm at a speed of approximately 500-600 revolutions. The pressure must necessarily be moderate. During such a careful drilling, a narrow hole will appear in the side, through which the water present at the drilling site will simply flow out.
Now, from plasticine, you need to make a small cap and stick it to the bottom of the edge so that the hole is centered. Again, pour water and re-drill using a 12 mm drill. The pressure must necessarily be weak. As soon as the drill passes the edge, you can remove all plasticine and evaluate the quality of the work, while the chips on the enamel must necessarily be insignificant.
Then it is necessary to widen the hole to small dimensions to install the mixer on the side of the acrylic bath. For this, a new marking is made, indicating the boundary of the hole. Then the surface should again be sealed with a transparent tape. Expand the holes with a special grinding machine, using a rubber nozzle along with the abrasive cloth. Turns should be put on a maximum, but make a minimum effort.
Once the hole has been extended to the optimum level, a nozzle with a diameter of 20 mm can be used. You should understand that with minimal effort, which will protect the enamel from damage, the work will not be very fast. It will take more than an hour to work with the grinder. When you make a hole, a sealing ring is inserted into it and the installation is done in the usual way.
There are other ways to drill enameled surfaces. Many masters glue a metal plate directly to the enamel and drill through this "sandwich" through and through. This material protects the enamel from damage. Before drilling, others carefully remove part of the enamel with a grinding machine, and then perform drilling with a crown cutter.
There are other ways to carefully drill the enameled surfaces. Many masters simply glue the metal plate to the enamel and drill through everything. The metal protects the enamel from damage. Others before drilling carefully remove a part of the enamel by means of a grinding machine, after which they make drilling with the help of a crown cutter.
A method of drilling cast iron with a diamond cutter using a wood conductor can be used. However, in this case, the milling cutter must be cooled frequently enough, watering it with water.
How to install a mixer on the side of an acrylic bath: video
Here you will see the procedure for mounting the mixer on the side of the acrylic bath:
As you can see, the installation of the mortise mixer can be done with your own hands. When doing such work, you need to act carefully and carefully. With the installation of such plumbing on board the acrylic bath is able to cope even a beginner.
- an absolute novelty in the sanitary engineering of premises of this type. Just recently, this kind of design was purchased separately for each functional - under the sink, bath and under the shower. Mounting was carried out to the wall of the room and not always allowed to divide the bath effectively into convenient zones.
The mixer on the side of the bathroom perfectly solved the difficult task of zoning a small area of the room for water procedures - with its appearance in the range of sanitary ware shops, the possibility of rational exploitation of each zone increased many times.
Let's talk in detail about what this design is, what kinds of it exist, what features of the installation it provides.
What is this mixer for?
The mixer on the side of the bath performs not only the design function for decorating the entourage of the room. This product creates a powerful and precisely directed water flow, which allows filling even a volumetric bath not only quickly, but also very carefully - without unnecessary splashes and unnecessary moisture on the walls and floor.
Note: In addition, it will help to hide a long and ugly shower hose, especially important for minimalist design.
Pros and cons of construction
The on-board bath mixer has several advantages over conventional cranes. We list the main:
- We have already said that the location of the taps in the bathroom is of particular importance for the spatial question of the room: it is the airborne design that allows the maximum rational use of the entire bathroom space and does not clutter the precious meters with shower hoses, massive attachments. In addition, when using this model, you do not need to mount two mixers in the bathroom - for the shower and for the set - they will be fully compatible in one design;
- The bathroom faucet on the ledge is especially convenient for large baths, which are at the peak of popularity in modern design of bathing facilities;
- A faucet at the corner of the bathtub or at its center allows you to avoid a large amount of splashing during the recruitment of water. Excess moisture is harmful in any room - things get dirty from the water, floor and ceiling coverings are damaged, the door panel structure suffers. Using an airborne mixer will avoid such harmful effects and keep your bathroom in pristine beauty and purity.
You should know: However, this design has a minus, especially for models with a shower head and a hose: the hose itself will be subjected to a greater load with this type of installation and, as a consequence, wear out more quickly. In view of this fact, it is worth considering the installation option of the following type: to strengthen the separate bathroom faucet with the set function and the shower model for the corresponding procedure.
Varieties of side cranes and their brief characteristics

The mixer on the edge of the bathtub is not of the same design. In plumbing shops you can find a wide variety of models. What is the peculiarity of each species - let's try to figure it out together.
- The two-valve crane on the side of the bath is made up of two separate crane-boxes, united in one design with the help of special fastening technology. It is the crane-axle boxes that will be responsible for all the useful functions of the product: regulation of the water head and water temperature. Two-vented bathroom faucets have a fairly low market value, but their direct operation can become a waybill - often you have to change the cushioning material in crane-boxes.
- The mixer with the attachment to the bath of the single-lever design is a model consisting of one lever and special polymer spheres fixed to each other. Polymer spheres carry out the dosage of the water flow, for this it will be necessary to move the lever in the up and down directions. By turning the lever to the right or left, the optimal water temperature is selected. type - the design is quite reliable, but in time may require replacing the cartridges through which the movement of water.
- The tap in the middle of the bath can be thermostatic. The device of the product in this case will consist in the following: the base of the crane constitutes a special element responsible for the mixing of water. Control over the work of the element is carried by a bimetallic cartridge, which will expand or contract, depending on the temperature of the water flow, and the process of including one or the other temperature conditions passes by moving the crane lever along the graduated scale.
The tap in the middle of the bathroom can be graded and the type of water flow - in this case, experts distinguish composites, showers and cascade mixers.
With dial-up mixers, the easiest way: based on the name, you can already understand that the design is designed to recruit water in the very capacity of the bathroom. But here about the cascading and shower products of the side mounting it is worth to tell separately.
The shower mixer on the side of the bath (example on the photo) or at its center differs from the conventional model of this type in that its hose due to the mortise type of fastening will be safely hidden under the bathtub itself, and only one watering can remain on the outside. In use, the design is very simple: when you are about to take a shower, pull the watering can out of the groove gently and then pull out the hose. After completing the procedures, the hose can be returned to its original location.

This model of shower mixers is very convenient in small bathrooms - you do not have to take a place on the wall for a conventional hose and watering can, their usual location can be strengthened by a beautiful mirror or original shelves for cleaning supplies.
However, one should also take into account the fact that the hose in such a construction will wear out many times faster - in fact each time during the procedure it has to be completely dragged through the grooves and then laid back. Constant excesses and bends of a hose - here the most frequent reason of breakage of a shower mixer on a bathroom side.
The newest and most fashionable model of onboard type mixers is cascade cranes. They have an incredible aesthetic appeal - because the flow of water from them most like a miniature waterfall. Strengthen the visual effect is helped by various mounting options: a cascade valve can be installed and on board, and on the podium, and on a special shelf. According to the designers, the cascade flow of water in the premises, made in natural style and from natural materials: natural stone, wood, marble, looks especially original.
Cascade-type valves have some mounting features that distinguish them from other designs: most often cascade cranes are podium or built-in. When installing a mixer of such a plan, the power of the water flow must necessarily be taken into account, on the basis of which the sectioning is carried out. Simply put - the more powerful the water will flow from the tap, the larger the diameter should be the technological hole. In addition, special attention will have to be paid to the selection of fasteners and other consumables - in the case of waterfall mixers they should have maximum strength.
Important! Cascade faucets - not the best solution for those who want to save on utility bills - the water flow rate when installing such a mixer rises many times.
How to mount cranes on-board type?

How to attach the mixer to the bathroom, especially if it has an original side structure? Let's talk about the main features of the installation:
- Independently functional holes for the tapping of side mixers you can do only in the tank of a bathroom made of acrylic. The cast-iron bowl will have to be taken to professionals - the cutting of the holes in this case must take place at the factory;
- The mixer on the side of the bathroom can have different designs: be two-ventilated, single-lever or thermostatic , therefore before going to the direct installation it will be superfluous to learn about the features of the installation of a particular design. You can read relevant articles or view a thematic video;
- Installing the mixer on the bath will require a specific set of tools. You will need: a drill, a coronary milling cutter, a screwdriver, a swivel (gas) wrench, hoses for wiring, fasteners (washers and nuts);
- Mounting the mixer on the side of the bath starts by selecting the installation location and applying the appropriate marking;
- Then you need to drill a diameter hole with the help of a drill with a milling nozzle;
- Under the faucet, a waterproof cushioning material must be laid, which is necessarily part of the components to the model;
- The next stage of the work is the installation of the structure itself in the prepared hole;
- Now it is very important to fix the mixer in the middle of the bath, making it so that the structure becomes as stable as possible. If the crane you have chosen is single-lever, it is best to use a special pin for fastening. For fastening other models, washers and nuts fit;
- The crane is tightly attached to the side of the bowl;
- Connect special hoses for water intake - separately for hot and separate for cold water. Do not forget to use special spacers for shims;
In the end, a trial run of water is carried out, after which it is necessary to check the absence of leakage in the joints of the flexible hoses.
Many remember the relatively recent times when the queen of the bathroom was Her Majesty the Cast-iron Bath. A few other options, they say, were not quoted. But now more and more owners of apartments make their choice in favor of inexpensive, light and comfortable baths made of acrylic. In addition to the undeniable advantages, acrylic bathtubs give new, previously unknown ways of installing equipment, in particular, mixers. What kind of mixer mortise for acrylic bath will be better? How do they differ among themselves? What are the pros and cons of each mixer? how
What is a mortise mixer? Technical features
With the development of the construction industry, new finishing materials, tools, appliances and plumbing are appearing every year. If more recently there was a common installation of cast-iron or enamel baths, today light and reliable acrylics come to their place. Consequently, and all the usual combined faucets, which were used for both bath and washbasins, have become a relic of the past. And they replaced new separate built-in ones. Thanks to this, the process of connecting the communication has become easier, there is no need to mount pipes in the walls next to the bathroom.
Mortise, as the name implies, is built in (cut) into the side of the acrylic bath. The very design of the mixer thus looks much more compact and aesthetic, because all unsightly parts and communications are hidden from the user's eyes. Absolutely different appearance, extraordinary fastening of elements of a design and the modified water supply have won the deserved popularity of the consumer.
For information: More recently, more advanced options have appeared on the market, namely, cascade mixers, built into the side of the bath. They have improved ergonomics, better finish. The main task of these devices is soft (without sprinkling) and fast filling of the bath.
Cascade mixer, built-in, in the bathtub provides water with the effect resembling a waterfall. If desired, you can choose a model with a backlight, "tinting" a jet of water depending on the temperature. This solution in the design of the bathroom gives a certain zest to the overall interior of the room.
Although built-in faucets for the bathroom and meet all modern requirements, but incorrect and unprofessional installation and incorrect use significantly impair the performance. Therefore, the installation of sanitary ware and communications must be done by specialists who can give guarantees for their work.
Different variants of mortise mixers you can see in the photo.
The positive and negative qualities of the mortise mixers

Some of the positive qualities that mortise mixers have for acrylic bathtubs have been mentioned above, but there is another undeniable plus of the device.
To understand what kind of advantage is at stake, it is enough to imagine the ever hanging shower hose. So the mortise cock for the acrylic bath has a headset hidden in the bottom of the bathtub on the shower. That is, on the surface of the bathroom there is only a watering can. And in the case when you need to use the shower, it is enough to pull the watering can and the hose will fully extend. Then, after the procedures are completed, the hose again hides under the bath.
Among the shortcomings that have built-in faucets for the bathroom, we can distinguish ... what we have already talked about as an advantage. Excessive bending of the hidden hose adversely affects the service life. If you compare a conventional and mortise mixer for an acrylic bathroom, the shower hose in a simple faucet serves several years with intensive use (1-5 years). At the same time, in the service mixer, the service lines are reduced by half, or even more (from 1 to 2 years).
Also to this disadvantage is the lack of possibility to determine in advance the damage to the hose, because it is mostly damaged at the base (where it is screwed to the mixer). That is, the leak will only show up after the puddle appears under the bath.
For information: also available mortise cranes for a bathroom without a "spout" - spilled, his role is played by a shower head. But, as evidenced by the reviews, this is not the most successful option.
Procedure for installing the mortise mixer
 Setting the mixer
 If the installation of the faucets on the acrylic bath will be carried out independently, then for installation you will have to acquire such tools:
- screwdriver;
- a set of keys or a wrench;
- an electric drill with nozzles of milling cutters of different sizes.
In order for the installation process to be fast and of high quality, the following procedure should be followed:
- Before installing the acrylic bath on its board at the place of installation of the mixer, markings for future openings are made;
Important! When proceeding to the layout of the holes, it is necessary to take into account the location of the supplying water pipes (to minimize the length of the hose), the convenience of access to the valves, spout and shower head.
- An electric drill with a crown cutter of the correct size cut holes according to the marking;
Need to know! If it is not possible to cut the mixer into an acrylic bath, you can purchase it with the already prepared holes for the plumbing. Or learn about the possibility of drilling holes in the store.
- The mixer is mounted on an acrylic bath. The main thing - do not forget to put a special gasket under the tap (should be present in the kit with a mixer);
- The mixer is screwed with special nuts (one or more), and in the case of mounting a single-lever valve, a metal half-moon washer (or half-washer) is installed before tightening the nuts. Then all nuts are tightened, for which it is better to use a torque wrench;
- When the tapping of the mixer into the bath is made, the supply hoses are fastened to the tap with hot and cold water. As the material used rubber, plastic or plastic. The best option will still be rubber hoses in a flexible protective sleeve with union nuts, under which are installed silicone or biconitic gaskets.
Angle mixer for acrylic bath is installed in a similar way.
Alternative version of the tapping of the mixer into the wall

In another installation, the flush-mounted bathroom faucets are mounted on a wall on which a false panel is mounted on the surface, which will allow unhindered access to all the crane units.
For this procedure, the procedure is as follows:
- Before installing the mortise mixer for the bathroom in the wall, a false panel is mounted. The faucet panel mixer is also installed as on the side of the bath. In the free space below the panel will be hidden supply water pipes;
- On the concealed bath mixer, eccentric adapters or hoses with union nuts are installed, as well as water pipes directly to the attachment point;
- If the fastening is rigid, then the pipes are fixed to special brackets, and if the connection is flexible, a fastening using a dowel bar is used.
At the end of the work, all connections are pulled up, the water supply is turned on, and all joints are checked for dashes. In case of presence they are removed by means of braces, repackaging or replacement of gaskets.
Summarize
To insert the mixer into the acrylic bath was as good as possible, you need to adhere to the installation technology, choose reliable plumbing products (hoses, mixers, adapters, etc.). If there is no experience of installation, it is better to use the services of a professional.
Bathroom only then will be really highly functional, practical and beautiful, if in its arrangement the designer successfully arranged the interior items and took advantage of space saving techniques. One such technique is a mixer on the side of the bathtub, because this sanitary accessory can be used for both the shower and the bathroom, which saves space, especially if it is small.
Features
Mixers have appeared on the domestic market for a long time. However, only in recent years began to produce baths with a mixer on board. Before that, the faucets were installed on a wall, which caused a lot of difficulties. Unlike the already familiar wall model, the onboard mixer is fixed to the rim on the rim of the bathroom side. In this case, the body of the assembly is attached to the outside of the bowl, under its side and not exposed to the view of a person. And the control organ of the mixer is on top, which looks presentable.
The use of innovative technologies and more thoughtful ergonomics allowed manufacturers to produce functional and durable mortise products of various types. Their installation on the side of the bathroom today does not cause any special difficulties.
A quality mixer can carry several functions at once:
- main - provides a strong head and a steady flow of water to quickly fill the bathroom. This avoids the risk of splashing water. Models with an adapter can also supply water through a hose to the shower head;
- aesthetic - the bath with the mixer installed on the board looks very stylish and beautiful. The design of this interior element can be the starting point for the design of the entire space or its original accent. Modern manufacturers really especially carefully think out the external aesthetics of similar products, which allows them to decorate the bathrooms and give the space a note of non-standard.
Benefits
Mortise constructions are distinguished by a wide list of advantages in comparison with wall variants and a shower:
- structural strength, durability, reliability is ensured by the use in the process of creating such sanitary ware of high-quality materials;
- high functionality - such products allow you to quickly dial a full bath of water without splashing drops on the walls;
- laconic lines, original shapes and interesting design Modern models allow you to decorate the space, bringing in it an additional gloss;
- it is compact and does not take up much space if installed on the side of the bathroom;
- long life is ensured by static construction;
- easy operation and comfortable use;
- allows to solve the problem of masking the connecting hose between the mixer and the shower head, giving the design a high aesthetics.
It should be noted that the durability and many other performance characteristics will depend on how well the mixer is installed on the bathtub. Therefore, this process requires special attention from the person.

disadvantages
Customer testimonials indicate that the cascade or other mixer on the side of the bath has only one significant drawback. And it consists in the rapid wear of the shower hose. During the operation of the structure, the hose can be hidden behind the side of the bath and pulled out from there as needed. However, this ultimately affects the condition of this detail, and it quickly deteriorates. In a couple of years after the purchase, the hose will have to be replaced.
Also some minus of similar products name their high cost. However, this is still a controversial issue.
Types of mixers
The first designs of this kind were used exclusively as design innovative models. However, today manufacturers create a wide variety of mixers, the designs of which can be of three types:
| View | Specificity of construction |
| two-valve | consist of 2 separate crane-boxes, united in one product. These cranes are axleboxes and are responsible for regulating the water pressure and temperature conditions |
| single-lever | have one lever of special polymeric spheres, which are fixed together, are responsible for adjusting the pressure of water |
| faucet with thermostat | the variant with a thermostat has a special element that mixes the flows of water of different temperatures. Inside the product is a bimetallic cartridge, which is responsible for the operation of the base element. The crane is switched on and the temperature mode is selected by moving the lever. Can have an adapter for water supply to the shower hose |
Two-valve mixer
Single lever mixer
Mixer with thermostat
In addition, modern mixers are divided according to the type of water flow into such types:
- set-ups are intended for a set of water directly in the bathroom;
- shower models of mortise type;
- cascade allows you to create a real tiny waterfall in your bathroom.
Mortise
Such products have in their design a shower hose that hides over the side of the bathtub, an adapter for switching the water supply mode. If you need to use the shower hose you just need to pull out from behind the rim, at the rest of the time only the spout and the lever for adjusting the head of water remain prominent.
Mortice mixer
The installation of a mixer of this design is not particularly complicated.
Cascading
Such models can have a wide, flat spout, "flattening" the jet of water. As a result, the water drains from the side of the bathroom, like a mountain stream. At the same time, the throughput of such a product is very high, which allows for a few minutes to collect a full bath of water.
Cascade mixer
Such a mixer is easy to install because there is no need to fine-tune the eccentrics. In addition, in this case the method of attachment to the bath is very simple. And if you supplement the cascade mixer with the original backlight, then it will look especially impressive. That's why cascading models are so popular lately.
What tools are needed for the installation
To install the mixer on the side of the bath passed without much difficulty, you need to have in your arsenal the following types of tools:
- drill;
- milling nozzle;
- screwdriver;
- adjustable wrench;
- flexible hoses;
- fasteners.
Tools for mounting the mixer
The availability of these tools makes it possible to shorten the time for installation.
How to install
Mounting the mixer on the side of the bathroom allows you to get rid of the problem of the appearance of streaks on the tile and puddles on the floor. After all, from a low, wide product, water drains into the bowl quickly and without splashing.
At the initial stage of work it will be necessary to study the design of the purchased mixer. After all, different types of such accessories (for example, the option with a thermostat and a cascade mixer) have a certain specificity that must be taken into account during the installation process. Also note that the cascade accessory is installed on the acrylic, cast iron bathroom in several different ways.
Mounting the mortise mixer on the side of the bath
The entire installation of the board product with their own hands is broken down into such stages:
- preparatory stage - selecting a place for the installation of an accessory, the marking of future holes on the rim is performed. In the case of an acrylic bath, the perforation of the actual diameter should be carried out using a drill, a perforated drill. If you selected ceramic model, there will be problems with the implementation of this task. For this reason, 3-hole mortise mixers (or sometimes 4, where the last hole is used for an additional element) are bought only when the old bowl is planned to be dismantled. Instead, a new model is installed with pre-prepared perforations of the edging at the manufacturing plant. The step between the holes should be made not less than 11 cm, but small, than 22 cm;
- installation of a shower hose - it must be inserted into the far hole, which has the largest diameter. Before installing the shower module, a pipe is installed in the adjacent hole connecting this part of the mixer to the tap. The installation itself involves the installation of a threaded end into the mounting hole, the subsequent tightening of the module by a lock nut. The latter is screwed from the inside of the bead. Between the locknut and the outer washer of the module, it is necessary to lay o-rings of silicone, which prevent the leakage of water during the operation of the structure. If you need to install one lever mixer, then to the product from below, you need to screw a special pin. It will later be required to wear a steel half-cup through which the mixer is attracted to the surface of the bath;
The mixer with the connected hoses is placed in the holes
- the final stage - at the end of work by means of special hoses it is necessary to connect by own hands a new mixer to a waterpipe.
Connection of flexible hoses Mixer on board - view from the inside
With the hidden method of mounting the product with your own hands, you can arrange all its elements of the external part in an arbitrary sequence. However, for this purpose it will be necessary to prepare several holes instead of one.