How to install a kitchen faucet in a sink. How to repair a mixer in the kitchen: tips that will help in a difficult moment
Also there are ball mixers. Their device looks like this:
They also have a "torso," but inside they have a ball, which is actually responsible for regulating the water. Under the handle, which is fixed with a screw, is a metal cap that holds inside the entire valve mechanism. Also inside there is a figured washer, which serves as a regulator of the angle of rotation of the lever, and it fits snugly against the ball itself. The bottom is not much different from the previous mixer.
Types of attachment:
- Hairpins. Just twist the nuts from the studs, and lift the mixer up.
- Nut. You just need to unscrew this nut.
Many masters advise to remove the sink entirely, which will make it easier to work with the mixer, at the same time it will be possible to renew the sealant. If you still want to overhaul the mixer, it is worth buying a set of hoses in a flexible metal braid, only be sure to check the length. You can also try hard cabling from metal-plastic pipes. On the one hand, you will need to buy special adapters
But on the other hand, this method of liner will last very, very long.
Before starting any work, do not forget to block the cold and hot water, and open the tap to reduce pressure, and of course drain all liquids. If you disconnect the pipes, then take a bucket to drain the remaining water. Repair of the single-lever mixer is very neat.
What symptoms will tell you what the problem is in the mixer:
Step-by-step instruction for repair: how it is arranged and how to disassemble
If the same problem, but in a ball mixer, then you need to do this:
- Remove the handle of the mixer. This is not much different from a cartridge mixer.
- After his removal, we take out the cam with the puck. It can be cleaned immediately from any rubbish. Excess will not be.
- Next we take out the ball itself, and carefully examine it. To begin with, consider the upper washer, it should just be cleaned. If the ball itself looks worn, then only replacement will help. If the springs do not tighten the saddles to the valves, then it is necessary to replace both, and then. It's not very difficult. You attach them with a screwdriver and pull them out.
- Well, in general, that's all. Also, the problem may be in lime scale, or in the wear of mechanical components.
- A weak pressure? Padding may be pinched on the piping, poor permeability of pipes or hoses. It is also worth mentioning about the aerator, this is such a mesh on the end of the crane. If something is not good with the water flow, then it's worth removing this mesh, and cleaning it, it's done very simply, you can use a needle, or you can use a strong head of water. If anything, it can be changed, the price is small, so you can sometimes afford to replace them. However, if a similar situation occurs often, it makes you think about what makes sense if you put at least mechanical filters. This will greatly prolong the operation of the device and the life of the shell.
On the whole, repairing the mixer in the kitchen with your own hands is not such a difficult task. In principle, in order to sort through the entire sink, it will take you one day. But do not rush. Do everything you need as accurately and carefully. But the easy and clear device of this mixer corresponds to the ease of its repair.


Active operation of the kitchen mixer every day and the presence of impurities in the water over time lead to the fact that the device becomes leaking and the liquid starts to ooze out constantly. And this can happen either through a traditional outlet spout, or near its base. If you do not react in time, then the mixer will lose its outward appeal due to the superficial deposition of salts, yellow debris will start to appear on the sink, and the water meters will wind the excess speed.
For complex repairs, you can issue a call to a professional plumber. But the elimination of the most common breakdowns under the force and "plumber-amateur." To do this, do not need a professional expensive tool and super skills.
The sequence of technological operations necessary to repair the mixer depends on its model. At the moment, two types are actively used:
- Leverage.
- Two-valve.
![]()
The two-ventilated, in turn, are subdivided:
- with ceramic liners (half-turn, quarter-turn);
- with a rubber gasket.
Required tools and materials
In order to start repairing the kitchen faucet, it is enough to have the simplest set of metalwork tools suitable for use in different situations:
- a set of carabiner wrench wrenches (can be replaced by a drawbar with a gap width up to 19 mm);

- cross-shaped and flat screwdrivers (you need at least a couple of sizes);
- pliers;
- fum-tape (can be replaced with a patch);
- solidol.
Attention! Not the fact that all of the above tools are useful in a specific situation. It all depends on the design of the faulty mixer and on what kind of breakdown will have to face.
Elimination of leakage at the fixing point of the spout
If water begins to leak at the base of the spout (sometimes called the "gander"), the following are considered the most common reasons:
- loosened the clamping nut on the spout;
- the gasket was deformed.
The first breakdown is easy to eliminate - just use a wrench to tighten the nut at the base of the spout. Thanks to this procedure the gander will sit more firmly in its place and the joint will cease to flow.

If this did not help, then most likely, the gasket worn out. This happens when the gander in the mixer is actively turning the gander in different directions. To eliminate the leak, you need:

Attention! In some geese in the place of docking with the body of the mixer is a bushing with gaskets-rings. To replace it, you have to unscrew it with a hexagon socket wrench.
If water oozes from the outlet of the mixer - the problem is usually in its locking part.
Repair of the lever mixer
Lever models are distinguished by the design of the shut-off and mixing cartridge:
- ball;
- ceramic.
The cause of leakage in such models can be the ingress of sorines into the locking assembly. To solve the problem, you need to disassemble the mixer and clean the inner cavity of all sorts of debris. For both types of lever mixers, the disassembly procedure starts the same way:

- Remove the decorative cover from the fixing screw.
- A cruciform (less often a hexagonal) screwdriver to loosen the fixing screw and remove the lever-lever.
- Remove the decorative ring and remove the clamping nut.
But the cartridges themselves (ball and disk) are different in design. In the first case, the passage of water is locked with a ball with feeding and mixing grooves for water. In the second case, the channels are blocked by two well-ground ceramic perforated plates.
If cleaning the cartridge from debris did not help, you will have to change the entire block. Over time, it wears out and loses its tightness.

Repair of a two-ventilated mixer
In such models, the causes of leaks may be identical to the leverage - clogging and wear of the locking part. But in any case have to disassemble them. For this you need:
- Remove the linings at the ends of the flywheels (unscrewed or tapped with a screwdriver).
- Unscrew the fixing screws and remove the flywheels.
- Unscrew the crane-axle using the key of the correct size.
Now you can clean the saddle of the locking part from the debris, check it for mechanical defects. Rinse the ceramic plates or rubber gasket. If the result in eliminating the leak is zero, you will have to change the locking part.

The easiest way is to change the crane-axle completely. But you can do with "less blood". Rubber gasket is not difficult to change to a new one or even cut yourself. Ceramic plates can be bought as part of a finished repair kit.
These are the main causes of leaks in the kitchen faucet and how to eliminate them. Obviously, difficulties should not arise and everything can be done without attracting professionals.
Kitchen faucet repair by own hands: video
How to repair a mixer in the kitchen: photo

Single-lever faucets in recent years literally flooded the market of household plumbing. And this is not strange, since these devices, despite the simple internal organization, have a high level of reliability, and their repair costs a penny. Why are the lever mixers so common and how to repair such a device yourself?
In the modern sanitary ware market there are quite a lot of different mixers, which differ both in external and internal components. Some of them have built in temperature sensors and wiring diagrams, thanks to which you can set the temperature of the water as accurately as possible, while others are very simple. The latter can safely be attributed hinged cranes, which are as easy to install and maintain.

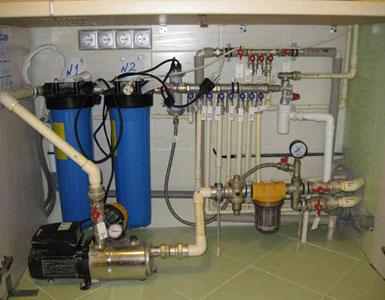
The main advantage of single-lever mixers is the absence of any metal elements inside the main device (cartridge). Instead, they are equipped with parts made of ceramics. They are not corroded and are not afraid of direct exposure to water. The only thing that can lead to their premature destruction is poor quality and unfiltered water. In spite of the fact that primitive filters are already installed in cartridges inside the mixer, in some regions of our country they are simply useless. Therefore, it is desirable to take care in advance of installing at least a local system of additional water filtration.
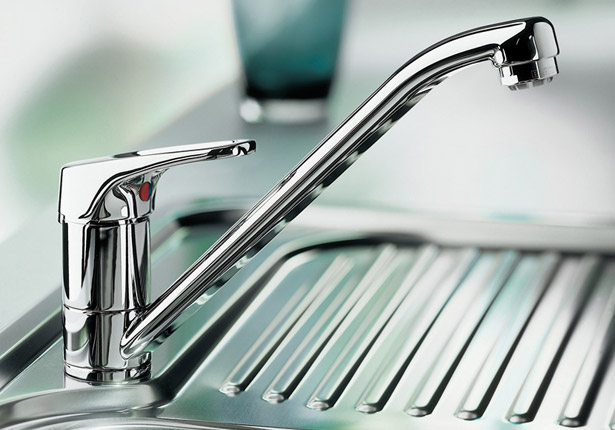
Another plus of single-lever mixers is their modern and minimalist design. In the field of the person's vision, only the basic elements fall, and the water supply, the main mechanisms are carefully hidden from outside views.
People choose these mixers not only because of the simplicity of the design or external characteristics, but also simple control and economy. You do not need to adjust the optimum temperature each time, just once you put the lever in the desired position.

Before proceeding to the main reasons for the breakdown, it is necessary to consider what the standard representative of single-lever mixers consists of:
- a lever for adjusting and supplying water;
- adjusting rod on which the lever is attached directly;
- a housing inside which is either a hinged valve or a plastic cartridge with a ceramic filling;
- adjustment ring, steam and adjusting cuffs.
The main causes of failure
Since there are several types of single-lever mixers in the market of sanitary devices at the moment, we will consider the most common types of breakdowns, as well as the reasons for their occurrence.
The main causes of failure:

Repair of the mixer: the operating procedure
Before starting to repair the mixer, it is necessary to cut off the water supply. After the water has been blocked, we open the tap and wait for the remains to drain. Since all work will be done in the immediate vicinity of the surface of the sink, it is desirable to cover it with a cloth. It is enough to put an unnecessary rag in the place where the mixer is located.
The following procedure may vary slightly, depending on the model and type of mixer used, but the overall repair pattern looks something like this:
- First we need to get rid of the special from the decorative plug, which is on the front of the mixer. It is a cold and hot water. Under the cap is a fixing screw, which must be unscrewed.
- Removes the lever itself. It is not necessary to exert unnecessary efforts, since mixers are most often made from cheap metal alloys and it is easy to damage the structure. If the lever does not lend itself, then you can pour it with hot water for several minutes.
- Under the lever is a decorative dome, which also needs to be carefully removed.
- Next, we need to remove the clamping nut, which is responsible for ensuring that the structure is in place.
- Depending on the type of mixer, there may be both a distributing ball and other elements of the hinge mixer inside, and a plastic cartridge with ceramic discs inside. In the first case, you need to check the integrity of the ball itself, check the condition of the gaskets, seals and springs that hold the valve in place. If necessary, we replace the elements. If you have a cartridge installed, then carefully remove it and go to the nearest store, where we are looking for a replacement.
- Leakage can also occur directly under the spout. In this case, it is necessary to replace the old seals.
- Under the cartridge, as a rule, there are rubber saddles, which eventually become unusable. We wash away the remains of dirt and other debris that got in the process of exploitation.
- In case of replacement of the cartridge, before installing a new one, it is necessary to thoroughly clean the seat itself of corrosion and rust. During installation, make sure that the latches are precisely in the grooves, otherwise the mixer will not work properly.
If the repair does not have a visible effect or only partially corrected the problem, then you need to find other possible causes of the problem. Let's consider other possible problems:
- The obstruction of the aerator leads to the fact that the water pressure is very different from that in the bathroom. To fix the problem, it is necessary to remove this element and thoroughly clean it. If the cause of its malfunction is rust, then it is necessary to completely replace this element.
- A strong tap noise when the water is applied may indicate that it is not suitable for the size of the gasket. This is especially true when you cut it yourself. In this case, we disassemble the mixer and cut the gaskets.
- The water pressure in the faucet can also be significantly reduced due to the obstructions of the connecting flexible hoses or water pipes. After cleaning the mixer, change the hoses to new ones, as deposits may form on old ones, which will lead to a repeated breakage of the cartridge or hinge.
- If the mixer is in the bath and during the bathing process, the water directing switch is lowered independently, then it is necessary to replace the gasket that is hidden under the spool. The mixer for this is not necessary to dismantle, just unscrew the nut and remove the hose itself, then change the gasket and return everything to its proper place.
- The lower gasket is much more difficult to replace, since it is necessary not only to disconnect the hose, but also to remove the adapter together with the spout. Further, the switch, the eccentric and the spool are completely delivered, after which we change the gasket and collect everything in the reverse order.
Self-repair single-lever mixer at home is inherently simple and does not require special skills in the field of sanitary engineering. The only thing you need to constantly remember - such devices do not like ill treatment.
If you think about the simplicity of repair, then you need to consider in advance what type of mixer you will install. It can be a product both on a hinged basis, and on cartridges. The first are less whimsical to the quality of water, and the latter can be repaired in a matter of minutes, since most faults affect the cartridge itself. The average cost of such a cartridge is 100-150 rubles, which can not but rejoice, although to choose the right model, you will have to take with you an old spare part. This is due to the fact that each manufacturer is trying in every way to improve their products and at the moment you can find dozens, if not hundreds of different models. Especially with such a craving for something new, the products differ from the Chinese manufacturer.
Single lever, or, as it is also called, joystick mixer confidently takes the place of obsolete valve designs. It is simple, easy to use and reliable enough. Can a house worker make repairs to a kitchen faucet with his own hands, without asking for help with plumbing? This we will discuss in this publication.
Like any mechanism, the mixer sometimes breaks down. The failure of a plumbing fixture in the bathroom or in the kitchen is the most common failure, it is impossible not to notice it - puddles on the floor and the annoying sounds of falling drops that do not stop day or night will not leave anyone indifferent.
The above troubles can be easily and quickly eliminated on their own. Of course, for this it is necessary, at least theoretically, to become acquainted with the internal device of the mixer, to know the reason for its failure and how to eliminate it.
Single lever mixer - plumbing fixture, which is characterized by its simplicity of construction, excellent functionality, durability and - most importantly -
All these questions will be discussed in detail below, but first consider the advantages of this plumbing device, by which he owes his popularity:
- Simplicity and maintainability. This has already been mentioned above - due to its simplicity, the single-lever mixer serves for a long time, and this time can be extended by timely repaired the product.
- Ease of operation. Do not need to turn the valves, just move the joystick of the mixer upward in one move to let the water run out. To adjust the temperature, the lever is turned to the left and to the right, and the head is adjusted by the vertical movement of the lever.
- Durability. The simpler the design, the less it breaks - the single-lever mixer consists of a small number of parts, and if it is carefully treated, install a filter on the water, then the product is guaranteed to last more than 10 years. Of course, this applies only to quality mixers.
On sale you can often find products from a fragile, short-lived, but very cheap silumin. In the best case, such a mixer will work for two years.
It is worth mentioning and simple repairs. Roughly speaking, any decent housewife will be able to make uncomplicated repair of a single-lever mixer with her own hands. Basically, it all boils down to a banal replacement of a disk cartridge or a ball - depending on the design of the device. But let's not run ahead and consider the internal arrangement of the mixer.
How is the device with one handle
Let's repeat once more - the device of the single-lever mixer is very simple - there are not any crane-boxes constantly broken. If you do not take into account the presence of spouts, shower heads, various switches, the device consists of only two main parts: a monolithic metal casing and a cartridge with a locking device of two discs or a ball. They are "responsible" for controlling the flow of water and adjusting its temperature.

The single-lever cartridge mixer is characterized by simplicity and minimum details: the cartridge is a consumable; the other parts are permanent, but with the possibility of replacing
The cartridge is placed in the body and securely secured inside only one nut, which is neatly hidden under the decorative cap. The joystick control cartridge is installed directly on its lever. Everything is simple, no extra details, hence - no serious breakdowns.
The internal arrangement of the single lever mixer can differ - the disc cartridge and the ball can open / close the water and adjust its temperature. Consider the construction of both structures.
The design of disk devices
As you can see from the name, inside this device there is a special flask-cartridge with locking and adjusting mechanism. In expensive mixers the cartridge is made of high-quality ceramics, in budgetary versions it is usually plastic.

Inexpensive model of the cartridge, the body of which is made of plastic. The gate of the disk mixer is a pair of discs with holes for cold, hot and mixed water in the cartridge. When the surfaces of both disks are combined, the flow of the flow through the device stops
The cartridge mixer is very simple to operate, but for those who are accustomed to a faucet mixer, it will be necessary to practice a little while, since the joystick turns very easily. But the good you get used to quickly: the desired temperature and water pressure can be adjusted with one easy movement. When the discs are partially or completely aligned, a stream with user-specific characteristics is formed.
Cartridge mixer consists of:
- The outflow, or, as it is also called, the "gander".
- A switch equipped with a fixing screw.
- Lock nut.
- Actually, the cartridge.
- Cases with a seat for the cartridge.
- Gaskets, studs, nuts - parts to ensure tightness.
Disks of the locking mechanism are most often made of ceramics, less often of steel alloy. On the upper there are protrusions, not the lower aperture, their shape is complementary to each other. When fully aligned, the projections overlap the holes, resulting in the formation of sealed connection. At partial overlapping in a spout water arrives. The smaller the protrusions of the upper cartridge cover the holes of the lower part of the shutter, the stronger the jet.

To the upper disc is attached a rod, the position of which can be changed to move the plates relative to each other. In this way, the amount of water passing through the cartridge plates
It should be noted that the plates are sandwiched between themselves very tightly - this is a necessary condition for the normal operation of the mixer. For this reason, cartridge models are very "not like" dirty water with foreign mechanical suspensions, since the miniature particles fall between the plates and lead to their rapid wear, resulting in premature failure of the shutter.
To prolong the life of the product, some manufacturers immediately install a water filter on the inlet pipe of the mixer at the factory. It is recommended to follow their example: to install on a water main good filter and safely serve purified water for all plumbing fixtures.
What does the ball mixer consist of?
As in the case of the disk model, the name indicates the design features of the gate mechanism of the device. In this mixer model, the water head and its temperature are regulated by a special ball. The part is made of metal, inside the ball is hollow. Outside perfectly polished. The ball has three holes - two for cold and hot water, the third for mixed.
A rod is rigidly attached to the workpiece, the other end is attached to the handle of the mixer control. Thus, when the handle is pressed, the rod turns the ball, opens / cuts off access to water and regulates the temperature of the jet.

The scheme ball mixer. The principle of operation is the same as that of a disk analog, but the design differs in some details
Manage the ball mixer much easier and more convenient than the disk, as the parts are smooth, perfectly adjusted, the joystick moves very smoothly and gently. The ball is installed in a kind of cartridge cartridge, which is easily removed from the device for repair or replacement.
By analogy with the disk device, the ball mixer is very demanding for water quality, it does not respond well to hard water and high iron content. Most ball leakage stop valves occurs due to the penetration of soricles into the gaps between the ball and the rubber saddles holding it. The installation of a water filter in front of the mixer is also considered mandatory in this case.
How to troubleshoot common problems
There is a puddle under the sink - the first thing is to inspect the spout. If it is completely dry, the problem lies in the breach of the tightness of the water supply. I'll have to climb under the sink and look for a leak. To make it easier, you need to dry the nozzles with a cloth, and then see where the water is boiling. Most often, the problem is eliminated by tightening the nut.

If the tightening of the nut does not help, close the water, remove the branch pipe, inspect it, inspect the thread on the nozzle and the internal thread on the mixer
When the thread on the pipe is damaged, the part must be replaced. With a damaged internal thread in the mixer body, the problem becomes much more serious. You can try to eliminate the leak by wrapping the thread of the branch pipe with sealing tape or sealant paste, but this temporary solution and the mixer will most likely have to be changed entirely.
It drips from the spout, although the steam is completely blocked - the reason may be the damage to the locking mechanism, because The abrasion of the sealing parts practically does not affect the operation of the single-lever devices.
A puddle of water on the sink near the base of the mixer body. The reason is a crack in the casing or wear of the gasket in the turning part of the spout. If there are cracks, the mixer needs to be changed - it will not be repaired.
Repair of the disk device
Immediately make a reservation that "repair" in this case is not entirely appropriate word, since, most likely, you will only have to replace the cartridge, or, in the most severe case, the mixer itself.
Rubber sealing rings constantly accumulate debris and salts are deposited, abundantly contained in urban tap water. Gradually, the tightness begins to break and a leak develops. To eliminate it, the device must be disassembled, cleaned and reassembled in the reverse order.

If the seals are damaged, it is good to use a warm solution of laundry soap before cleaning, then rinse, dry and re-assemble
Before starting to disassemble the mixer, it is necessary to shut off the water supply. Then the algorithm is as follows.
First of all, we remove the decorative plug from the side of the case. It is removed very easily, you need to hack with a knife or screwdriver. After the cap is removed, access to a small fixing screw opens, which is unscrewed by either a hexagonal key or a screwdriver. The screw must be completely unscrewed and pulled out, after which you can remove the mixer lever, gently pulling it up.
On the body of the mixer, a decorative washer is usually screwed or freely installed. It must be removed, and then unscrew the clamping nut that fastens the mixer to the sink. The nut has a large diameter - you will need a adjustable wrench or carob of the appropriate size. After that, the cartridge can be removed from the housing and examined for damage.

When disassembling the mixer, it is necessary to remember the exact location of all fixtures and parts. You can photograph the whole process of disassembly on the phone, so as not to be mistaken, as sometimes it is even important which side the part is installed on
For the cartridge inside the body of the mixer there is a so-called "saddle" with a rubber seal - simply put, a usual rubber gasket, which in due course can clog or lose elasticity. As a result, water starts to flow from under the mixer base. If, after cleaning or replacing the gasket, the problem has not disappeared, then it is most likely in the cartridge itself and it will have to be replaced.
Please note: discs in cartridges do not have standard sizes. They may also differ in the location of the water supply and outlet openings. Therefore, if it is decided to replace them, the old parts must be removed from the case and taken to the store, where it is necessary to show the seller for comparison. You need to buy the same cartridge, without any differences.

The new part is placed in its place in the body of the mixer, while the cartridge needs to be turned with a small force until it snugly sits in the socket. After that it is possible to assemble the mixer in the reverse order
After the clamping nut is clamped, you can turn on the water and check the new cartridge for service. Adjust the water pressure and its temperature without a handle need a rod. However, for convenience, you can immediately put the handle on the rod.
How to fix a ball mixer
A ball mixer was invented almost half a century ago, and since then its design, in fact, has not changed. It is very simple and reliable enough - there's nothing to break.
If there are any problems, then most often they are associated with either poor-quality materials, of which a sanitary device is made, or with bad water. As in the case of a disk mixer, the gaskets must be removed, thoroughly examined for damage, then either replaced or cleaned of dirt, washed, dried and replaced.

The most common type of malfunction of a mixer with a ball valve is a lean jet. Occurs most often due to the clogging of the ball mechanism
For the models of ball valve mixers, the disassembly and repair process is similar to the above. The difference is only in the position of the ball, which rotates relatively tightly pressed to it rubber seats. The contact density of the parts is ensured by the watering mechanism.
The lever itself, which transmits the movement to the regulating rod, is removed exactly as in the disk models: it is necessary to uncork the decorative plug, unscrew the screw, remove it, and then remove the mixer lever. Next, you need to unscrew the clamping nut and remove the washer that is under it. This opens access to the ball. The ball itself is easy to remove - you just need to pull the rod.

Internal view of the ball mixer. The ball valve mechanism is located inside the cartridge, made in the form of a sleeve. The ball inside it is supported by saddles, the stability of the position of the sleeve itself is ensured by the cuff and springs
As noted above, the most common problem is the deposition of salt and grains of sand on rotating parts and the mixer elements in contact with them. All the dirt should be carefully removed and be sure to inspect the springs - they can also be dirty. In addition, springs can lose elasticity and need to be replaced.
The cause of breakage of the mixer can also be contained in the ball itself. Ideally, it should be made of high quality stainless steel grades. In this case, it only needs to be cleaned of dirt.
In fact, manufacturers, especially Chinese, save on expensive materials and produce parts from low-quality metal. Over time, the surface of such a ball begins to peel, rust, water holes are clogged with rust particles and the mixer breaks down. In this case, cleaning the surface will not help, the ball will have to be replaced. The old part, like with the disk cartridge, you need to take with you to the store for comparison.
To collect a ball mixer it is necessary strictly in the reverse order, to work very accurately and to center the details. An incorrectly installed element will quickly wear out and may cause another breakdown.
A separate point should be mentioned the most common and, at the same time, insignificant problem - clogging of the mixer aerator. This small detail is a common mesh and is designed to prevent the emergence of splashes. The cells of the reticulum become clogged with deposits of salts and miniature debris particles over time.

Remove the aerator is very simple - you need to unscrew the washer from the end and pull out the part. If the reticulum does not come to full disrepair, but simply clogged, it must be cleaned and replaced
The aerator can be replaced if it is possible to find a suitable analogue in size, or, in extreme cases, use a mixer without it.
Another problem is the clogging of the flexible mixer lines.

Flexible carts - rather thin tubes - have a small diameter and may well become clogged. Particularly prone to blockages are the joints of tubes with other parts
Considering the condition of modern water pipes and the quality of city water, there is nothing unusual here. In this case, it is necessary to close the water, unscrew the carts, clean them, inspect for damage to the thread and install it back.
Video-instruction for repair of the mixer
After watching the training video, you better introduce the process of disassembly / assembly of the single-lever mixer.
How to disassemble the device and replace the cartridge:
Thus, in fact repairing a single-lever mixer is not such a difficult task as it might seem at first glance. You can solve it yourself if you want and a minimum set of tools.
We hope that the material given in this publication will help readers to save a lot, as most people, at the very first problems with a mixer, just buy a new one or cause sanitary equipment, and buying a quality mixer and professional services for replacing it is not a cheap pleasure.
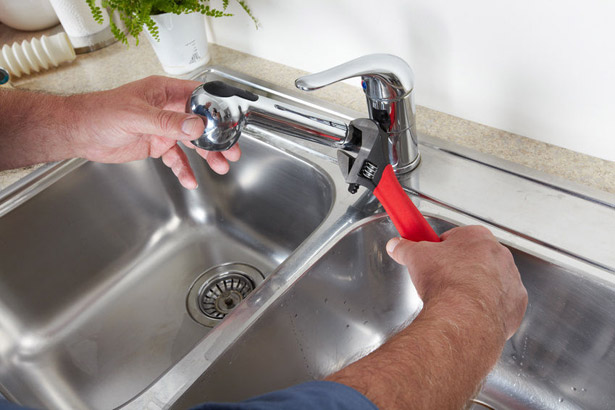
The kitchen faucet provides us with water dozens of times a day. Not surprisingly, it breaks down more often than in the bathroom. Before calling plumbing or buying new faucet, it is worth trying to repair it yourself.
If you are reading this article, it means that some of these failures happened to your mixer:
- The tap is leaking, water is dripping from under the handle;
- Water drips from the spout, even when the valves are closed;
- When the mixer is opened, a droning sound appears in the pipes;
- The jet of water is too thin;
- Single-lever mixer works "jerks";
- Water flows out from under the union nut on the spout;
- The lever of the crane is not fixed in the required position;
- Leak in the flywheel area (valve constructions).
What you need to repair
Before you start repairing the kitchen faucet yourself, you need to prepare all the tools and necessary components of the crane.
You will need:
- The key for hexahedrons;
- The key for adjustment;
- Knife-cutter;
- Screwdriver and hammer.
Also, repair requires additional materials - dry rags, grease. And if the tap is leaking, you will have to buy spare parts: a new cartridge or its parts (for a single-lever mixer), seal rings, crane-bushbox (for a two-piece design).
We are making a single-lever ball-type mixer
The reasons for which you want to repair the crane, there are four:
- Cracks, chips, caused by mechanical damage to the body;
- Litter in the cartridge between the seats and the ball;
- Wear wear;
- Blockage or rust of the aerator.
What if there was a defect on the case? You can try to repair it by cold welding - sealant (putty). But it, nevertheless, is a temporary measure, and soon it will be necessary to replace the mixer.
If the problem lies in the low water pressure, then, most likely, the reason is a clogged aerator. Then you need to get it, clean the mesh, for example, with a toothbrush, and then install it back.
Let's deal with the faults more seriously.
When the tap is flowing without visible damage, it is most likely a violation of the integrity of the gasket or the failure of the cartridge. In this case, a complete disassembly of the kitchen single lever mixer is required.
How to disassemble the tap? First, shut off the water and empty the remains of the tap. Then study the device of the single-lever kitchen faucet in the photo.
Now start the repair step by step:
- The screw is unscrewed on the main body. It is usually hidden behind a decorative cover, which must be removed with a screwdriver, as shown in the photo.

Advice! You can disassemble and repair the device, even if you do not have an allen key at hand. For this, the fastening nut is gently taped with a hammer on the screwdriver.
- The lever and cap are removed, and now we need to get the cartridge and inspect the whole device for defects. To do this, the washer-cam is unscrewed by the adjustable wrench.

- The dismounted crane is inspected for defects: the gasket, the surface of the ball and the springs supporting the rubber seals in the holes are inspected. Sprung springs and a worn-out faucet, if necessary, are replaced. At this stage, you need to clean all the parts from the accumulated water deposits.
- Most often, the flow from the tap arises from the resulting clog between the ball and valve seats in the cartridge. In this case, you just need to change it. The whole complexity of this task consists in the proper choice of the cartridge, and the repair of the mixer by its own hands is quite simple.
Advice! Going to the plumbing shop for a new cartridge, take an old one with you, so as not to lose with the size, because the cartridges are not standardized - they are produced in a variety of diameters and materials.

The new cartridge is installed in such a way that its holes are aligned with the holes inside the mixer body. Then screw back the washer (first with your hands, then tightly, but not too tightly with a key).
Also see our other materials:

- We check the quality of our work by letting water out. If it does not leak, then proceed to the installation of the cap, and then the lever - we twist the screw in it and fasten the plug.
And how to change the gasket in the mixer? This is also quite easy. It is necessary to remove the old O-rings and change them to new ones, which we previously apply a little plumbing lubricant.
Advice! For all rubbing parts of the product, use non-toxic grease on a silicone base. This will increase the service life of the structural elements by half.
How to fix this type of mixer? It is necessary to disassemble and replace worn out elements - a crane-axle and / or a gasket.
The sequence of work in this case will be as follows:
- The water completely closes, after which the flywheel of the valve is put into operation so that the overpressure does not act on the part.
- Next, you need to disassemble the design - for this, the decorative caps are removed and the screw securing the flywheel is turned out. This requires a screwdriver. Further, the old crane-box is replaced with a new suitable size, and the construction is assembled back.


- If the gasket is worn out, it is simply removed, and a new one is installed in its place, lubricated with sanitary lubrication.
Often, faucet mixers need to be repaired due to the fact that the oil seal has leaked. Then it must be disassembled according to the same algorithm and replace the worn packing.

And sometimes in order to adjust the valve valve, it is enough just to tighten the stuffing box, as shown in the video:
Advice! Replacement packing is only needed when the bushing is tightened tightly, and the leak is still present. As packing is used (for old mixers):
- Rubber tube of appropriate dimensions;
- Threads of sacking;
- Twine with impregnation from drying oil.
If you see that the carving has worn off on the details, it means that it's time to update the plumbing.
Possibility to repair kitchen faucet alone is a great way to save money. However, not always repair can completely restore the efficiency of the crane and it is often easier to simply change the mixer in the kitchen.
Keep in mind that:
- The most durable are the structures of heavy metals (brass);
- The most substandard - Chinese or Turkish products from silumin;
- Convenience of the single-arm device is obvious - it is opened with one free hand. Also it is easier to repair, because the design of a smaller number of parts.