Two-key switch: connection diagram
The two-key switch is not much different from its one-key "brother", it has almost the same structure. In addition to the housing, it contains input / output terminals or screw terminals. The only difference is the number of keys.
A current is supplied to the input terminal block, then wires are connected to it with contacts that communicate with each key separately. The pins are connected to the output clamps / terminals to which the cable will need to be connected. Its function is to connect the lamp and the switch.
The main feature of a two-button switch is that it can control a pair of lamps: 2, 4, 10 and even more, but not 3 or 5.
Installation of a two-gang switch appropriate in such cases:
- when connecting a chandelier with several groups of lamas;
- when you need to install a lamp in a room close to the street: one lamp will light up the light in the corridor, and the other - outside;
- when connecting a separate bathroom: one lamp will illuminate the bath, the other - the toilet.
Installation
Installation of a two-button switch is as follows:
1. First of all, the elements that have the name pre-installation are mounted: a junction box in which the wires will be connected, a receptacle for a switch (electricians call it a socket outlet) and a protective device. The essence of the latter is simple - to protect the system from short circuits and other things.
Do not forget to de-energize the apartment before work!
2. Laying the necessary wires, without which we will not succeed. The must-have list includes:
- a supply wire, which is pushed up to the junction box from the protection device, and then directed to the socket;
- wires from our chandelier or other light sources.
3. Installation of the protective device. We used a two-pole switch, the choice of which depends directly on the power of the light bulb. Now you need to remove the insulation layer.
4. Installation of the switch. Again, we measure the required size at the wires, we ruthlessly remove all unnecessary things. We connect the wires to the terminals. We take into account that zero is colored in blue, and grounding is indicated in yellow. The remaining vein (light) will serve us to transfer the phase.
Make sure that the input and output phases match. If the blue wire is on the right at the top, it should be at the bottom too.
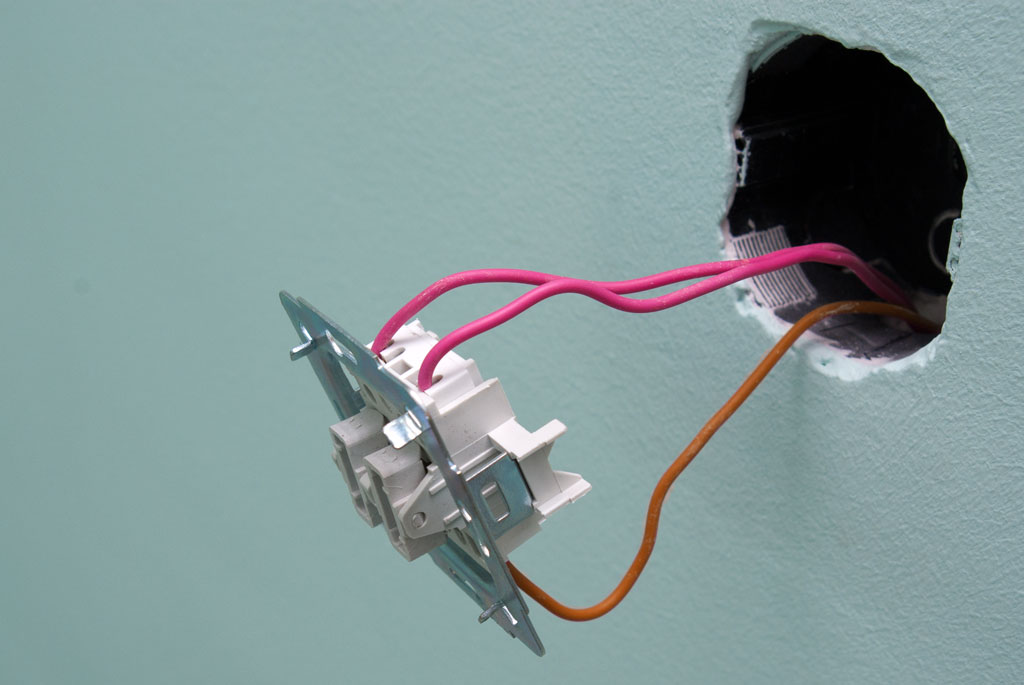
5. Installation of the switch. Next in line we have a socket box, which we are successfully installing. Don't forget to strip the wires! The next step is to connect the two rocker switch to these wires. On its reverse side, you can usually see a diagram. So we follow the specific convention. In our case, Latin L denotes a suitable phase, for the rest of the veins there are special contacts. Thus, the switch is connected.
We consider the circuit breaker connection
And we have everything ready for the final stage. On the photo of the connection diagram of the two-button switch you can see what we should get at this stage:
- the junction box in which we placed the wires;
- the actual switch;
- sources of electricity;
- wire for power supply.
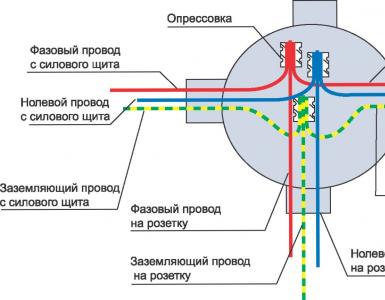
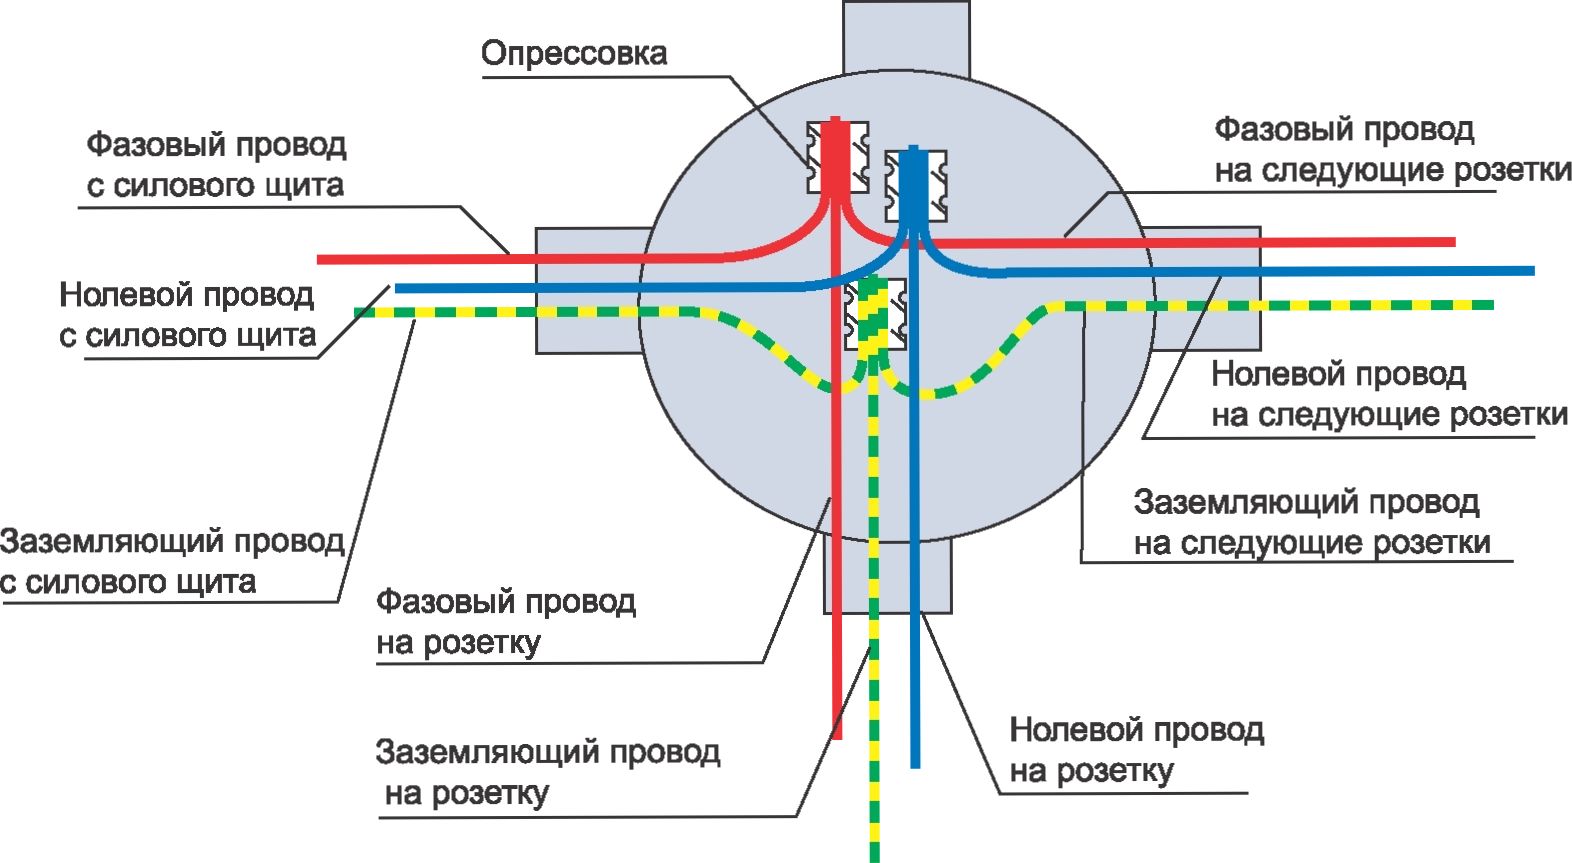
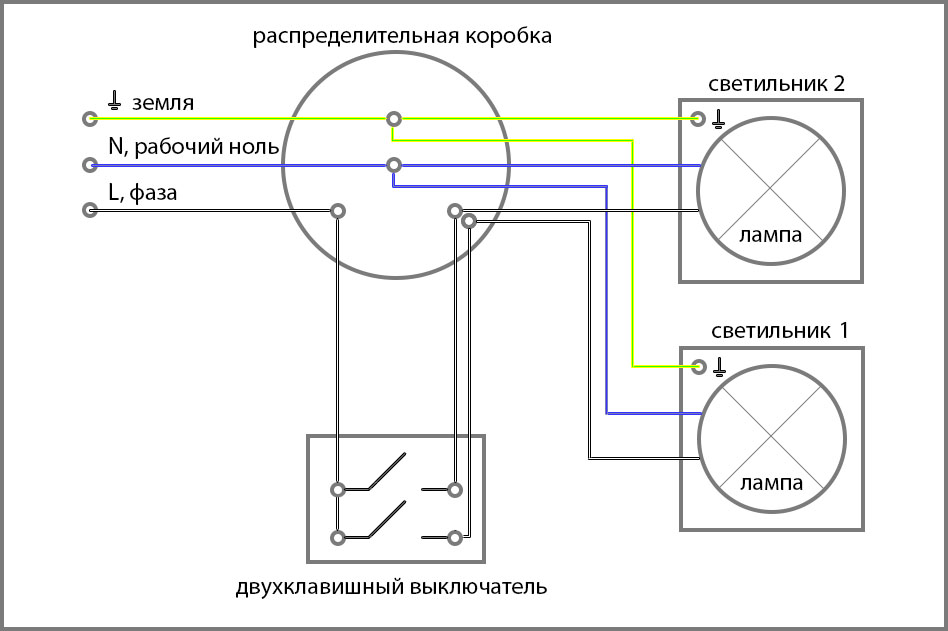
We remind you that the switch in the two-key variation has one contact for connecting more ... A phase from a junction box is connected to the input; the outputs are responsible for the operation of the bulbs. There are three contacts and exactly the same number of clamps.
Before connecting a two-button light switch according to the diagram, remove the insulation. In the supply cable, the wire, which has a brown color, is a phase, blue is traditionally indicated as zero. We remind you that no other options other than those when the switch breaks the phase are not suitable! So we decided for your own safety and convenience, so that the light bulb can be changed without harm to health by turning off the light.
Otherwise, there is a risk of receiving a current charge.
In the case of a switch with two buttons, a common contact is assigned to the phase conductor. We connect the phase of the supply cable with a common contact. Then we connect the zeros of the cables for power and lighting devices. In other words: we have to connect the blue (blue) wires from the supply cable to the corresponding wire leading to the light sources. The red wire is intended for the phase to go to the switch.
If you want to diversify your apartment with interesting solutions, you can see what other switches are in this article. A rather interesting and modern solution will be the installation of a remote switch. You can learn more about this.