Installation of sockets and switches: installation of a socket in the wall
It is not necessary to look for a specialist to install sockets and switches. These works can be done by yourself and no worse than professional workers. It is enough to follow simple rules and comply with the requirements of standards. To make everything work out neatly, you will have to purchase or borrow part of the tool.
Rules for mounting sockets and switches
The position of sockets on the walls is determined in accordance with the tasks, the distribution of household and multimedia equipment and convenience. Existing standards define the requirements for the distribution of sockets and switches, and this concerns the permissible distances from the installation site from fences, openings and the floor:
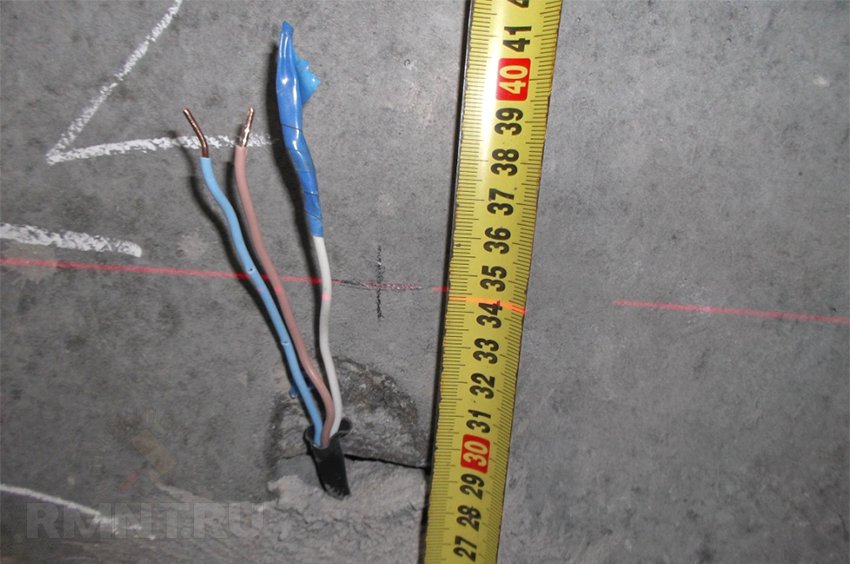
- The distance from the floor in living quarters is 30 cm for sockets and 90 for switches and dimmers.
- The distance from the floor for sockets in the kitchen is 110-120 cm (for a washing machine, dishwasher, a height of 100 cm is allowed).
- Distance from adjacent walls, partitions and other stationary objects - 15 cm.
- Groups of sockets and switches are mounted horizontally in line with each other.
- The distance between the centers of two sockets in a group is 71 mm.
All distances are measured based on the level of the finished floor covering and wall cladding, which should be taken into account when preparing the socket boxes in the initial stages of repair.
The choice of socket outlet depending on the type and material of the walls
Today, only plastic is used as a material for mounting boxes. When choosing, you should focus on the following characteristics:
- Installation method. In solid or hollow walls. The latter have special clips for attaching to drywall or other sheet wall material.
- Dimensions. The standard diameter of the socket is 71 mm, while the depth varies. Ordinary sockets are installed in boxes with a depth of 45 mm, dimmers and special switches and sockets in recessed sockets 60 mm.
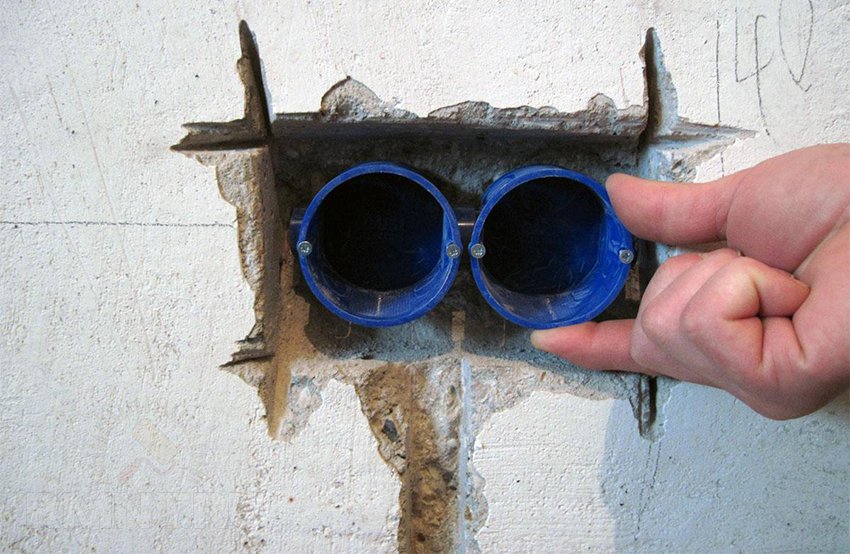
- Single or joint. Butt, composite socket boxes have a special protrusion in the lower part for grouping them in a row with the formation of a channel for laying a switching bus. Ready-made combinations of combined 2 or 4 socket boxes are also available.
- Mountings available. Along the edges of the front of the box there are racks with self-tapping screws for fixing sockets with the corresponding perforation on the mounting plate.

markup
Designate the places where the sockets will be installed. In accordance with the requirements, the position of the center of the outlet is marked. Draw a vertical and horizontal line in the level with an intersection at the marked point. Draw a circle with a diameter of 72 mm. In brick walls, it is desirable that the center of the mark falls on the body of the brick, and not on the seam, in plasterboard partitions - excluding entry into the frame profile.
Niche or hole preparation
How the niche for the installation of the socket box will be prepared is determined in accordance with the design of the wall or partition and the material from which it is made.
By design, the order of actions is determined:
- Solid (concrete, brick, foam concrete, etc.).
- Hollow (drywall, chipboard, etc.).
In accordance with the material of the walls, a tool and methods for sampling material from a niche are selected.
Concrete, foam concrete, brick
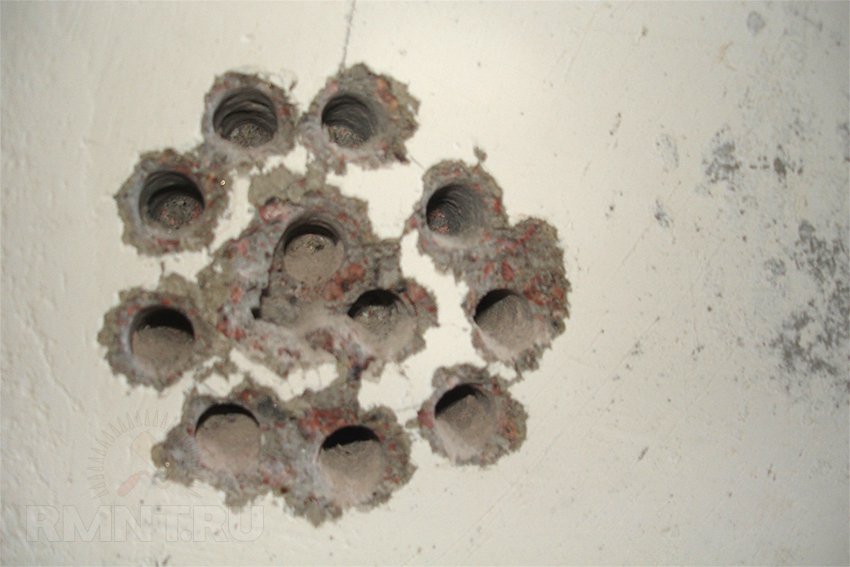
There are three ways to drill a hole:
- Angle grinder and diamond wheel.
- Drilling holes around the circumference.
- Using a crown of the desired diameter.
With the help of angle grinders (grinders)
Using an angle grinder (grinder) and a diamond wheel, two horizontal cuts are made along the upper and lower borders of the circle and two vertical cuts on the sides. The cuts are made so that at all corners the depth of the cut is at least 45 mm. Next, using a chisel and a hammer, the material inside is selected.
The disadvantages of the method are huge: dust in enormous quantities, the slots go far beyond the limits of what is necessary, a square recess instead of a round one - an increase in the volume of the filling solution.
With the help of a puncher and a drill
Accurately allows you to cope with drilling around the circumference of the future deepening. Concrete drills with a diameter of 6-8 mm are used. It is better to drill directly along the marked circle or from its outer side along the tangents. The distance between each new drilling is approximately 8-10 mm.
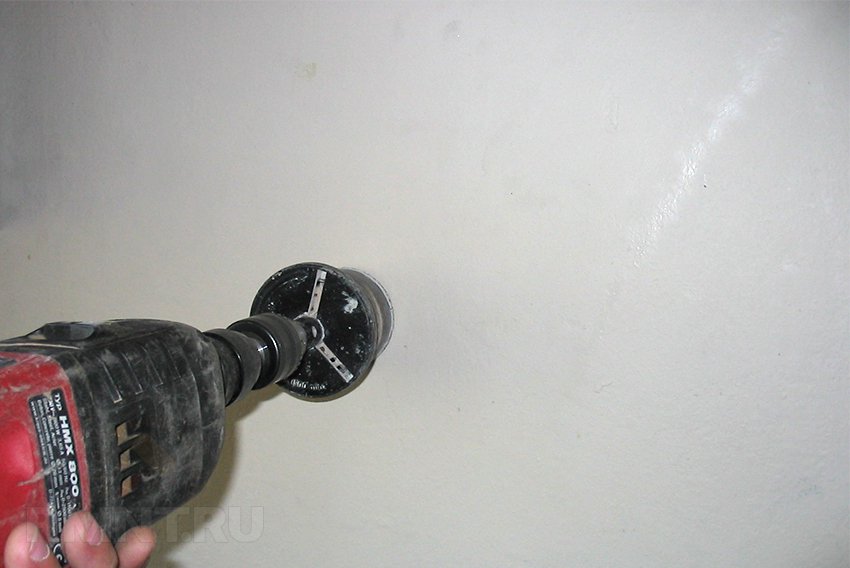
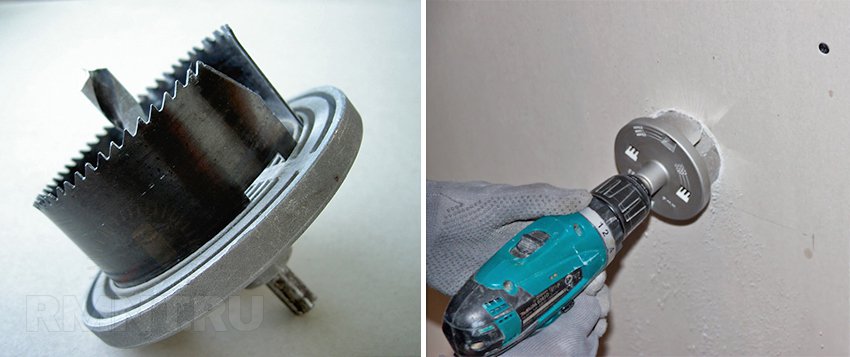
Perforator and crown
The most effective way is to use a 68 mm crown with victorious teeth or diamond coating. For foam concrete, it is allowed to use drywall crowns:
- Make an indentation in the center of the mark.
- Fix the crown in the perforator, set the limiter to a depth of 55-60 mm.
- Position the drill in the center of the crown against the prepared recess. Start drilling gradually with several short visits.
- As you deepen, remove the crown and remove concrete dust and crumbs.
- After passing to the full depth, remove the crown and clear the space for the socket from the concrete with a chisel and a hammer or a perforator with a drill blade, then level the bottom of the resulting niche.
Drywall or other sheet material
A special drywall crown is used with teeth with a diameter of 68 mm. Using a screwdriver or chipper, prepare a recess in the center of the mark. Attach the crown to the drill chuck. Drill drywall with a drill from the crown and then a hole for the socket.
If there is no crown at hand, then a 6-8 mm drill drills holes around the circumference of the mark, then the central part is removed. The edges are leveled with a file.
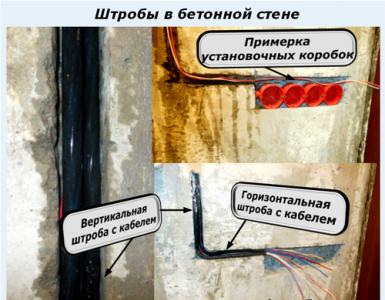
Cable entry and laying method
The wires are brought to the installation site of the sockets in the strobe, which is done before the installation of the sockets. In hollow partitions, the cable is laid exclusively in a protective corrugation with fastening along the frame racks.
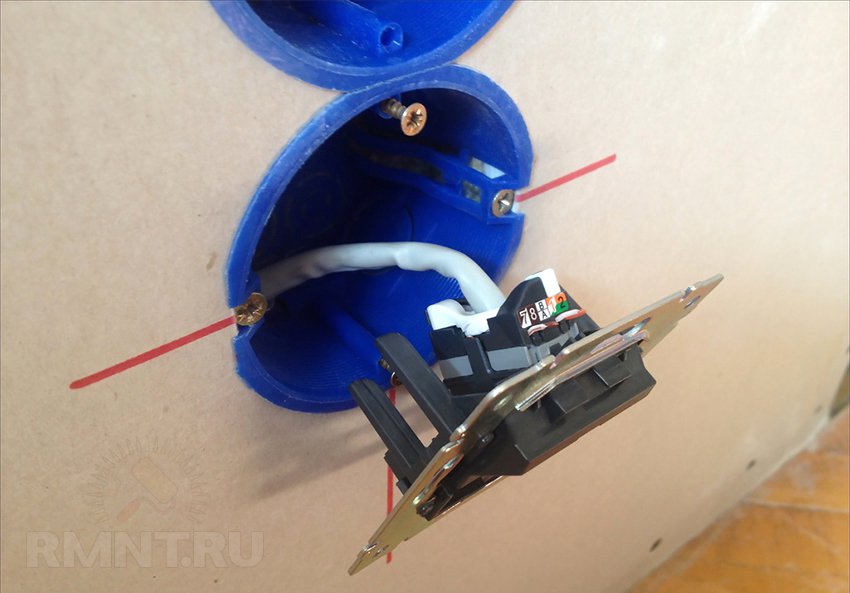
Installing and fixing the socket
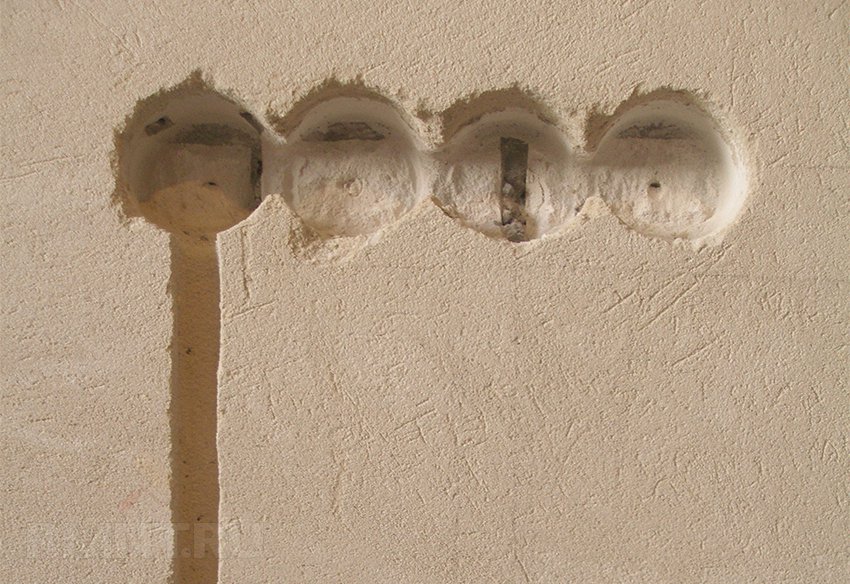
The socket box must be installed so that the mounts for the socket or switch are strictly horizontal. The socket box is fixed with a mortar in a brick, concrete or aerated concrete wall or with clamps in hollow partitions and sheathed walls.
Difficulties may arise when installing a block of combined socket boxes. Even small distortions in height and inclination will lead to the fact that sockets or switches will be slightly shifted towards each other, which visually looks ugly.
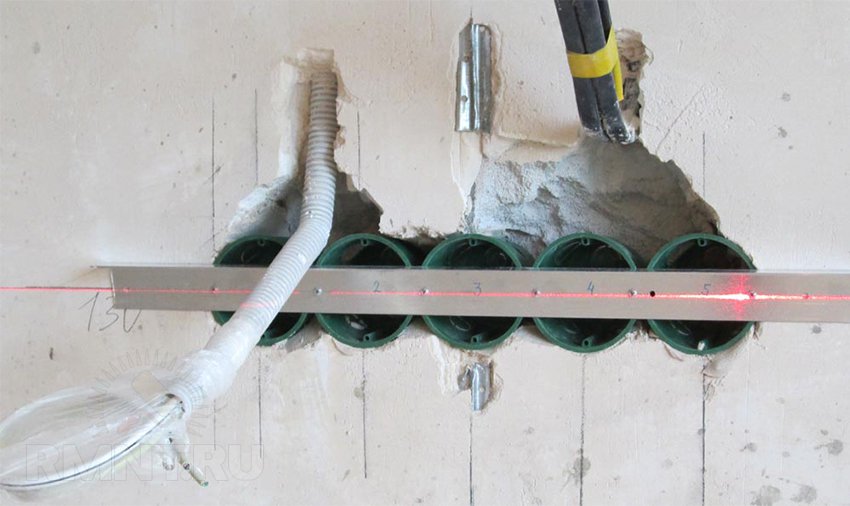
A fairly simple trick will help. Prepare an aluminum or steel corner 40 mm longer than the width of the prepared niche by 20 cm. Drill two more holes along the edges of the corner, stepping back 2 cm. Having fixed the socket boxes on the corner, it will be possible to insert them evenly and fix them in the same level without distortions. Holes along the edges will help to firmly press the structure to the wall.
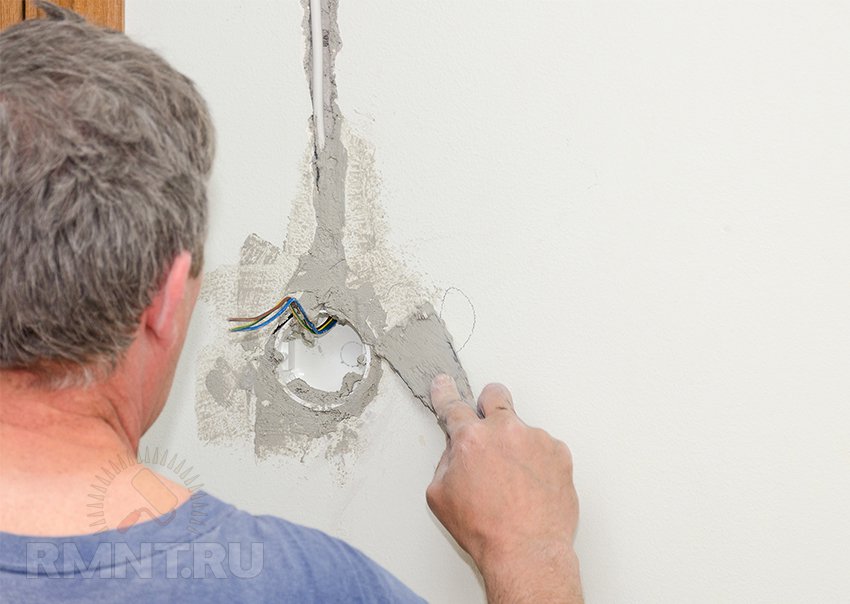
To fix with a solution:
- Prime the hole in the wall first.
- Mix mortar or alabaster.
- Apply a layer of mortar on the inner surface so that when the socket is inserted, a part protrudes outward, and the back wall clearly rests on the mortar.
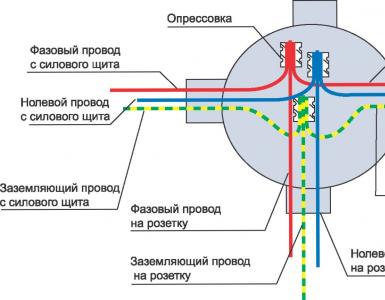
- Pass the cable through the technical hole in the socket. Insert the socket with force and level it.
- Remove excess solution.
Continue the installation of sockets and switches after the solution has completely dried, at least a day later.
For fastening in hollow walls:
- Remove the fixing plates from the socket.
- Insert a supply of cable into the technological hole and secure the protective corrugation with a nylon tie. Install the socket in the prepared hole.
- Insert the plates into the slots on the bottom of the box and tighten with screws or self-tapping screws from the kit to the box.
Before tightening the fasteners, the installation level must be verified strictly in a horizontal plane. Immediately after installing the socket, you can mount sockets and switches.