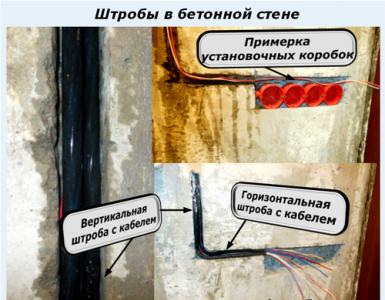
How to make an invisible plumbing hatch
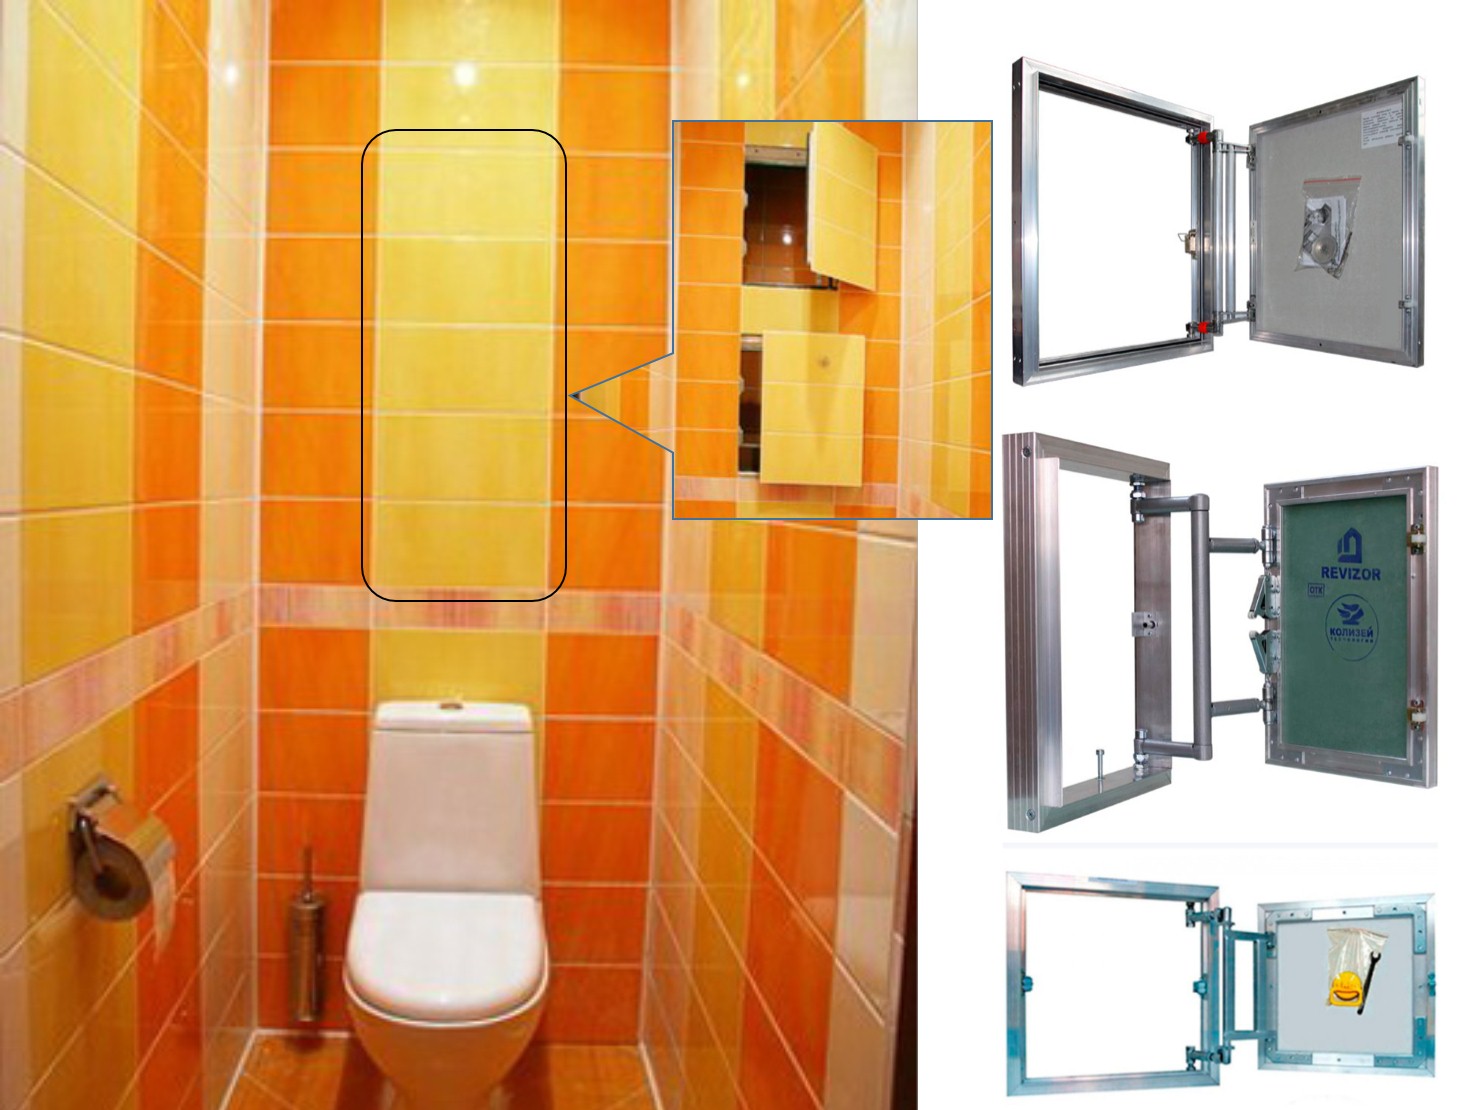
Modern requirements for engineering communications from time to time conflict with the decisions of designers. And the design features of the premises do not always allow for the necessary control over the state of the networks. The solution was found quickly: having decorated the main part of the communications, leaving special openings for periodic monitoring and repair work. Since the main engineering networks of the house run in the kitchen and bathrooms, open holes would look extremely unaesthetic. To hide the place of access to communications and make its use convenient, a sanitary hatch under the tile is called. Such a technique will allow you to be able to inspect plumbing and electrical appliances at any time, repair or replace them. After all, hidden under the finish, they would be inaccessible. Hatches are mounted flush with the surface and have the same finish - most often tiles, mosaics, porcelain tiles. Therefore, the overall design does not change, the style of the room is completely preserved.
Ceiling hatches have a special design. They require additional fixation of the door so that it does not swing open under its own weight. Sometimes ceiling hatches have an additional function and "work" as lamps.
Hidden hatches for tiles, mounted in walls or floors, have the ability to withstand large external loads, because they are decorated with the same tiles as the room. Heavy porcelain stoneware, artificial stone or tile should not interfere with easy access to communications. In addition, hatches must be waterproof, because often in such rooms there is high humidity. The sanitary tile hatch is usually made of PVC or aluminum, which provides corrosion resistance. Sometimes gas tightness is also required.
What are their designs and materials?
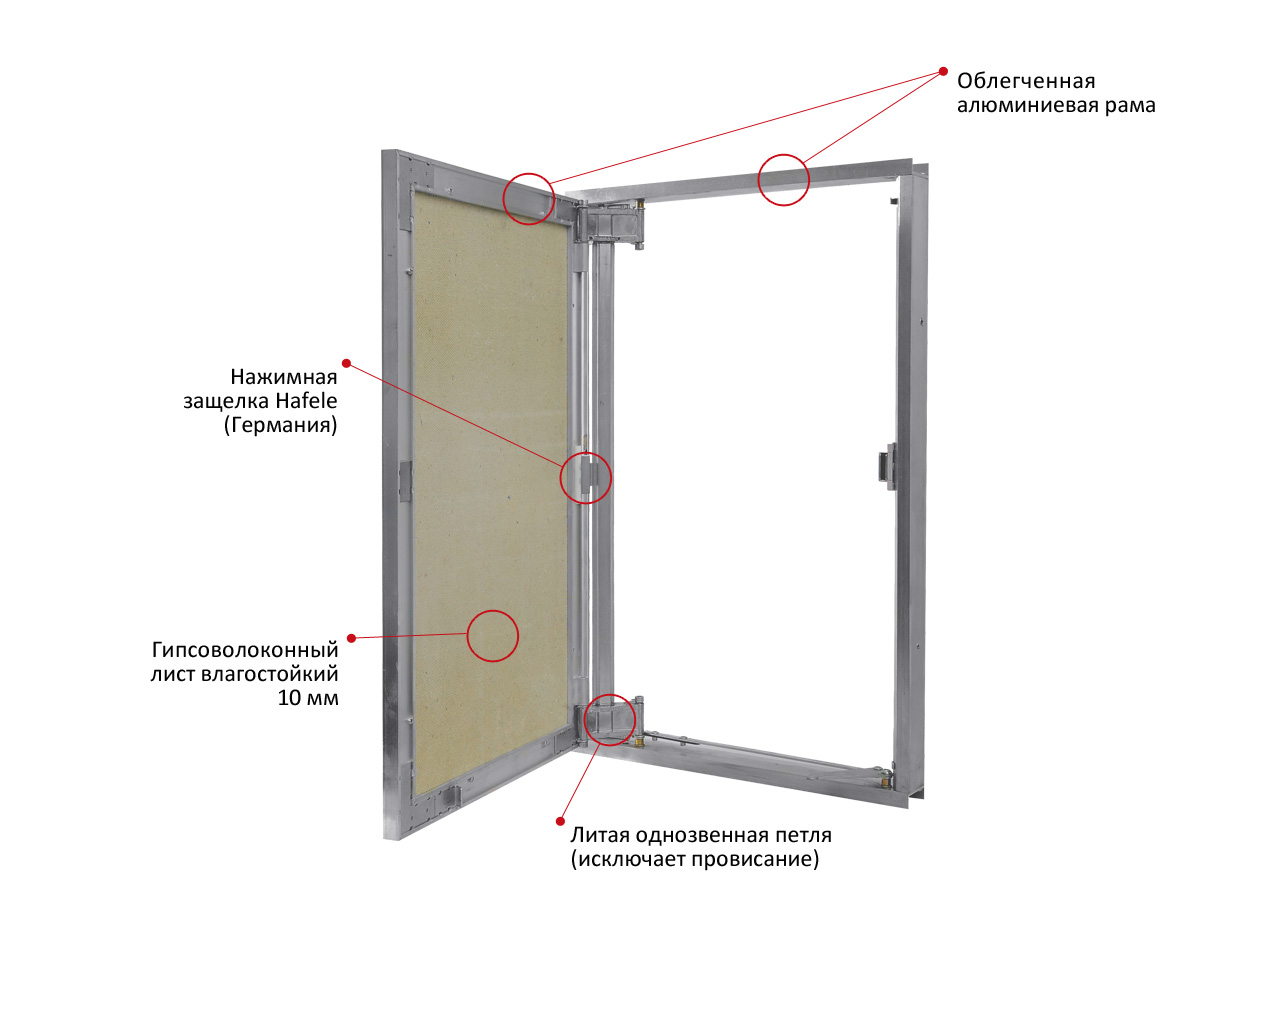
By standard, a hidden tile hatch has a rectangular (square) frame that is inserted into an opening in a wall or floor. The door is attached to the frame with hinged hinges. Both the hinges and the door are made from the same material as the frame. That is, they can be metal or: plastic. This ensures that in the future the construction materials will deform in the same way and distortions will not occur.
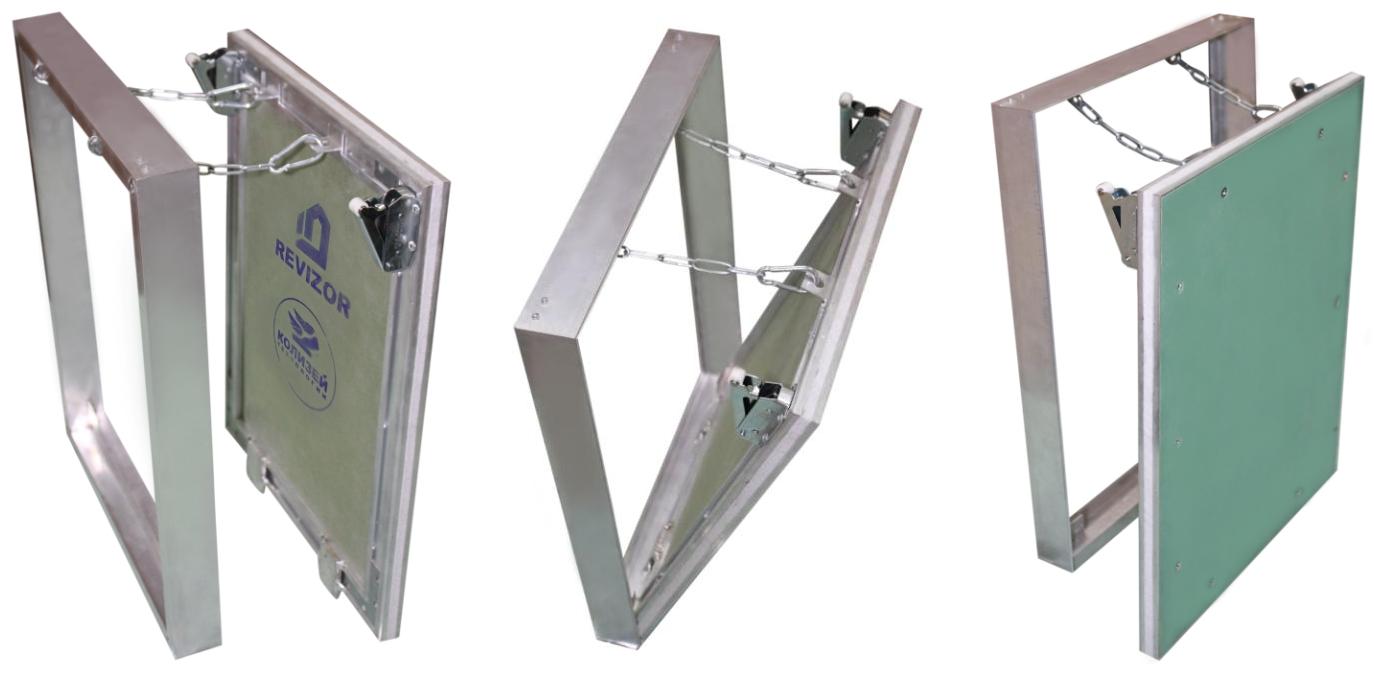
Most often, there is only one door, but if the opening is more than 70 cm, then two doors are installed. Doors are structurally divided into hinged and sliding. The first ones open like a regular door and have left- and right-hand options. Usually they are placed where there are no objects that prevent the door from opening. The sliding ones are first opened “on themselves”, then they are shifted to the side with the help of special design hinges. This is convenient in crowded conditions, for example, if the hatch is installed between the wall and the toilet bowl, 15 cm is enough for such a hatch to open. If there is no such space, a folding option is used, when, after shifting, the lid rises up or folds down.
Frames also have 2 varieties:
- adjustable: after installation in the hole, the size of the frame is adjusted, and the excess is cut off;
- not adjustable: the frame is immediately made according to the exact dimensions of the hatch.
There are frameless models, where the hatch door is attached with magnets or sealant. But as a plumbing hatch for tiles, this design is not suitable, since it is not able to withstand the weight of the cladding.
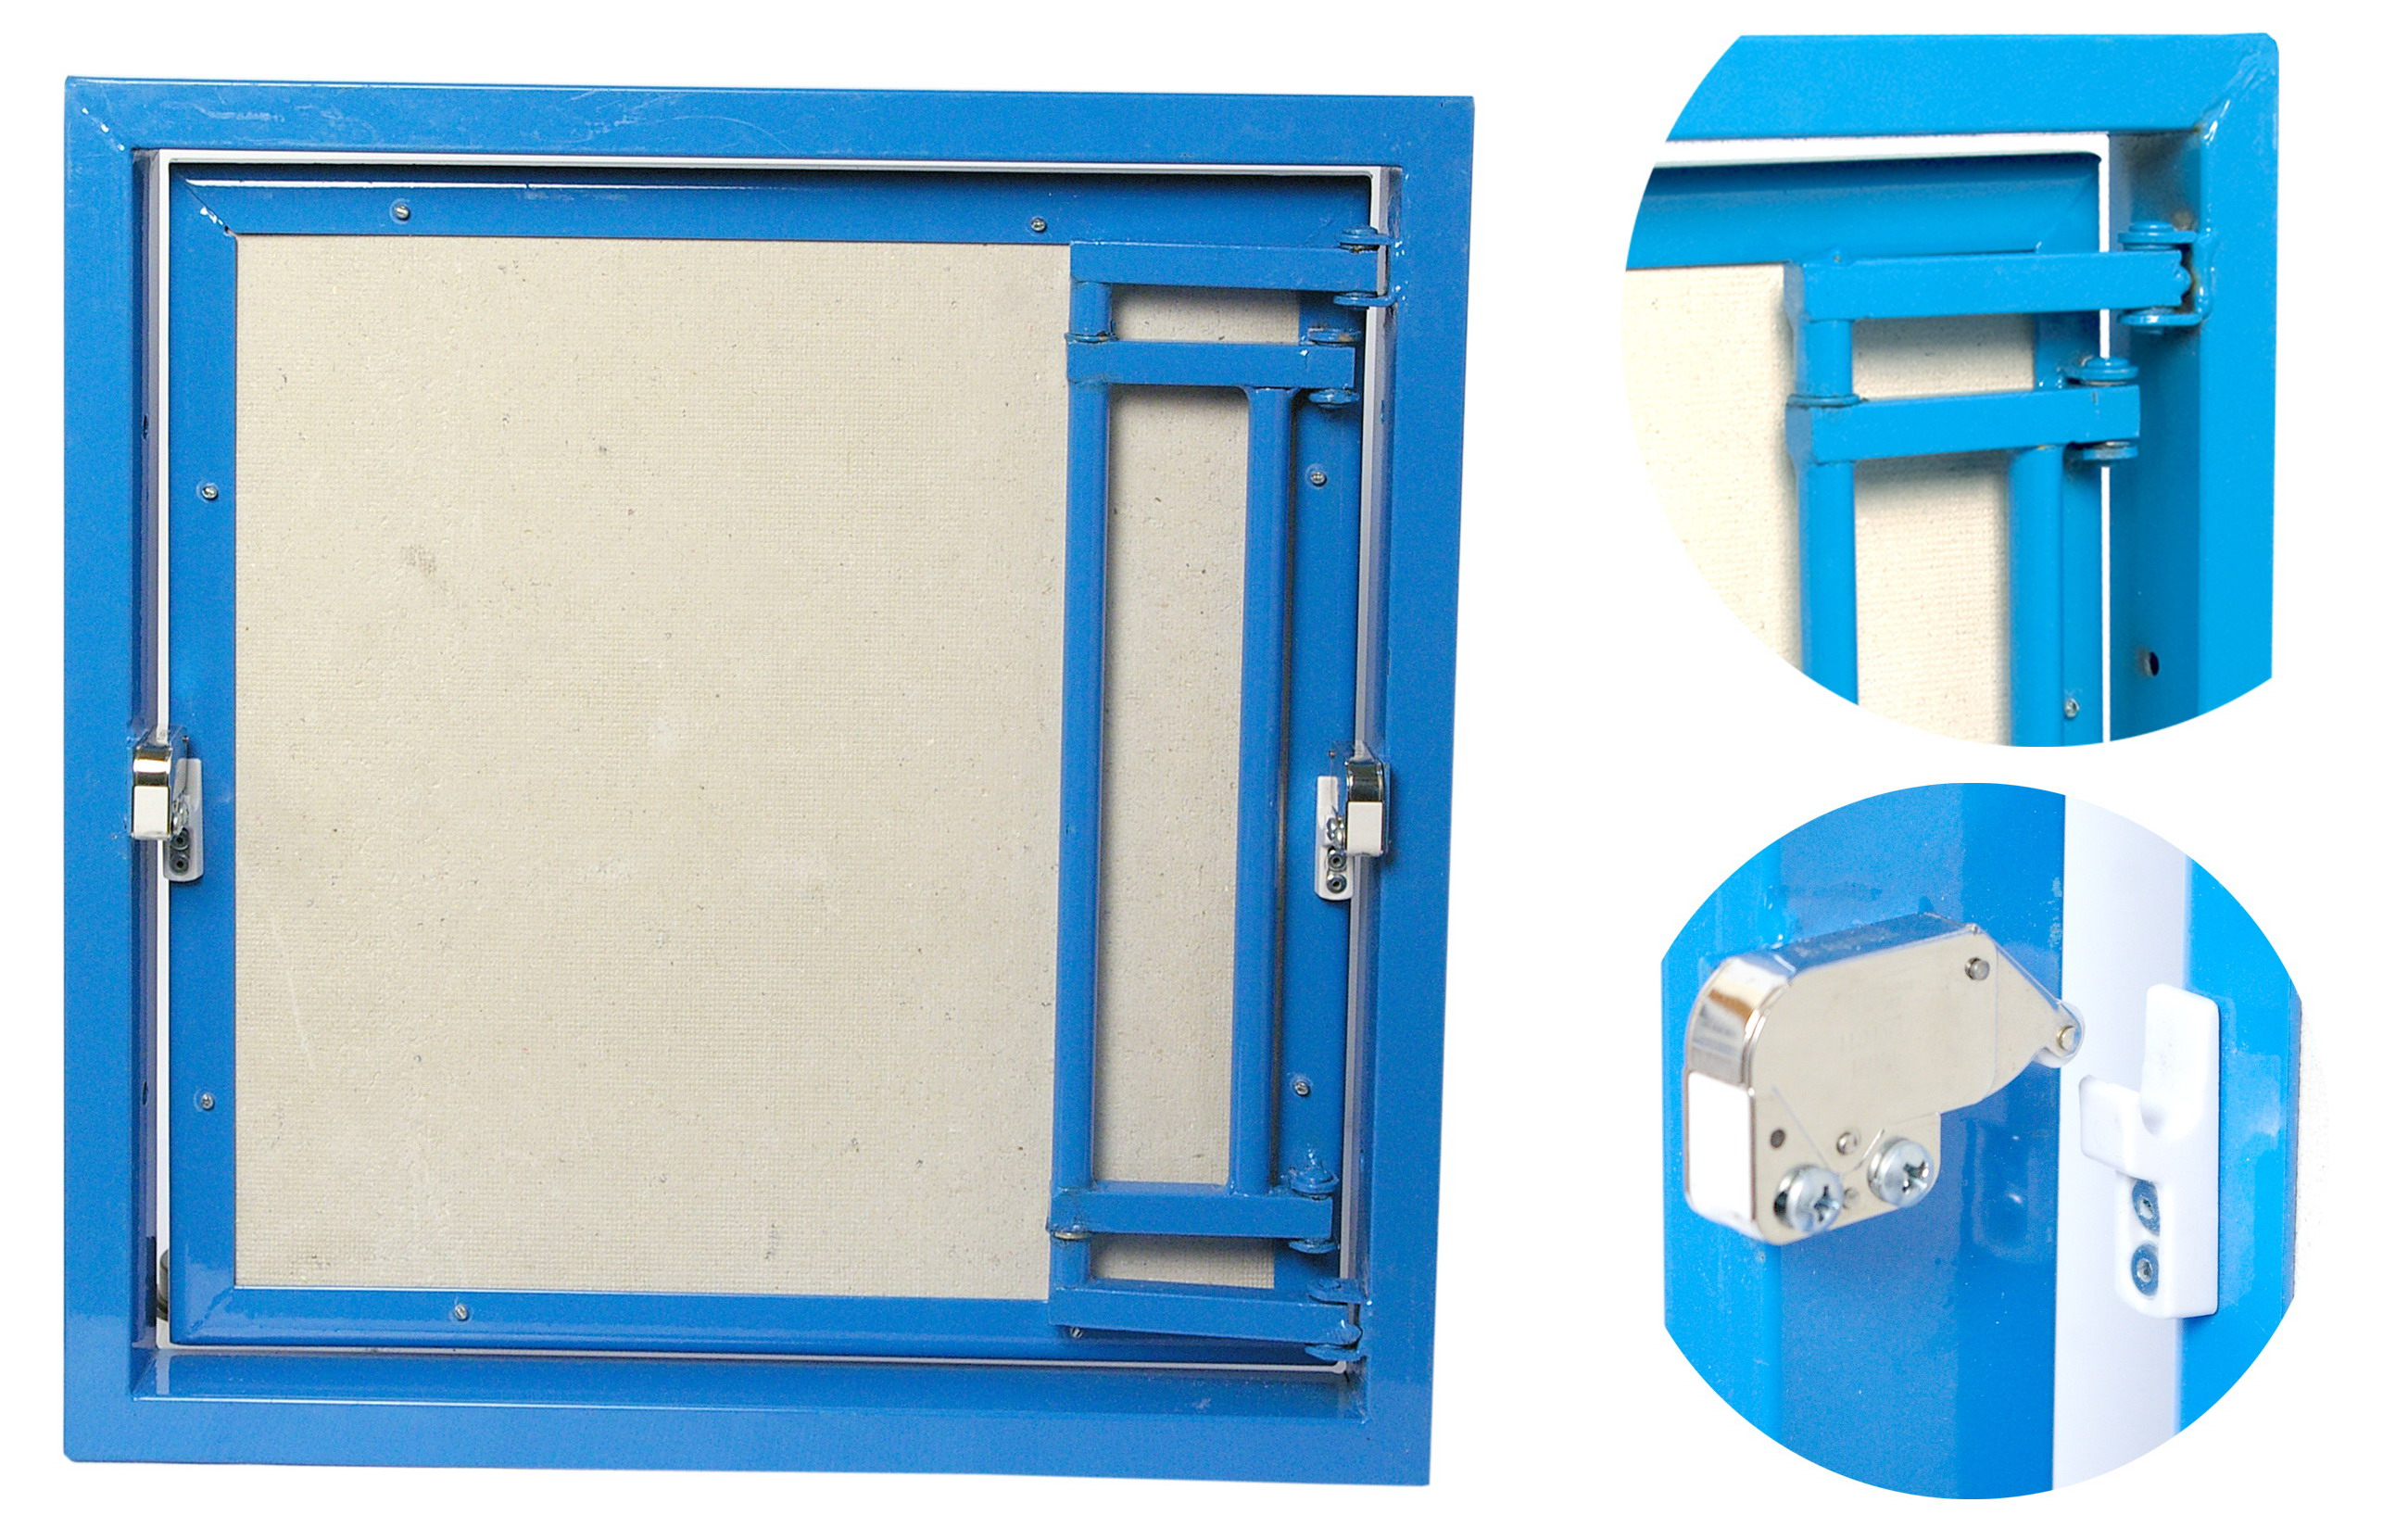
According to the method of opening, the hatches are divided into hatches for tiles, push, opened with keys or suction cups. The first hatches will open with a simple click on them, which is very convenient. But there is also a drawback - after all, if you accidentally press it, it will also open, which can be dangerous. Hatches "under the suction cup" have a special handle.
Installation subtleties
The basic rule for installing inspection hatches is that they should not be visible. The invisible hatch under the tile should be mounted flush with the wall or floor, and the trim on the door should harmoniously fit into the pattern. Such hatches are quite expensive, so many people prefer to make them with their own hands.
For self-assembly, you will need quite a bit:
- purchased or homemade hatch design;
- self-tapping screws;
- screwdriver;
- building level;
- tiles and tile adhesive.
You can do it on your own completely and not buy a sunroof. The frame is made from an aluminum profile or wooden beams treated with a moisture-proof sealant, and the sash is cut from moisture-resistant drywall. Decorative tiles on the hatch are installed last, precisely fitting the plumbing hatch under the tiles into the design of the room. It is best to start tiling the room after installing the hatch, then the result will be perfect. On the hatch, the seams are not overwritten in order to visually find it faster. The locking system of such a hatch can be borrowed from old furniture.