Scheme of laying the rafter system on the attic roof. Mansard roof rafter system, design and calculation. Types of mansard roof truss systems
As experienced builders say, an attic can be installed in a house if there is a roof. The type of roof affects how much this measure will increase the usable area, whether it is comfortable to use this room and how complex the work will be required. The most common types of roofs for arranging a residential under-roof space are considered to be gable roofs with straight and broken slopes.
The rafter system of the attic roof is designed in such a way as to free up space in the center, where the height of the ceilings reaches an acceptable height, placing the bulk of the supporting elements at the edges. This article will tell you what the roof frame consists of, how to choose the best design option and perform installation correctly.
Types of rafter systems
When starting to design a rafter system for an attic roof, pay attention to the layout of the house. Based on the types of supports, choose the appropriate device option:
- Layered. This type of rafter frame is suitable for houses in which a load-bearing partition runs in the middle. Then the weight of the roof structure is distributed between it and the external walls of the structure. This is an easy and rational way to organize the frame, but it is suitable if the distance between the external walls and the internal support does not exceed 7 m.
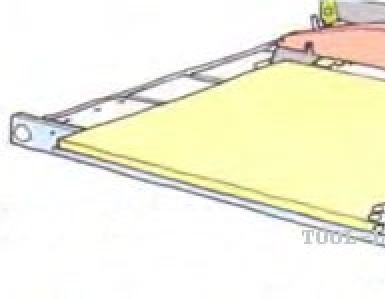
- Hanging. This type is used when there are no load-bearing partitions or columns inside that are used to transfer the weight of the roof to them. Hanging rafters rest on the mauerlat and ridge girder. For roofs up to 50 sq.m. m, with a low roof weight, the simplest configuration is used, consisting of rafter legs and a horizontal tie. To cover a large structure, this structure is reinforced with racks, braces, and struts. These elements increase the stability of the roof, but “eat up” the usable area of the attic. The permissible distance between the walls of the structure for hanging rafters is 14 m.
- Combined. A mixed type of rafter system is used when support columns are installed in the middle of the house instead of a load-bearing partition. It turns out that some of the rafters can be leaned on the columns, and the rest can be mounted as hanging ones. This method is quite often used for arranging attic roofs, since it allows the use of fewer auxiliary elements, reducing the load on the foundation and without cluttering the roof space.
Please note that the installation of the attic must be planned at the project creation stage, because the type, weight and design of the rafter system are necessary for calculating the foundation. If the decision to erect an attic roof arose at the final stage of construction, it is necessary to recalculate the weight of the house taking into account new data in order to check whether the foundation can withstand the additional load, especially if the site has complex soil and a small distance between the surface and groundwater.
Calculation of rafter system elements
According to building codes, a room is called residential if the height from the floor to the ridge is at least 2.5 m and there are sources of natural light, that is, windows. Therefore, the main parameter of the attic roof that needs to be calculated is the angle of inclination of its slopes. The catch is that if you lay down a slight slope, the height of the ceilings in the attic will be lower than allowed by the rules. And, if you make covered slopes, the roof will turn out to be very heavy, expensive and unstable. Therefore, it is used, the slopes of which change the slope, its upper rafters have an acute angle of 30 degrees, and the lower ones - 60 degrees.


Ceiling angle and height
An important stage in the design of an attic roof is the calculation of the cross-sectional size of the elements of the rafter system. The easiest way to find out the recommended size is in a reference table with calculated values that take into account the length, distance between adjacent elements, type and quality of the material. However, if the roof is of non-standard size, it is necessary to perform a calculation based on calculating the total load from the weight of the roof that falls on the rafter system. The calculation scheme also takes into account temporary loads in the form of the mass of fallen snow, which are reflected in the climate coefficient, which characterizes the weather at the construction site.

To create the rafter system of an attic roof, wood is used, but this is not advisable in all cases, since in order for the rafters to cope with the load, it is necessary to increase the cross-section of the lumber used, which further increases the weight of the structure. To break out of this vicious cycle, it is necessary to abandon wood in favor of stronger metal rafters.
Rafter system design
The components of the rafter frame of an attic roof are no different from the design of other types of pitched roofs. It includes:


In most cases, the elements of the rafter system are made of high quality wood. To avoid deformation during operation, it must be dried to a humidity of 15-18%, treated with deep penetration antiseptic impregnation and fire retardant if you plan to install the chimney on the roof.
Assembly sequence
It is better to assemble the rafter system with the help of an experienced craftsman, since even lifting heavy, long beams is problematic. It is not recommended to carry out installation in rain and snow, as the moisture content of the wood will increase during operation. Typically the build process looks like this:


The reliability of the attic roof truss system depends, first of all, on the correctness of the calculations, therefore, if you are not confident in your engineering abilities, it is better to use a standard project created by a professional architect.
Video instruction
The reliability of the roof frame with a residential attic depends on how well the installation of the attic roof rafters is carried out. The complexity of this process is explained by the need to take into account several important components that affect the truss structure.
The rafter system for mansard roofs was developed by the French architect F. Mansart in the 17th century. What’s surprising is that many of the technical solutions for attic living spaces that he proposed are still relevant today. It was thanks to Mansar that the fashion for high ceilings and large windows in attics appeared - they significantly increased the level of comfort for the people living in them.
Types of mansard roofs
The roof rafter system comes in two types:
- layered - in this case, the beams rest on the load-bearing walls of the house;
- hanging - all elements of the rafter structure are connected into a truss and a common frame and mounted on the outer supports.
The type of mansard roof being erected depends on the design of the rafter system:
- Single slope inclined. The roof has a plane that rests on walls of different heights.
- Gable. It is a roof with two planes diverging to the sides at a certain angle.
- Broken. It is a type of gable roof. Consists of planes with a broken surface.
- Half-hip and hip. These roofs have four slopes.
- Tent. Such a roof can be conical, pyramidal, or domed.
- Vaulted. It has parabolic or rounded outlines.

Most often you can find a gable version of the mansard roof. This fact became decisive for the architecture of many domestic cities and towns.
When a gable mansard roof truss system is being erected, drawings for it are drawn up taking into account certain data, including:
- geometric parameters of the structure;
- type of roofing material;
- climatic and weather loads;
- relief of the site and surrounding area.
When developing a project, it should be remembered that if it is necessary to have a large usable attic area, the angle of inclination of the rafters must be made smaller.
The procedure for calculating rafters
A competent and accurate calculation of the mansard roof rafter system will allow you to build a strong and reliable structure that can last for many years.
When performing calculations, take into account:
- weight of attic elements;
- wind and snow loads.
Since these indicators vary in different climatic zones, the design of the rafter system of roofs with an attic can differ significantly. The method for calculating rafters when creating layered structures is simpler than hanging ones. In some cases, roofers use combined options for arranging the frame.

When an attic is to be built, it is advisable to entrust rafter drawings and complex calculations to professionals with extensive experience in such work. The fact is that when performing calculations, mathematical formulas and different coefficients are used.
By calculating the weight of the roof, they find out the magnitude of the load, which is expressed in kilograms per “square” of the truss structure. Typically, the average value of this parameter for residential buildings is about 50 kg/m².
Calculations of wind and snow loads in regions with unfavorable climatic conditions indicate that rafter systems for gable mansard roofs should be made with paired rafters and continuous sheathing - they will avoid frame deformations.
Stages of arranging an attic roof
The rafter system consists of the following elements:
- Mauerlat;
- ridge beam;
- rafter legs;
- vertical racks;
- inclined struts.
In order to increase the reliability of the roof frame and give it the necessary rigidity, struts, crossbars, racks, and beam supports are installed between the rafters. The base for the roof covering is made sparse or solid.

Installation of the rafter system of an attic gable roof - a step-by-step process:
- Install an upper beam with a cross-section of 10x10 or 15x15 centimeters. To fix it to the racks, metal staples, special nails or self-tapping screws are used. In this case, the first beam is assigned the function of a rafter frame.
- The mauerlat is laid, which is one of the main structural elements - it is subject to considerable loads due to the weight of the roof and the influence of precipitation and wind. To do this, use boards with a thickness of at least 5 centimeters or timber, the smallest section of which is 5 × 10 centimeters. Before laying the boards, a waterproofing layer is installed underneath them so that moist air does not penetrate into the Mauerlat. They are fixed to the walls with staples and nails. Additionally, the Mauerlat is tied to the load-bearing walls using thick metal wire, previously embedded in the walls during their construction.
- Install the rafter legs, maintaining a gap between them of 60–200 centimeters.
- First of all, the rafters of the attic roof that are outermost to the gable are installed. Then, using a level, other structural elements are installed.
- At the top of the frame, the rafters are connected to each other.
- A ridge beam is installed - it is required for a roof whose length exceeds seven meters. If this parameter is smaller on the roof, then this element is not necessary for the rafter system.
- Then they begin the construction of the sheathing, laying insulation and water barrier, and then the roofing material.
How to make a rafter system correctly
Before making a rafter system for an attic roof, you should familiarize yourself with a number of rules:
- Rafters and other elements of the attic living space must be made from beams, the minimum cross-section of which is 10x10 centimeters. Choose high-quality timber, containing no more than 3 defects per linear meter.
- When fastening the attic frame, special nails, metal staples and wire harness are used.
- The humidity of wooden elements for constructing a roof with an attic should not exceed 15%.
- All lumber must be treated with preparations and compounds with an antiseptic effect that protect against rotting.
- When constructing a roof with an attic, the optimal choice is coniferous wood, which is less susceptible to exposure to humid air.
- For vertical posts, a wooden beam with a cross section of 10×10 centimeters is used. They are installed in a strictly vertical plane using a plumb line. These racks are the basis of the walls of the future attic. They are then sheathed with sheets of plywood, plasterboard or other finishing material.
- Before attaching the rafters of the attic roof, you need to pay attention to the laying of the windows, since it will be quite difficult to change anything later.
Installation of a sloping attic roof according to drawings
A sloping roof is a type of gable roof. It is used when it is necessary to increase the volume and living space of the attic space. House owners think about how to make a sloping attic roof when they want to create conditions for more comfortable living in the attic.
The rafter system for such a roof is calculated using the same method as for a gable roof. The main stages of their construction are also similar.

But when erecting a sloping roof, the following rules are adhered to:
- The boards intended for fixing the rafter legs are insulated along the entire length. Thanks to this measure, heat loss is significantly reduced, thereby creating a more favorable atmosphere in the room.
- The cross-section of the rafter legs and the pitch of their installation, when creating a mansard roof with an additional slope, must correspond to the calculated data, taking into account possible impacts and containing a safety margin.
- Since the installation of thermal insulation will lead to the appearance of condensation at the point of contact between the cold environment and the warm one, it is imperative to use a vapor barrier.
- To create thermal insulation, you need to use natural materials that are fireproof and environmentally friendly.
Features of the arrangement of the attic floor
The installation of attic rafters must be done so that the frame provides maximum reliability, allowing it to withstand the weight of the roofing pie. At the same time, the rafter system must be light in order to reduce the load on the load-bearing walls of buildings.

For this reason, the main material for the construction of attic floors today is still wood that meets these requirements. In this case, ceramic or metal tiles and ondulin are used to cover roofs. These roofing materials allow you to create a reliable coating with excellent performance characteristics.
When arranging the attic floor, you need to remember that it should provide a higher degree of thermal insulation compared to other living spaces. At the same time, it is necessary to perform high-quality hydro- and vapor barrier.
An attic in a house is always interesting, beautiful and profitable. However, not every master will undertake to do all the work independently. Reasons: ignorance of technological subtleties and the complex rafter system of the attic roof. But you can build an attic yourself, the main thing is a good design and a sober assessment of your own strengths and financial capabilities. And we will advise and tell you what types of rafters there are, and we will analyze the structure of the rafter system of the attic roof of various types.
The drafting must take into account all the nuances. If miscalculations are made, the developer runs the risk of ending up with something different from what was planned. The simpler the roof, the more convenient it is to make it yourself. Types of roofs are:
- Gable, where the slopes descend on both sides;
- A broken line, consisting of two or more slopes of different angles of inclination;
- Hip with a triangular shape of slopes;
- Semi-hip - end-type slopes are located approximately half the height distance;
- Dome for polygonal or round buildings;
- Vaulted - in cross-section, such a roof has the shape of an arc.
The attic roof is distinguished as ventilated and non-ventilated. The type is selected depending on the climatic characteristics of the region, for example, in areas with high rainfall it is better to build ventilated facilities.
Types of rafter systems

The rafter system of the attic roof is selected depending on the layout of the building and differs as follows:
- Layered rafter system attics are installed when the load-bearing partition runs through the middle of the building. The design redistributes the weight load and is suitable for buildings where the distance between the external wall panels and the internal support system does not exceed 7 m.
- Hanging rafter systems applicable in the absence of internal partitions and walls. Supported by a mauerlat and a ridge girder, they are suitable for buildings where the distance between the external walls and the structure does not exceed 14 m.
- Combined rafters Attics are most often needed in buildings where columns are installed instead of partitions. It turns out that part of the rafter structure rests on columns, and part is made in a hanging version. The absence of auxiliary elements, reduced load on the foundation and no cluttering elements are the main advantages of the system, which is why this option is used most often.
Important! Types of rafter systems are selected at the design stage in order to correctly calculate the required strength of the foundation. In the case when the decision to build an attic arises at the final stage of construction, an accurate diagram of the truss system of the attic roof and a complete recalculation of the weight of the house taking into account new data will be required. The process cannot be neglected, especially in areas with weak soil. Otherwise, the end result will be that the house will quickly subside, and groundwater will render the foundation unusable in a short time.
Structural features of the rafter system

The main components are little different from a conventional gable roof:
- Mauerlat is the base of the roof that bears the weight.
- Rafters are elements of the system that form the inclination of the slopes. The top is fixed to the ridge, the bottom - to the mauerlat or stand.
- Post - an element that supports the ridge or back of the rafter leg.
- Struts are needed to strengthen and support the rafter legs. The strut has an oblique cut and serves to prevent the rafters from bending under the weight of the mass.
- Ties - a horizontal tie of a pair of rafters, placed in the upper or lower part.
Important! Rafter elements are often made from the highest grade wood. A timber with a moisture content of no more than 15-18% is purchased and pre-treated with anti-rotting compounds and antiprenes.
Assembly diagram of the rafter system for the attic

An attic rafter system is quite a troublesome task, so it is better to entrust the assembly to a specialist. But if this is not the case, tips and videos will help you complete the simplest design yourself.
- The mauerlat beam is laid on the top frame of the walls. If the house is log, you can get by with upper crowns reinforced with brackets.
- Install floor beams. Mounting on the mauerlat or protrusions of wall panels. The simplest fastening is without extension, supported on the walls, but with extension is when the beam is carried outside the perimeter of the house to create an overhang. In this case, the distance between the end of the beam and the wall panel should be at least 0.5-1.0 m.
- Vertical racks are installed. To do this, determine the middle of the floor beam, then equal intervals are set aside from it - the distance should be equal to the width of the attic room.
- The puffs are secured to the racks, and it turns out that each pair of racks looks like the letter “P”.
- Installation of the lower rafter elements is carried out with fastening to the rack. Fasteners - self-tapping screws or nails, fasteners on the mauerlat in the form of a movable fastening slider, compensating for the shrinkage effects of the timber.
- Installation of rafters for the upper part of the attic roof is carried out by connecting each pair with a metal plate or bar.
- Final processing includes laying a waterproofing membrane and sheathing. The lathing for soft roofing material is solid, for profiled sheets and other hard materials it is sparse.
The proposed installation of the rafter system is the simplest. It is quite possible to equip such a structure with your own hands, you just need to make the correct calculations, the rafter system, drawings of the attic roof, and diagrams will help you complete the work without errors.
Rafters with extension behind the wall panel

This option is used when there is a small amount of internal space. You will have to rest the rafter leg on the upper floor beam. Mauerlat is not needed here, but reinforcing struts are required. To strengthen the base, you can fill in a reinforced concrete belt. Attaching the floor beams to the monolithic belt is done with anchors, into which support posts are inserted to the maximum thickness of the beam.
Important! The external structure forms a cornice: for wooden houses the width is from 0.5 m, for those made of concrete and stone – from 0.4 m.
Scheme of work:
- Install the outermost floor beams that form the outline of the overhangs. The section of the beams is 150*200 mm.
- The remaining beams are mounted along a cord stretched between the outer beams: the distance between them is equal to the pitch of the rafter legs. Insulated roofs require a rafter pitch of 0.6 m; if rafters are installed with the specified pitch, they can be made from timber with a section of 50*150 mm.
- Having cut out the tenons, prepare the supports.
- Install the corner posts and secure them with temporary supports.
- Using a plumb line, determine the location of the support points of the beams and select holes for them.
- Install row posts and a pair of load-bearing supports in the centers of the attic gable.
- Lay purlins from 50*150 mm boards. Secure the purlins with corners.
- Connect the supports with bars, also securing them with corners to the purlins.
- Fasten the crossbars using temporary fasteners with an inch. Deviation from the edge of the frame is 300-350 mm.
- Make a template for the bottom row of rafters: attach the blank board to the end of the purlin and beam, determine where to cut off the excess, try it on and trim it.
- Install the end rafter posts.
- Make a template for the top of the rafter legs.
- Try on the template and build a tier, how the rafter system will be, photos of the attic roof will clearly show the entire structure.
- If the templates fit perfectly, make the required number of rafter legs, mount them in place, strengthen the crossbars with the headstock to avoid their sagging and firmly sew them to the ridge area. The lower part does not require rigid hemming, it should be free.
The final completion is the installation of the gable frame, sheathing and roofing material. If it is not entirely clear how to complete this project, watch a video from professionals; the material will help you understand the intricacies of construction.
Attic from frame modules

The mansard roof rafter system involves a version of frame modules that is much simpler than the previous one. It is not groups of individual supports that are mounted on the ceiling, but ready-made block modules of the side walls of the future attic room. Similar designs of mansard roofs and their rafter system allow you to work not at height, but below, calculating and measuring every step. The step-by-step process is as follows:
- Make the walls of the attic according to the design in advance, with the longitudinal beams acting as purlins and support elements. Together with the racks, lay out these elements on a flat area and mark the sockets for the support points of the side walls with squares - make cuts along them.
- Select a spike on the racks.
- Connect the longitudinal beam with the vertical posts and you get a frame module (double). These are the future walls of the attic.
- Lift the frames up and install them in place. Temporarily secure the installed frames with spacers and then fasten them with brackets.
- Select sockets at the edges of the beams for mounting the lower row of rafters; if necessary, modify the sockets with a chisel.
- The upper rafter tier is made on the ground, for which the blanks are first adjusted to the required elements.
- The base of the upper triangle of the attic structure is a stretcher, and its length is equal to the distance between the installed planes (vertical) of the already mounted frames.
- Select sockets along the edges of the stretch, and spikes on the lower heels.
- Assemble rafters for the attic of the upper tier, mount a crossbar for additional fastening, and reinforce the ridge assembly with a triangular-shaped wooden overlay.
- Pre-production of rafter legs for the attic will allow you to avoid working at height. You only need to cut the top bevel, which rests on the top post of the wall panel and on the tension of the upper trusses.
- Try on the lower rafter part to the end, mark the tenon shape area on the lower heel, cut out the tenons according to the drawing made.
Now all that remains is to move upstairs and raise all the rafters. First install the trusses, securing them to the upper frame of the walls, and then install the lower part, attaching them to the ceilings (beams) with brackets. It turns out to be a completely comfortable floor, the rafter system for which was assembled on the ground. To make it easier to understand the task of building an attic roof, a modular rafter system, watch the video. All other stages are carried out according to the standard scheme of a conventional gable structure; the attic and rafter system are shown above.
When starting to build an attic, you need to have a good project. The type of roof should be harmoniously combined with the appearance of the entire building. When choosing the design of the upper floor, you need to find out how it is structured and what its pitch is. The design of the rafter system is the basis of the roof. All components, supports, the distance between them, material and fences are important. This is the supporting skeleton of the roof, which determines its reliability and durability; in addition, the rafter system allows it to perform its direct function - to protect it from bad weather. If you plan to build an attic with your own hands, you need to choose a not very complex design scheme. The rafter system largely depends on what type of roof will be chosen, what rafter pitch and what type of attic roof will be preferable. The project must contain the distance between the rafters, the spacing of the beams, and take into account both the roof’s own weight and the load caused by natural precipitation. In addition, all components must be resistant to temperature changes.
The rafter system and components for different types of attic structures have their own differences. At the same time, the structure should not be very heavy, so as not to load the walls of the building, reliable and durable, and the pitch of the rafters should be optimal. There are different types of attic roofs:
- Gable, with two slopes on the sides.
- A broken line, consisting of two or more slopes with different angles of inclination.
- Hip, where two or more slopes have a triangular shape.
- Semi-hip, with end slopes located approximately at a distance of half the height.
- Dome, for buildings with a polygonal or round shape.
- Vaulted, having the shape of an arc in section.
The type of roof is divided into ventilated and non-ventilated structures. Depending on the climate, a building of one type or another is chosen. For humid climate zones with high rainfall, it is preferable to build ventilated roofs. In such roofs, the layer of air between the roofing material and the insulation performs an additional protective function. Unventilated, broken, more suitable for dry climates.
Features of the attic roof
The characteristic features of an attic roof, in contrast to standard roofs, is the impact on the structure not only from the outside, but also from the inside. External in the form of precipitation and wind and internal in the form of condensation arising due to the difference in temperature indoors and outdoors. Therefore, the structure of the upper floor and the rafter system must have additional vapor barrier and thermal protection - layers of material laid at some distance from each other. For additional thermal insulation, mineral wool is usually used; together with moisture-proof material and waterproofing on the roof, they form good protection. A small distance between the layers will provide ventilation to the roof.
How to properly install thermal insulation and waterproofing
Rules for rafter systems
When constructing an attic roof, strict adherence to the standards and recommendations regarding the design of the rafter system and their spacing is necessary. The main ones:
- The timber or board for making rafters should be selected from high quality wood that is well dried (with a moisture content of no more than 15%).
- The size of the rafters should be maintained at least 100x100 mm in cross section.
- It is not allowed to insert beams into the lower crown; this can weaken the structure.
- Be sure to treat all wood components with a fire retardant and antiseptic to prevent fungus and rot.
- The angle of inclination of the rafters is from 30 to 60 degrees.
- The rafters are fastened with metal corners or metal brackets and special nails; the strapping is done with wire.
- The height of the rafter system varies from 2.5-3.5 meters, and the broken structure allows a height of up to 4 m.
- Particular care should be taken to design and calculate components and window openings, rafter spacing, because After installing the rafters, it will be difficult to change the parameters of the roof windows.
Rafter materials
The rafter system of the attic roof can be constructed from various materials. Modern industry makes it possible to use not only wood, but also lightweight metal beams and assemblies. The most common are:
- metal structures;
- reinforced concrete structures, used mainly for industrial buildings;
- wooden structures;
- combined designs.
The material should be determined based on the design parameters of the building, its size and application. Metal and concrete rafter systems are usually used on industrial buildings. In private and small-sized houses, wooden structures are often preferred. Wood is easier to process, the roof structure is not so heavy, a rafter system made of wood is easier to install and is much more environmentally friendly.
Calculation of the rafter system
In order for the roof to last a long time, reliably perform its functions and not require constant repairs, it is necessary to make accurate calculations before starting construction. You should take into account the roof’s own weight, depending on its material, the amount of precipitation and wind load. In accordance with the calculations, the type of rafter structure and the installation pitch of the rafters are selected. We list the main types of rafter systems:
- hanging;
- sloping roof rafter system;
- layered system;
- combined.
Calculations for systems with a sloping structure and sloping roofs are easier and faster than for hanging rafters. The most common are combined rafter structures of pitched roofs. It is recommended to entrust the calculation of complex rafter systems to professional designers. Calculation using complex formulas and coefficients should give the load value per meter of square rafter system. For residential buildings, the standard average load is 50 kg per m².
Design diagram of the rafter system
Lathing and Mauerlat
The design of the sheathing is directly related to the type of roofing. For soft types of coating (for example, ondulin), the sheathing must be continuous. When using slate, metal tiles or corrugated boards, the boards on the sheathing should be placed at a distance of 25-40 cm. For the manufacture of sheathing, an edged board with a thickness of 40-50 mm is usually used. If the roof has a low slope, snow retention structures should be installed.
For stone buildings, such a part of the rafter system as the Mauerlat is common. Its task is to compensate part of the load of the rafters on the walls of the house. In addition, Mauerlats connect the roof structure and the building. As a rule, the Mauerlat is attached using anchors to a concrete belt on top of the walls. In small wooden houses made of timber or logs, the role of the Mauerlat can be played by the last crown.
Rafter system supports
In the case of mounting the beds on poles, the dimensions of the poles should be 100x145 mm ± 5 mm. If the bench is mounted on a wall or ceiling, you can install a narrow board between them. Lezhen can not be used for a hipped roof if beams without roof struts are used.
Installation
Let us briefly describe the order in which rafter systems for pitched roofs are installed. You should start with the installation of the Mauerlat on which the rafter system will rest. It is made from timber measuring approximately 10x15 cm and takes on the load of the rafters. Waterproofing in the form of roofing felt or similar material is placed under the timber. The Mauerlat is fixed with studs or with cement mortar.
If the roof has a broken or combined structure, the most common form of truss is U-shaped. It is recommended to install such trusses at the bottom, then lift them and install them on the roof. The frame is assembled from a 5x15 cm board or 10x10 cm timber and is mounted on the roof at a distance of 0.5-2 meters. The distance between the trusses determines the load that the roof must withstand. The smaller the distance between the rafters, the greater the weight the structure will withstand. The most common are triangular trusses.
Important! The outer trusses should be installed first, connecting them with a ridge. The ridge is leveled horizontally using a level, after which intermediate trusses can be installed.
A similar design with U-shaped trusses is optimal for a roof width of no more than 6 meters. For roofs exceeding this parameter, a design with an additional central support made of timber is recommended. The rafter legs and trusses in the upper part are connected to each other by horizontal beams. To make a reliable and durable attic rafter system, you should use coniferous wood. The timber, well dried and sanded, is carefully checked for the presence of knots on all elements and discarded. Fastening is carried out with metal corners, brackets at equal distances and overlays.
Construction of the roof truss system
The installation of an attic roof allows you to significantly increase the usable area and rationally organize the space of a low-rise building. However, its construction often frightens home craftsmen because the process is too complex and labor-intensive.
There is no need to be afraid, because the result will provide a beautiful roof and comfortable additional rooms. And in order for the result of the work to please the owner and household members, you need to know what rules are used to construct the rafter system of an attic roof, and what is the easiest and best way to arrange it.
When we mention mansard roofs, we immediately recall a pentagonal gable structure of impressive size over a log house, concrete or brick walls. Visual memory suggests that its slopes must certainly have different slopes, i.e. the bottom of the roof simply has to be much steeper than the top. Due to the difference in the angles of inclination, a convex fracture is formed, which gave the roof the popular name “broken”. The term has justifiably migrated to the technical definitions of attic structures. It reflects the essence of the usual standard in the device, but often has nothing in common with the configuration. Despite the fact that the design of all mansard roofs necessarily includes two parts, their presence cannot always be determined visually.
Purely based on external indicators, the predominant number of attic structures can be divided into:
- Triangular roofs, the lower and upper parts of which have an equal slope. Outwardly, they resemble traditional gable structures without kinks in the plane of the slopes.
- Pentagonal roofs with slopes having convex corners. This category clearly demonstrates the presence of two joined parts in the design.
In both of these varieties, the rafter system consists of two tiers stacked on top of each other. The lower structure forms the useful space of a residential attic with a height of 2 to 2.5 m, so that moving inside it is not difficult. The second tier creates the shape of the roof top and is allowed to be of arbitrary height.

By varying the angle of inclination of the upper and lower rafter legs, you can obtain the optimal roof shape in your own opinion. It is believed that a pentagonal attic, the corners of which are in contact with an imaginary circle, looks best.

Note that the principle of constructing a sloping roof is suitable not only for gable rafter systems. Interpreting the basic method, the attic can be organized in hip, single-pitched, hipped and other roofing structures.
Sometimes an existing structure is converted into an attic, the construction of which did not use “broken” technology. However, these roofs cannot a priori be classified as attic. True, if the rafter legs have sufficient power, no one bothers to use the crossbars of pitched rafter systems as ceiling beams, and the supports of additional purlins as beams for cladding the attic.

We found out that the main feature of an attic roof is the presence of two adjacent rafter structures connected into a triangle or pentagon of a shape that is attractive to the owner. In their construction, standard ones are used:
- Layered, according to which the lower tier of the attic is built and used in the construction of the upper part.
- Hanging. In accordance with it, only the upper part of the structure is built.
If, to simplify, the section of the attic roof is divided into two halves, you will get a trapezoid at the bottom and a triangle at the top. The inclined sides of the trapezoid are allowed to be exclusively layered, and the sides of the triangle are layered and hanging.

Basic diagrams of rafter systems
A “classic of the genre” is rightfully considered to be the pentagonal diagram of the rafter system of an attic roof with support posts forming the walls of the interior. Its section is conventionally divided into simple geometric shapes. In the center there is a rectangle, on the sides of which there are two mirrored rectangular triangles, and an equilateral triangle on top.
Standard attic construction
The layered rafters of the lower part of the structure rest at the bottom on the mauerlat, and with the upper heel on the right or left purlin. The part of the mansard roof frame that crowns the structure is made up of hanging rafter arches. They are supplemented with a suspension headstock in the middle if they are intended to cover a span of more than 3 m. The headstock cannot be connected to the arch tightening with a notch, like a support post. Its job is to prevent the tie from sagging - it is not a support, but a suspension.
The supports-racks of the layered rafters of the lower part rest through the beam on the ceiling. If it is necessary to increase stability, struts are installed under the supports. The posts are connected to the frame and purlins by notches, the joints are duplicated with metal corners and toothed plates. If the floor is concrete, bitumen waterproofing is laid under the floor. The bed can be laid not on the ceiling, but on brick pillars or on leveling boards. When constructing an attic on a wooden floor, you can do without the beams altogether and embed the racks directly into the beams.

The rather steep lower parts of the slopes of attic roofs are practically not affected by the snow load; precipitation does not linger on them. However, steeply installed rafters have another problem - gusty winds will tend to overturn and tear off the roof. Therefore, attaching the system to the Mauerlat must be taken very seriously. In an attic situation, each rafter is tied to the walls with twists, and not through one, as in conventional pitched structures.
Method of moving rafters beyond the wall line
It often happens that the planned attic structure creates too narrow an internal space. It can be expanded by moving the rafter legs outside the walls. Those. the rafter leg will rest not on the mauerlat, but on the beams of the upper floor. This case, in theory, does not need a Mauerlat at all. But reinforcing struts in the scheme with the removal of rafters are used without question, because there is no support at all under the extreme part of the side triangles.
The installation of the Mauerlat can be eliminated, but pouring a monolithic reinforced concrete belt for attaching beams to brick walls is highly desirable. The floor beams are attached to the monolithic belt with anchors, and support posts are driven into them to a maximum of 1/3 of the thickness of the beam. An important point: moving the rafters outside the wall is simply required to form a cornice for wooden houses with a width of at least 0.5 m, for concrete and stone houses at least 0.4 m.

Technology for constructing a rafter structure with the rafter leg extending beyond the wall:
- We install the outermost floor beams that define the contour of the eaves overhangs. Because the ceiling will be loaded, the section of the beams is taken from 150x200mm. If, when laying the starting beam, it turns out that the walls do not form an ideal rectangle, we try to correct the flaws by changing the position of the beams.
- We lay and fix the remaining bars along the laces stretched between the fixed outer beams. We control the height and pitch of the beams before fastening. The distance between the floor elements is equal to the step between the rafter legs. For insulated roofs, the optimal rafter installation pitch is 0.6 m, because it is equal to the width. If the rafters will be installed with a similar frequency, they can be made from 50x150mm boards.
- From the left and right edges we set aside a distance equal to the length of the short leg of the right triangle. At the marked points, carefully use a chisel to select nests a third of the height of the beam under the outer supports.
- Let's make supports by cutting out tenons. They need to be made according to the size of the selected nests. For the manufacture of corner supports, a beam with a cross-section of 100×150 mm is suitable, and two load-bearing supports for the gable sides of the roof should be made from it. For ordinary racks, 50×100 mm timber is sufficient. The material for the supporting elements should be longer than the design height by the length of the tenon, but it is better by 10 cm in case of errors during cutting.
- We install the corner posts and fasten them with temporary spacers. We connect the posts with lace.
- We use a plumb line to check the points in the beams for selecting nests for row supports and select the indicated holes.
- We install row posts and two load-bearing supports in the centers of the attic gables.
- On the installed supports we lay purlins - boards with a section of 50x150mm. We fasten the purlins with corners. It is not necessary to use as many nails as in the corners of the holes. Two or three are enough for each plane. As a result of laying the boards, the frame of the walls of the future attic is obtained.
- We connect the supports installed opposite each other with bars, attaching them to the purlins with corners. These elements will serve as tensile crossbars. Therefore, for their manufacture you will need 1st grade lumber with a cross-section of 100×150mm. For each installed crossbar, a temporary support from a 25x150mm inch is needed.
- We temporarily fasten the crossbars on top with the same inch, retreating 20-30cm from the edges of the frame. Temporary thin flooring of one, two or three boards is needed for ease of installation of the upper part of the rafter system.
- We make a template for the rafters of the bottom row from an inch. To do this, we apply a blank board to the end of the purlin and beam. Then we outline the lines of the grooves along which the excess will be sawed off. We try it on and trim the excess if necessary.
- We make rafter legs using the template. If there are doubts about the flawlessness of the construction, then it is better to cut out only the upper groove first. By placing the rafter in its proper place, you can then adjust the lower groove after the fact without unwanted damage to the material.
- We install the end rafter legs, which will need to be connected again with lace.
- Using the lace as a guide, we install the rafter legs of the lower tier of the attic.
- Similarly, we make a template for the upper part of the rafter system. In order to find the line of the top cut, we temporarily sew a board onto the gable support.
- Let's make a mirror version of the previous template. The rafters of the upper tier will rest against each other.
- Let's try both templates on the roof. If everything is normal, we use them to make the required number of upper rafters from 50x150mm boards.
- We are constructing the upper tier of the rafter system.
- To prevent the crossbars from sagging, we install headstocks of the required size to each upper truss. We firmly sew them only to the ridge area; the bottom should not be rigidly fixed.
Next, the rafter legs are screwed to the walls with wire ties. Then the pediment frame is installed, along which it needs to be sheathed. Finally, the sheathing is installed at a pitch corresponding to the characteristics of the roofing material.

Method with frame modules
The technology differs from the previous method in that it is not individual supports that are installed on the floor, but modules-blocks of the side walls of the future attic that are completely prepared for fastening.
The block method of constructing a rafter system allows you to optimize the construction of an attic roof, because the construction of modular elements is carried out on the ground. In quiet conditions without a sense of altitude, it is easier to achieve precision node connections.

The process of installing a block mansard roof:
- Based on a pre-made design, we manufacture the frames of the attic walls. Using this method, longitudinal beams play the role of purlins and beds. We lay them out together with the racks on a flat area and use a square to mark the sockets for the supports of the side walls. We make cuts along the measured lines.
- We cut out spikes on the racks, the size of which must correspond to the size of the nests.
- We connect the longitudinal beam with vertical posts, we get two modular frames - these are the walls of the attic.
- We lift the frames up and install them in the intended place. We temporarily fix the position of the walls with spacers, then attach them to the floor beams with brackets.
- Using a chisel, we select sockets at the edges of the beams for installing the lower row of rafters. They need to be placed in one line. To maintain the geometry, it’s easier to first mark them with a chainsaw, then modify them with a chisel.
- We perform the upper rafter tier of the attic on the ground, having previously fitted the blanks to the installed elements. To ensure an accurate fit, we temporarily nail a board to the end of the future roof so that one of its edges clearly follows the central axis of the rafter system. The base of the upper attic triangle serves as a stretcher. Its length is equal to the distance between the outer vertical planes of the installed frames. We select nests along the edges of the guy wires, and spikes on the lower heels of the rafters.
- We assemble the trusses of the upper tier, for reliability we install an additional crossbar, and we reinforce the ridge assembly with a triangular wooden overlay.
- Before we move to the roof, we make preparations for the rafter legs. We try them on to the frames laid out on the ground. It is more convenient to “cut” them in one fell swoop, grabbing several pieces with a clamp. We cut out only the upper bevel, taking into account the fact that it will rest partly on the wall post, partly on the stretch of the upper rafter trusses.
- We try on the bottom rafter to the end. In the area of its lower heel we draw the shape of a spike, repeating the configuration of the nest in the beam. We cut out the thorns.
- We move the trusses of the upper tier and the rafters of the lower tier to the roof. We first install the trusses, attaching them to the upper frame of the walls with staples, then the rafters of the lower part, attaching them to the floor beams with the same staples.
The subsequent stages of roof construction are carried out according to standard rules. Drawings for a mansard roof, clearly representing the structure, will introduce you in detail to the described principles of constructing a rafter system. Thanks to the production of joints by cutting half a tree, the strength and rigidity of the frame as a whole increases, which will eliminate the need to install additional struts.

The disadvantage of this method is that the finished modules are quite difficult to transport to the roof. To transfer the assembled blocks there without the use of lifting equipment, a minimum of 4 people will be required.


Board and nail rafter system
It is impractical to build a powerful attic over small country houses, but you still want to save space on a small plot. For owners of small buildings there is an excellent option - a lightweight board and nails layered structure. The method should appeal to those who love saving, because the construction does not use solid timber.
For the manufacture of each of the supporting elements, two boards are used, between which spacer sections of the bar are installed. The cavity formed by the bars explains why the system is lightweight compared to its solid counterparts. To ensure spatial rigidity, wind braces are installed connecting the supports to the rafter legs. The lathing, in turn, will make its contribution to strengthening the structure.

The popular way to develop a layout
For a successful work result, a project is very desirable. It is not a fact that the presented drawings with dimensions are suitable for furnishing a particular home. Typology in construction is now not at all welcome. If there is no documentation at all, it is better to make at least a sketch of the future roof, not forgetting the height of the ceilings in the attic. Wherein:
- Proportions must be observed, because an attic that is too large can turn a small house into an awkward, mushroom-like building.
- It must be remembered that the lower part of the attic roof is built using layered rafter legs, and they optically lower the overhang and overlap the upper part of the high windows. There will be no noticeable overhanging effect when constructing an attic according to the scheme with the rafters removed.
- Do not forget that the height of the attic room must ensure freedom of movement. It is this landmark that is required to correctly determine the height of the racks of the attic walls.
You can select the best roof proportions using the traditional template-layout method. According to it, bars or boards are laid out on a flat, spacious area, repeating the contour of the building in real size. By changing angles and moving components, you can achieve the optimal configuration. The elements need to be fixed with nails and immediately measure the lengths of beams, rafters, tie rods, and posts. The resulting dimensions will help in making templates.

The video will demonstrate the calculations and layout of the rafter system for an attic roof:
The basic options and diagrams for the installation of an attic rafter structure that we have given will help you decide on the choice of the optimal type of rafter structure.